Quick Overview:
A simple Google search for “WordPress XML-RPC” yields over 2.67 million results. Notably, most of these articles are centered around WordPress XML-RPC attacks and offer guidance on how to disable XML-RPC to improve security.
As XML-RPC attacks become more common, website owners and administrators are becoming increasingly concerned about protecting their WordPress sites. The xmlrpc.php file, which can be helpful for certain functions, can also pose security risks if not managed correctly.
This blog will explore the significance of xmlrpc.php and the importance of disabling it to enhance your WordPress website’s security.
We will provide comprehensive guidance on how to disable XML-RPC using both manual methods and plugins, giving you a range of options depending on your preferences. Additionally, we will assist you in determining the activated or deactivated status of xmlrpc.php on your WordPress site.
Let’s now explore the realm of WordPress XML-RPC and learn the steps to disable XML-RPC to mitigate cyber attacks on your WordPress site.
What is XMLRPC in WordPress
XML-RPC is a WordPress API that allows users to interact with their WordPress websites using external applications, tools, and services. It utilizes XML (Extensible Markup Language) as its payload format, enabling communication between systems. Although XML has become less common compared to JSON, WordPress initially relied on XML as its primary format when XML-RPC was introduced.
The “RPC” in XML-RPC stands for Remote Procedure Call, which enables one system to request another to perform specific actions. While newer APIs like REST or Graph API have gained popularity, XML-RPC served as a means to achieve similar functionality before these options surfaced.
Why WordPress XML-RPC is considered a Vulnerability
Initially intended for seamless remote interaction with websites, XML-RPC has become a significant security concern due to its exploitable vulnerabilities. Malicious actors have found ways to exploit the xmlrpc.php file, making it a gateway for brute force attacks. These attackers systematically attempt various combinations of usernames and passwords, seeking unauthorized access to WordPress sites.
Furthermore, hackers cleverly use the pingback feature with xmlrpc.php to orchestrate Distributed Denial of Service (DDoS) attacks. This nefarious tactic inundates servers with multiple concurrent requests, causing disruptions and jeopardizing the site’s stability.
Implementing robust defense measures is essential to stay one step ahead of these threats. It is wiser to disable XML-RPC when it’s not actively needed. By doing so, website owners can fortify their defenses, mitigating the risk of unauthorized access and creating a safer online environment for themselves and their users.
Disable XMLRPC Manually (on Apache and NGINX Servers)
Disabling XML-RPC thwarts any attempts to access the xmlrpc.php file, defending the WordPress application from potential threats. In contemporary iterations of WordPress, communication with external systems primarily relies on sophisticated APIs like the REST API. Consequently, it is prudent to deactivate XML-RPC entirely to mitigate the vulnerabilities posed by brute force and DDoS attacks.
In the following paragraphs, we shall delve into the manual methods of disabling XML-RPC on Apache and NGINX servers and employing a custom code filter. Before proceeding with any of these approaches, it is essential to exercise caution by backing up your site using a reliable and trustworthy backup service of your preference.
Disable XMLRPC on Apache
To disable XML-RPC on Apache, you can quickly achieve this by adding a code snippet to the .htaccess file in your website’s root directory.
If you are unsure about performing this task independently, seek assistance from a proficient coder.
Turn your unique software ideas into reality with our expert coders. Elevate your business potential – Hire us now for custom software development!
However, we have provided a visual demonstration below, illustrating how to access the .htaccess file in WordPress.
Locate the .htaccess File
To access the .htaccess file, you can utilize your preferred method, such as cPanel or FTP.
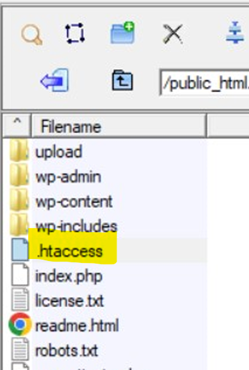
- Start by logging in to your cPanel account and selecting the “File Manager” option. Then, navigate to the “public_html” folder, where you locate the .htaccess file.
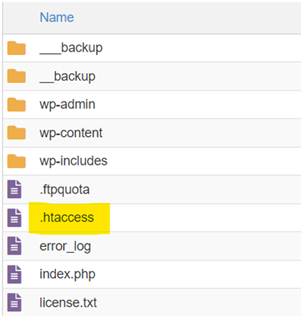
- Alternatively, to access the .htaccess file, you can use FTP. Download the file using software like Filezilla, make the necessary edits on your local machine, and then upload the edited version back to the server.
Edit the .htaccess File
To prevent XML-RPC requests in WordPress and restrict access to specific IP addresses, follow these steps:
- Open the .htaccess file and insert the provided code snippet at the top.
# Block WordPress xmlrpc.php requests
<Files xmlrpc.php>
order deny,allow
 deny from all
allow from 111.222.333.444
</Files>
- Save the changes made to the .htaccess file.
Please be aware that the code snippet employs the “order deny, allow” instruction, which restricts all requests to the xmlrpc.php file by default. Nevertheless, the “allow from” line grants access solely to designated IP addresses. If you want to disallow requests from all sources, just delete the “allow from” line from the code snippet.
Disable XMLRPC on NGINX
To turn off XML-RPC on NGINX, a different approach is needed compared to the simple .htaccess method
- Find and open the virtual host configuration file in the /etc/nginx/sites-available directory.
- In the server block of the configuration
Location = /xmlrpc.php {
    deny all;
  }
- Make sure to save the changes you’ve made to the configuration file so the modifications can take effect.
Disable XMLRPC Manually (Using a Custom Code)
There is another viable approach to disable XML-RPC in WordPress without changing your web server settings. You can use a filter to achieve the same result.
To do this, you need to create a custom plugin, also known as a site-specific plugin, and add the following line to its code to disable XML-RPC functionality.
Add_filter( ‘xmlrpc_enabled’, ‘__return_false’ );
Please ensure that you include two underscores prior to the term “return.” Use this syntax to disable XML-RPC requests in WordPress. Implementing the code instructs WordPress to reject incoming XML-RPC requests.
Again, prefer creating a plugin over modifying the functions.php file in your theme. Plugins ensure your modifications are retained during theme updates and enable code snippet incorporation from the internet without directly altering theme templates or functions.php. This segregation enhances site management and security.
Transform your digital presence with a dedicated WordPress developer. Unlock the full potential of your website today!
Disable XMLRPC With Automation (Using a Plugin)
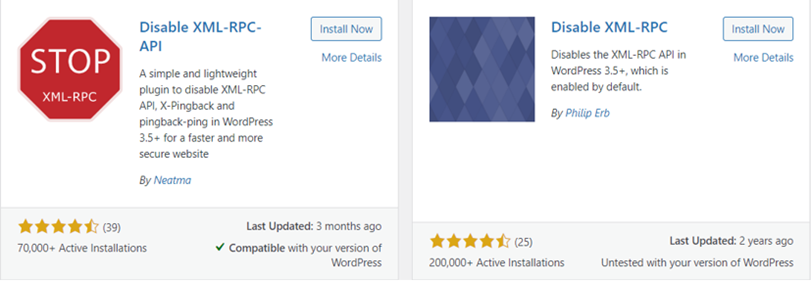
Due to its simplicity, many developers and website owners find it more convenient to utilize plugins rather than manually adding codes to disable XML-RPC. WordPress offers several quick plugin options to protect against XML-RPC vulnerabilities effectively.
- Total Deactivation: Plugins like Disable XML-RPC API and Disable XML-RPC can completely deactivate XML-RPC functionality on your WordPress site.
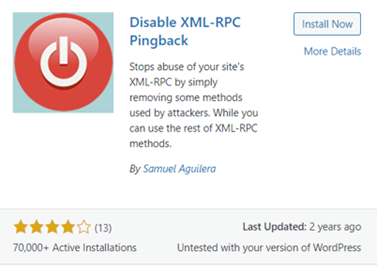
- Selective Protection: For a more targeted approach, alternatives like Disable XML-RPC Pingback selectively disable specific exploitable parts while keeping the rest unchanged.
However, employing WordPress security plugins does have its drawbacks. These plugins can consume system resources, potentially impacting site performance due to additional code execution.
Moreover, they only offer application-level security and require continuous management to maintain optimal performance. Some security plugins might also pose risks to WordPress security, especially regarding login functionality.
Thus, a careful assessment of the trade-offs between the ease of using plugins and the potential performance and security implications is necessary to make an informed decision.
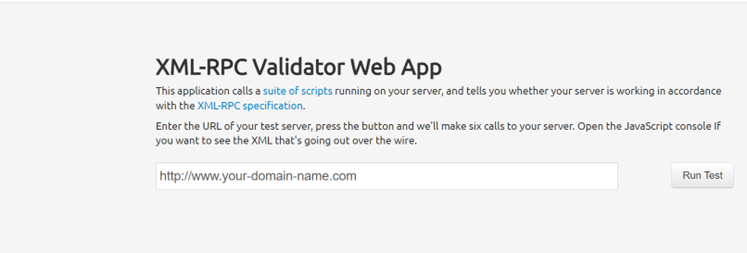
Confirming the XMLRPC Status on Your Site
Once xmlrpc.php has been disabled, it’s vital to confirm the status of XML-RPC on your WordPress site. By default, XML-RPC is enabled on all WordPress sites, so it’s necessary to check the status of the xmlrpc.php file after disabling it.
Conclusion on How to Disable XMLRPC in WordPress
Finally, enabling xmlrpc.php should be limited to specific cases like communication with older version systems or facing restrictions in updating WordPress. However, it is generally recommended to disable xmlrpc.php and to keep your site up to date with the latest technology.
Nevertheless, only disabling xmlrpc.php won’t fully protect your WordPress site from all vulnerabilities. Hackers can still exploit other vulnerabilities. Therefore, opt for additional services like Positiwise Software Solutions to safeguard your site against brute force attacks, XSS, SQL injection, malware, DDoS, and other WordPress security threats.

Expert in Marketing Strategy and Brand Recognition
Jemin Desai is Chief Marketing Officer at Positiwise Software Pvt Ltd, he is responsible for creating and accelerating the company’s marketing strategy and brand recognition across the globe. He has more than 20 years of experience in senior marketing roles at the Inc. 5000 Fastest-Growing Private Companies.