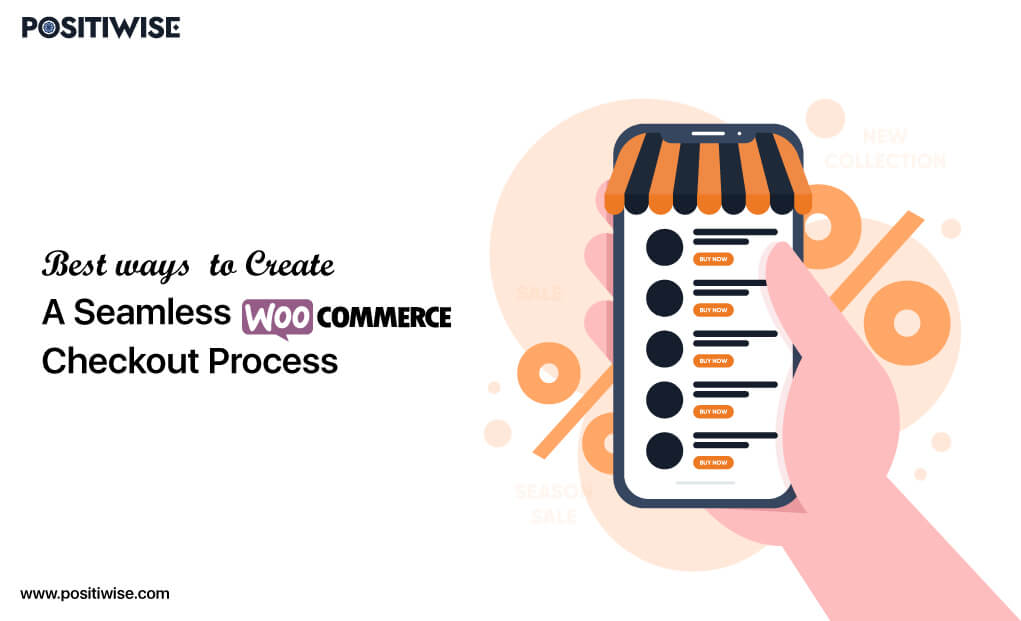
Quick Overview:
You explore a virtual store, carefully add items to your cart, and when it’s time to finalize your purchase, the checkout process seems like navigating a labyrinth. Frustration takes hold as unexpected costs pop up, steps appear never-ending, and confusion shrouds what should have been a straightforward transaction. This scenario is far from uncommon; it’s a challenge that numerous e-commerce websites consistently come across. But fret not – as within WooCommerce, you can provide your customers with a seamless checkout process that flows seamlessly, without hassle, and with a touch of delight.
Introduction
In a digital landscape where nearly 70% of shoppers explore e-commerce sites, load their carts, and then abandon their purchases, a smooth checkout process becomes paramount. Unanticipated costs, sluggish or convoluted checkouts, and restricted purchasing options all contribute to lost sales.
However, there’s a glimmer of hope in the form of numerous approaches at your disposal, all of which can be embraced to craft an effortlessly smooth checkout encounter within WooCommerce, subsequently amplifying your conversion rates.
In this guide, we will unveil those tactics, but before we do that, let’s lay the foundation by answering a couple of fundamental queries:
- What is WooCommerce?
- What is a Checkout page?
- Why is it essential to make the WooCommerce checkout setup simple?
- What does a good WooCommerce checkout process look like?
What is WooCommerce?
WooCommerce is a free software designed for WP-based websites. Its primary goal is to simplify the creation of online e-commerce shops.
With WooCommerce, transforming a regular website into a fully operational online store becomes effortless as it provides all the tools required to establish a comprehensive e-commerce platform with all the essential features. It also empowers users to manage those created online stores efficiently and handle tasks like:
- Arranging product displays
- Overseeing orders
- Seamlessly accepting payments through multiple gateways, etc.
WooCommerce Journey
The journey of WooCommerce began in 2011 when WooThemes launched it. In 2015, it was acquired by Automattic, the parent company of WordPress. The merger of WordPress and WooCommerce propelled their growth, and to this day, Automattic remains immersed in developing WooCommerce and its extensions. Partnering with a knowledgeable WooCommerce development service can help businesses leverage the powerful ecommerce capabilities of the WooCommerce platform.
WooCommerce Features
Here are some of the features that this software offers:
- Product Management: It allows adding and organizing products on your online store. You can create different product categories and customize attributes like size, color, etc.
- Shopping Rules: It provides flexible shopping rule features that you can customize to match your business needs, streamlining the ordering process and customer experience.
- Order Management: You can efficiently monitor and manage customer orders through the Order Management feature. You can even manually create orders if required.
- Sales Reporting: WooCommerce comes with built-in sales reporting to help you track your business performance. Additionally, you can extend reporting capabilities using various extensions.
- Extensions and Plugins: It offers an “n” number of extensions and plugins that enhance functionality. These cover areas like – marketing, shipping, inventory management, etc.
Enhance Your Store with Expert WooCommerce Store Development
Revamp your store with expert WooCommerce development! Elevate user experience and boost sales. Upgrade now for a thriving online business!
What is a Checkout Page?
A checkout page is where you input your payment information and finalize your order. On this page, you have to enter details like:
- Shipping address
- Billing details
- Preferred payment method
- Any additional instructions related to their order.
In lay terms, the checkout page is where the transaction takes place, transforming a customer’s shopping intentions into a confirmed purchase.
5 Steps to Improve the WooCommerce Checkout Process
Here is the five-step procedure that you need to follow to improve the checkout process in WooCommerce:
- Install the Flux Checkout for WooCommerce plugin
- Select WooCommerce Checkout Design
- Customize WooCommerce Checkout Design
- Enable Login/Guest Checkout
- Customize the Order Confirmation Page
1. Install the Flux Checkout for WooCommerce Plugin
Follow the steps mentioned below to install the flux checkout plugin:
- Open a fresh tab in Chrome.
- In the search bar, type “https://iconicwp.com/products/flux-checkout-for-woocommerce/” and press Enter.
- Download the package.
- Login to your WordPress dashboard.
- Navigate to Plugins > Add New.
- Click Upload Plugin
- Choose the .zip file and upload it.
- Click Activate once the file has been uploaded.
2. Select WooCommerce Checkout Design
Follow the steps mentioned below to select the WooCommerce checkout design of your choice:
- Navigate back to the WordPress dashboard if necessary.
- Navigate to WooCommerce > Flux Checkout >Styles.
- Click the radio button to choose between Classic or Modern Flux checkout design.
3. Customize WooCommerce Checkout Design
Follow the steps mentioned below to customize the WooCommerce checkout design:
- In the Styles tab, perform the following actions:
- Choose Your Theme: Select a theme that matches your store’s aesthetic and style.
- Navigate to Styles: In the Styles tab, access customization options.
- Customize Header Styles: Choose between Text or Image for the header type. If using Text, modify Header text, font family, color, and more.
- Personalize Checkout Styles: Adjust the Checkout Design for a unique touch. Change the placeholder, link, and button colors depending on your theme.
- Finalize Your Changes: Review and ensure you’re satisfied with your checkout’s appearance. Click Save Changes to apply all modifications.
4. Enable Login/Guest Checkout
Follow the steps mentioned below to enable login/guest checkout:
- Navigate WordPress dashboard > WooCommerce > Settings
- Click on the Accounts & Privacy tab.
- Click on the checkboxes that you want to utilize.
5. Customize the Order Confirmation Page
Follow the steps mentioned below to customize the order confirmation page:
- Navigate to WooCommerce > Flux Checkout
- Click the Thank You Page tab.
- Toggle the switch placed in front Enable Flux Thank You Page.
- If needed, toggle the switch placed in front of the options that you want to utilize, like Show Map.
- Add content in the Thank You Page Content box.
- Click Save Changes.
Why is it essential to make the WooCommerce checkout setup simple?
There are a vast number of reasons to create a WooCommerce checkout setup, such as:
- User Experience: Simplifying the checkout process ensures a smooth journey from adding items to completing the purchase. Complex checkouts can frustrate customers and lead to cart abandonment.
- Faster Transactions: Streamlined checkouts save time for both customers and businesses, resulting in a better shopping experience.
- Trust and Transparency: A straightforward checkout process enhances trust. Customers feel comfortable sharing payment details when the process is clear.
- Mobile-Friendly: With many customers shopping on mobile devices, a simple checkout setup guarantees compatibility across screen sizes.
- Conversion Boost: User-friendly checkouts directly correlate with higher conversion rates. Easy purchases encourage customers to complete transactions.
- Competitive Edge: In a competitive e-commerce development world, a simple checkout distinguishes you from rivals. Customers prefer effortless shopping.
- Repeat Purchases: Positive checkout experiences foster repeat business. Satisfied customers are more likely to return for future transactions.
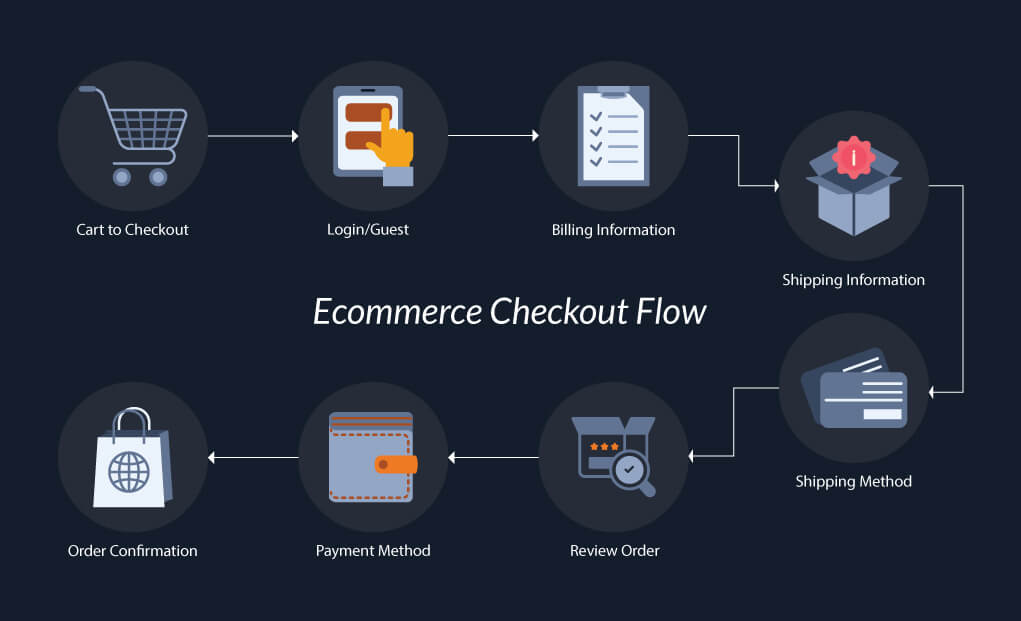
What does a good WooCommerce checkout process look like?
An optimal e-commerce checkout process should be a seamless experience – uncomplicated, straightforward, and centered around the user. It should effortlessly lead your customers through every phase of the checkout, from the initiation of the process to the moment when they confirm their purchase. The flow of an ideal checkout page should be something like this:
WooCommerce Checkout Flow
7 Key Components of a Better Checkout Experience in WooCommerce
Here are seven key components for a better checkout experience in WooCommerce:
- Guest Checkout Option
- Visible Progress Indicator
- Security Badges
- Multiple Payment Options
- Flexible Shipping Options
- Clear CTA Buttons
- Order Confirmation Message
Let’s talk in detail:
1. Guest Checkout Option
Not all customers want to create an account before making a purchase. Offering a guest checkout option caters to those who prefer a quick and hassle-free experience without the need for account creation. Research from the Baymard Institute suggests that 24% of customers might abandon their carts if forced to create an account.
2. Visible Progress Indicator
Implementing a progress indicator in a multi-step checkout process helps customers track their progress and know how many steps are left. Incorporating them reduces anxiety, maintains customer involvement, and encourages them to finalize their purchase.
3. Security Badges
In a world concerned about data security, prominently displaying security badges like SSL seal helps build customer trust. These badges assure users that the information they are entering is safe and will not be shared with anyone else. This, in turn, boosts their confidence to share the details without any hesitation.
4. Multiple Payment Options
Implementing a progress indicator in a multi-step checkout process helps customers track their progress and know how many steps are left. Observing such info makes users feel at ease as these visible indicators reduce anxiety, maintain customer involvement, and encourage them to finalize their purchase.
5. Flexible Shipping Options
Different customers have different payment preferences; thus, your checkout page should consist of a range of payment options like mobile payment solutions (UPI), credit cards, and bank transfers. etc., in order to ensure you can cater to diverse customer needs.
6. Clear CTA Buttons
Make sure your CTA buttons are clearly labeled and stand out. Labels like – proceed to checkout, buy now, place order, etc., guide customers through the checkout process, helping them understand the next step.
7. Order Confirmation Message
An order confirmation message functions like a receipt that assures customers that their order has been received. This message can consist of a thank you message, order details, payment information, shipping method, expected delivery date, etc.
Conclusion Seamless on WooCommerce Checkout Process
The checkout process is more than just a regular part of selling things online – it’s a smart chance to change curious shoppers into happy, regular customers. Suppose you aim to increase the number of customers purchasing from you, boost your sales, and maximize your earnings. In that case, it’s essential to make the checkout process excellent. Remember that checkout isn’t just the end step; it’s like a door to success in the busy world of online shopping.

Expert in Marketing Strategy and Brand Recognition
Jemin Desai is Chief Marketing Officer at Positiwise Software Pvt Ltd, he is responsible for creating and accelerating the company’s marketing strategy and brand recognition across the globe. He has more than 20 years of experience in senior marketing roles at the Inc. 5000 Fastest-Growing Private Companies.