

Quick Overview:
Lightweight websites are highly in trend, and most businesses prefer them to enter digitized markets. It helps them to analyze the ecosystem, reach out to the target audience, and optimize the business metrics per growth and expected opportunities. If you ask a development professional to curate such a site, the first answer will be ASP.NET Core Razor Pages. This tech from the .NET ecosystem can help you build marvelous websites with top-notch features. But, to efficiently utilize it, we must understand its fundamentals, which we will learn in this blog.
Getting Started with Razor Pages in ASP.NET Core
In the dot net development, you can find numerous technologies from Microsoft, helping companies streamline operations. And among all such amazing tech stacks, there’s ASP.NET Razor Pages. It’s a well-used and highly considered ASP.NET Core web development technology. Most of the veteran developers consider it for building lightweight applications.
So, let’s undergo the Razor Pages in ASP.NET introduction to solidify our app development foundation.
What are Razor Pages in .NET Core?
ASP.NET razor pages are a new-age development concept in the .NET ecosystem. It helps organizations to avail of a page-based server-side rendering application. You can utilize it with ASP.NET Core, ASP.NET Web API, and an MVC-based application. Primarily, it coexists with all such technologies for better efficiency.
In addition, the razor pages in ASP.NET are highly lightweight, helping to minimize resource utilization and save money. When you hire the best .NET developer in the industry, they highly recommend razor page dot net development over ASP NET Core MVC for data-driven sites.
Why Prefer ASP.NET Razor Pages?
ASP.NET razor pages offer numerous top-notch features, leading provide the following benefits:
- ASP.NET Core razor pages application can run on multiple platforms, including Unix, Windows, and macOS.
- The lightweight infrastructure ensures high performance and speed for every end-user.
- The organized codebase supports better development and maintenance.
- A developer can find plenty of documentation for it.
How Does ASP.NET Core MVC Differs From ASP.NET Razor Pages?
Many businesses and novice .NET developers find selecting ASP.NET Core MVC and ASP.NET razor pages complex. But, you will not find this complexity, as we will answer it accurately.
In ASP.NET Core MVC, the application is divided into three primary parts: Model, View, and Controller. Among all three, controllers are essential in grouping the actions and routing them when a user request gets executed.
The action groups in MVC look similar to the following snippet. The actions are grouped and handled by a single controller.

On the other hand, Razor Pages provides an entirely different architecture. Every individual route in an ASP.NET razor page application becomes a separate razor page. Also, each page can have more than one controller, making it more cohesive than the MVC model.
If we revamp the ASP.NET Core MVC structure to razor pages, it will look like the following:
A Step-By-Step Process To Understand Razor Pages in ASP.NET
In this tutorial, we are going to learn about creating ASP.NET Core razor page applications using Visual Studio and Visual Studio Code IDE. In addition, you will find separate procedures for Windows and macOS machines. But, before you start, ensure that your system has the latest version of the IDEs, probably the 2022 version.
There is a total of three tutorials, and all three contain the same code. You need to put the code in the Program.cs file to perform ASP.NET razor pages dot net development. Additionally, you can edit the code per your expertise and requirement to see a different output.
The Code for Program.cs file:
var builder = WebApplication.CreateBuilder(args);

// Add services to the container.
builder.Services.AddRazorPages();

var app = builder.Build();

// Configure the HTTP request pipeline.
if (!app.Environment.IsDevelopment())
{
    app.UseExceptionHandler("/Error");
    // The default HSTS value is 30 days. You may want to change this for production scenarios, see https://aka.ms/aspnetcore-hsts.
    app.UseHsts();
}

app.UseHttpsRedirection();
app.UseStaticFiles();

app.UseRouting();

app.UseAuthorization();

app.MapRazorPages();

app.Run();
ASP NET Core Razor Pages Building Using Visual Studio
If you need to create a razor page on a Windows machine using the Visual Studio IDE, then the following procedure is for you. Execute each step in the provided sequence to understand the fundamentals.
Step-by-Step Guide for creating a Razor Pages web app
Step 1: Open your Visual Studio IDE, and once its interface is displayed, click on the “Create a new project” option. It will lead you to generate a new razor page project for this tutorial.
Step 2: You will see numerous template options on the right side. It may include ASP.NET Core Web App (Model-View-Controller), ASP.NET Core gRPC Service, and more. From all these options, you need to choose ASP.NET Core Web App.
- In addition, you must also check the description of the template. It must contain the “Razor Page content” keyword.
- Click on the Next button.
Step 3: Now, a dialog box will be showcased with numerous fields asking you to input project details, such as name, location, and solution name. You can give any name to your project per your requirements and convenience.
- Again, hit on the Next button to move forward.
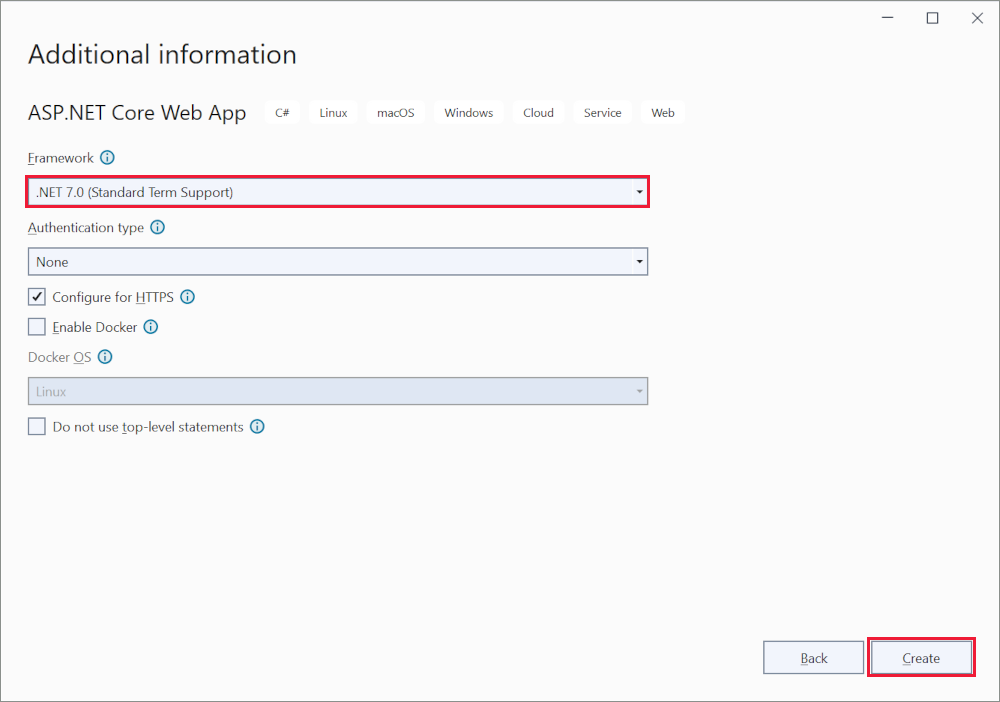
Step 4: At this step, you will see another dialog box with the title Additional information. Here, you need to select the framework, authentication type, and docker OS and clarify whether you want to use top-level statements.
- In this tutorial, we are going to use the .NET 7.0 framework with standard term support. And there’s no authentication, but the checkbox for HTTPS configuration is selected.
Step 5: Click the Create button to see your project in Visual Studio.
Step 6: Now, move to the solutions explorer, available on the right side of the window. You will see the project’s name, RazorPagesMovie, in this tutorial.

- In addition, all other files associated with the project will also be available. You can edit them, put your code, and run it. And that’s how the Razor Page application gets developed.
Run the app
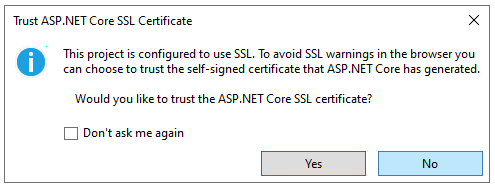
Step 1: To run your Razor Pages in ASP.NET, press the key combination of Ctrl + F5. It will run your software without involving a debugger.
- It will show an error if you still need to install an SSL certificate. You only need to click the Yes button when it displays a dialog box.
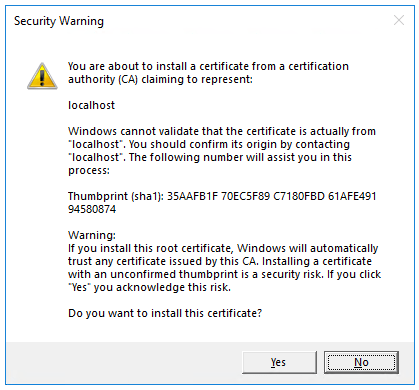
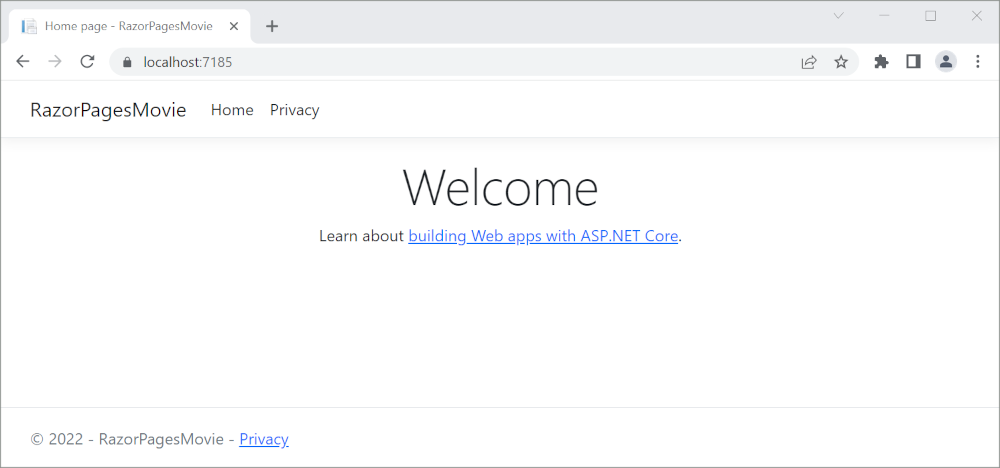
Step 2: Further, it will show a security warning. Again, click on Yes, as we are just learning. Finally, you will see the output as follows.
Build Your Business with a Custom .NET Application Development Services
Take your business online with custom ASP.NET app development services. Our top .NET developers deliver secure, scalable web applications to grow your enterprise business.
Dot NET Core Razor Page Building Using Visual Studio Code
Now, you will learn about the process for creating ASP.NET Core web development using Visual Studio code. You can follow this procedure on any Windows, Linux, and macOS machine, as Visual Studio Code is a cross-platform compatible IDE.
- Open and access the integrated terminal of Visual Studio Code IDE.
- Navigate to the system directory where you want to create the project file. For navigation, you need to execute the “cd” command.
cd filename- Run the following command once you are in the required folder.
dotnet new webapp -o RazorPagesMovie
code -r RazorPagesMovie
- After running the commands, Visual Studio Code will display a dialog box asking to verify whether you trust the authors.
You need to confirm the verification by selecting the checkboxes. The IDE asks for these details because dotnet created the Razor Page files for you. As you can see from the commands we executed, the “dotnet new” keyword generates a project named “RazorPagesMovie.” The keyword “code -r” initiates the project in a Visual Studio code instance.
- Your Razor Page project is now created; the only task left is running and verifying it.
- Before running, execute the following command for HTTPS connection.
dotnet dev-certs https --trust
Now, use the same combination as Visual Studio IDE (Ctrl + F5) to run the Razor Page application.
- You will see a warning where you need to select the Yes option. As soon as you click on it, the application will start running in the browser.
Dot Net Core Razor Page Building Using Visual Studio IDE on macOS Device.
The macOS users come with an exception. Their operating systems work differently, so a different Visual Studio IDE package is available to support them in creating Razor Pages.
If you use an Apple MacBook or similar device, follow the procedure below to create an ASP.NET Razor Page project.
- Open the IDE and go to File. Then, choose New Project.
- A dialog box will display on your screen for choosing a template. From the available alternatives, go to Web and Console, then move to App, and finally choose the Web Application.
- Now configure your ASP.NET razor pages project by choosing a framework as .NET 7, with no authentication and no use of top-level statements. Further, click on Continue.
- Input the project name. In our case, we have input it as RazorPagesMovie. After that, click on Create to see your dot net razor page application.
In the solutions explorer, you can edit the .cshtml and .cshtml.cs files per your needs. You can also hire .NET developers from Positiwise Software to build an ASP.NET razor page application for you.
- Finally, run the application by going to Debug > Start Debugging. It will start the Razor Page app, and you will see output in a browser.
Why Consider Positiwise Software for ASP.NET Core Web Development?
For the best-in-class ASP.NET core razor page application development, you must consider Positiwise Software Pvt Ltd. By onboarding them as your technology, and you will always have the best .NET developers working on your business software. Moreover, they offer some exceptional services as below, which has retained them as a leading development firm for 10+ years:
- 21+ years of software development expertise.
- Experience creating feature-rich applications using ASP.NET Core Razor Pages, .NET, .NET Core, AngularJS, ReactJS, HTML, CSS, and more.
- Compliance with industry and regulatory standards.
- Flexible payment and hiring models.
- 100% transparency and zero hidden charges.
- Alignment with agile development approach.
Concluding Up
The ASP.NET Core Razor Pages are reliable for creating lightweight websites and web applications. It’s entirely different from ASP .NET Core MVC due to individual controllers for every action. As a beginner, you must know how to create a razor page application using Visual Studio and Visual Studio code IDE. It will help you understand the structure and workings of this dot net development technology.

Expert in Software & Web App Engineering
Parag Mehta, the CEO and Founder of Positiwise Software Pvt Ltd has extensive knowledge of the development niche. He is implementing custom strategies to craft highly-appealing and robust applications for its clients and supporting employees to grow and ace the tasks. He is a consistent learner and always provides the best-in-quality solutions, accelerating productivity.


