Step-by-Step Guide to Creating Custom Block in Gutenberg WordPress
Custom Gutenberg editor for WordPress is one of the most advanced editors to create a website using block technology. From saving time to enhancing overall WordPress web design, it helps with all. But, sometimes, its built-in blocks need help to fulfill project requirements. And then comes the custom WordPress Gutenberg blocks.
Custom blocks are seamless to develop and utilize. In this guide, you will understand the process of creating one for your WordPress website. So, let’s get started.
The Process To Create a Custom Gutenberg Block in WordPress
In this procedure, we are going to use a plugin for building a custom Gutenberg block in WordPress. Whether you are a beginner or an intermediate in development, the Genesis Custom Blocks plugin can help you streamline the task.
So, to start with the custom block creation, install the Genesis Custom Blocks plugin and activate it. Once you complete the activation, follow the below process to understand custom block development by creating a testimonial block for your WordPress website.
- 1: Curating The Custom Gutenberg Block
- 2: Create a Block Template for WordPress
- 3: Preview and Finalize Custom Gutenberg WordPress Block
- 4: Start Using The Custom Block
Step 1: Curating The Custom Gutenberg Block
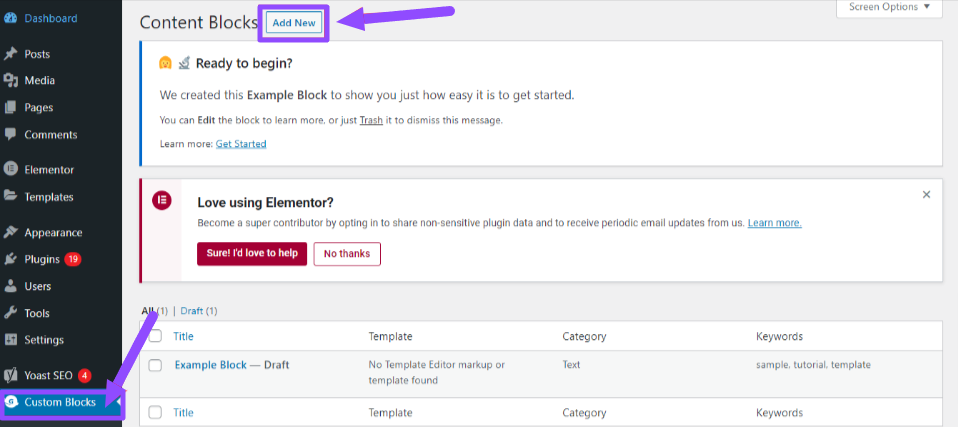
Open the WordPress dashboard, and from the left pane, click on Custom Blocks and then Add New. It will open the block editor page. Again, click on the Add New button available at the top.
After you click on the Add New button on the editor page, set a name for your block. In our case, we have provided the name as Testimonials.
Further, by clicking on the Block, you can open its settings in the right pane to access & configure advanced settings. You can use all the provided settings to configure categories, add keywords, set names, icons, and more.
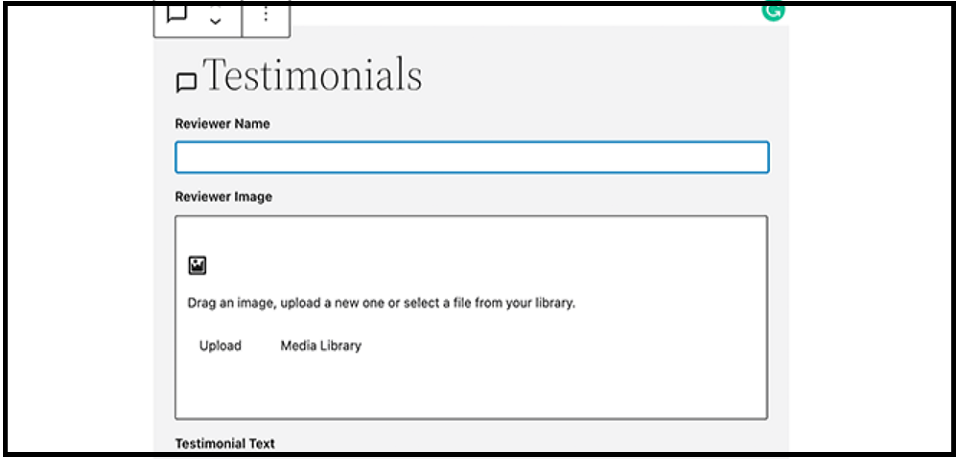
Now, you can see a block named Testimonials on the interface. It’s time to modify it and make it as per requirements. For this tutorial, we are going to add three different fields to it, namely:
- Text area field
- Image field
- Reviewer Name field
So, let’s add them all.
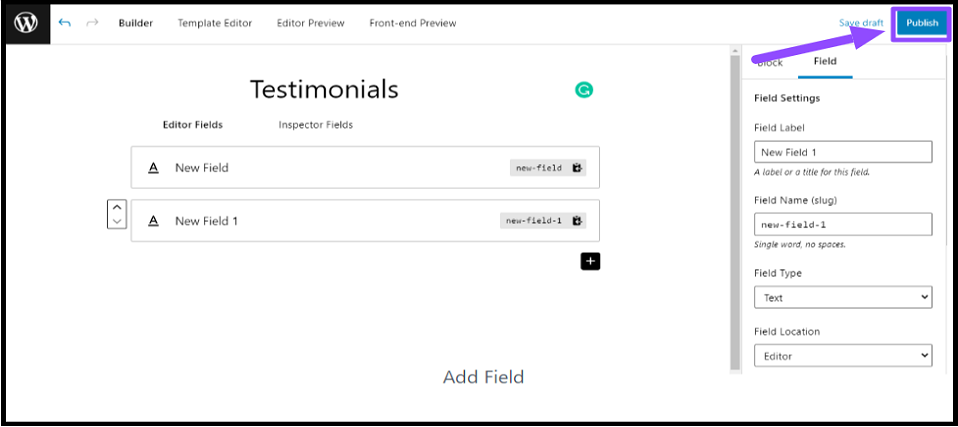
Click on the ( + )plus icon in the lower right corner of the Block. It will open the filed settings in the right pane with the following configuration options:
- Field Label: Input any string of your choice in this field.
- Field Name: The name will be set as per the field label.
- Field Type: We are going to use an image block so that we will select an image from the drop-down menu. Similarly, you can select the type as needed.
- Field Location: Choose the editor or inspector location.
- Help Text: Input the description for the field so that others can understand its purpose.
Once you set the fields for the image for the testimonial block. Then, again, follow the procedure by clicking the ( + ) plus icon and adding the other two fields. Select the correct field type for an output similar to the one below.
In addition, you can also use the drag-and-drop feature to rearrange the fields. And if you still need to edit a field, click on it and modify settings in the right panel. Otherwise, click on Publish and save the custom Gutenberg WordPress block.
In addition, you can also use the drag-and-drop feature to rearrange the fields. And if you still need to edit a field, click on it & modify settings in the right panel. Otherwise, click on Publish & save the custom Gutenberg WordPress block.
Step 2: Create Block Template WordPress
Creating a custom block using the plugin is not enough, as it will only work once you create a template.
A custom block template determines the working of the Block and how it displays the data on the website using HTML, CSS, and PHP. In addition, primarily, you can use the following two methods to create a template:
- Built-in Template Editor (For HTML, CSS, and static data)
- Manual Template Creation and Configuration (For complex data and PHP-based Block)
Let’s understand both methods.
Method #1 Template Creation using Built-in Editor
- Open the custom block page and navigate to the Template Editor tab.
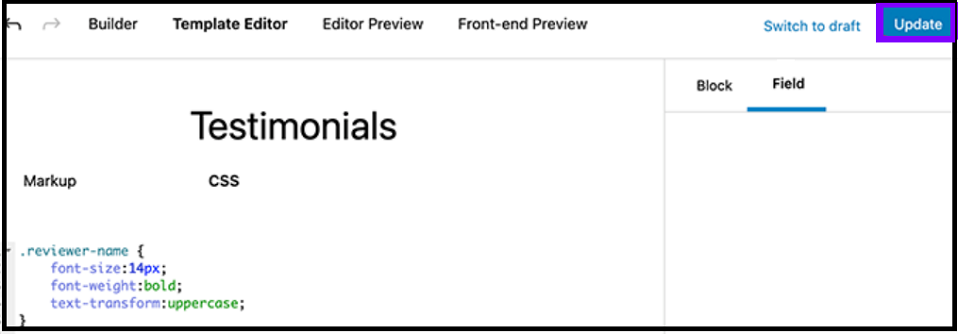
You can edit HTML (Markup) and CSS in the editor tab. You can write your custom HTML/CSS and add it to the files.
- For our Testimonial custom block, add the following HTML.
- Switch to the CSS and add the following code block to it.
The template will be created, and the first method will be completed. Let’s move to the next template creation method if you want to use PHP.
Method #2: Manual Custom Gutenberg Block Template Uploading
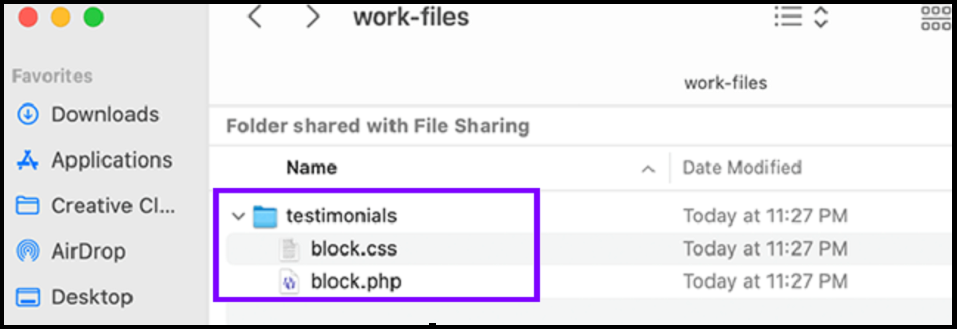
- On your system containing WordPress, create a folder with the name of your Block. In this case, create a folder with name testimonials.
- Generate a file with the name block.php under the folder. In this file, enter the following code.
In this code, there’s a function called block_field(). It would get used to fetch data and display it on your website. Also, it will take care of the style of your custom WordPress Block. Moreover, you can hire dedicated WordPress developers to create code blocks for your custom Gutenberg block.
Save the file and move further to the next step.
- Under the same folder (testimonials), create another file with the name and extension block.css. And after its generation, put the below code in it:
- Save the changes to the files.
Now, your testimonial folder would have two files – block.css and block.php.
- Upload the Template folder to your WordPress website using an SFTP client called FileZilla. In addition, you can also use the file manager of your hosting provider, if applicable.
- Connect to the website and navigate to the following location:
/wp-content/themes/your-current-theme/- Once you are in the folder, create a new folder inside it and name it blocks.

- Open the block folder and upload the testimonials folder inside it.
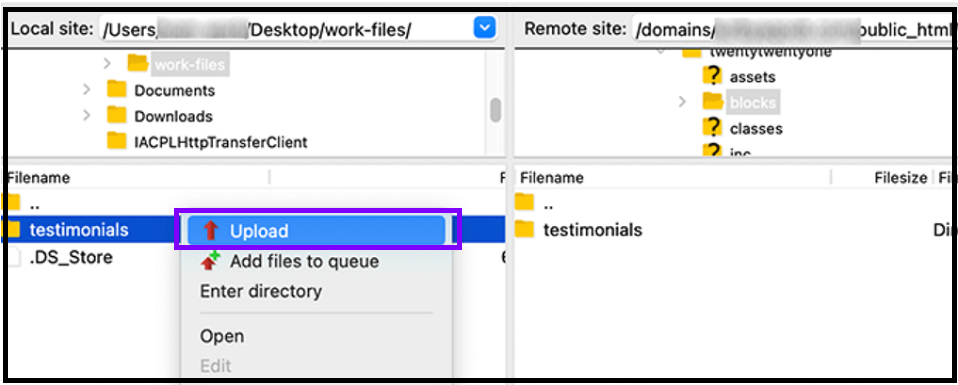
- The manual process is completed.
Step 3: Preview and Finalize Custom Gutenberg WordPress Block
Previewing is a crucial step involved in creating a custom WordPress block. It helps to finalize the settings and add blocks to the website.
From the Editor Previewer tab, input some sample content into the Block.
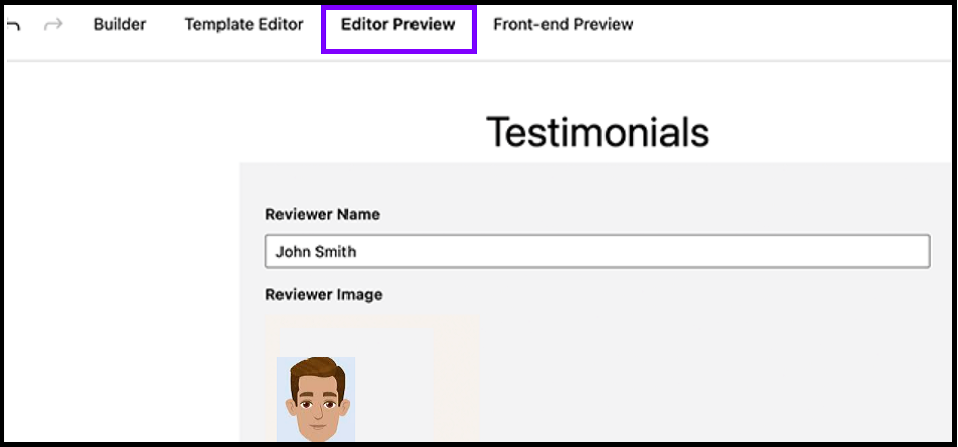
Further, click on the Update button to save the changes.
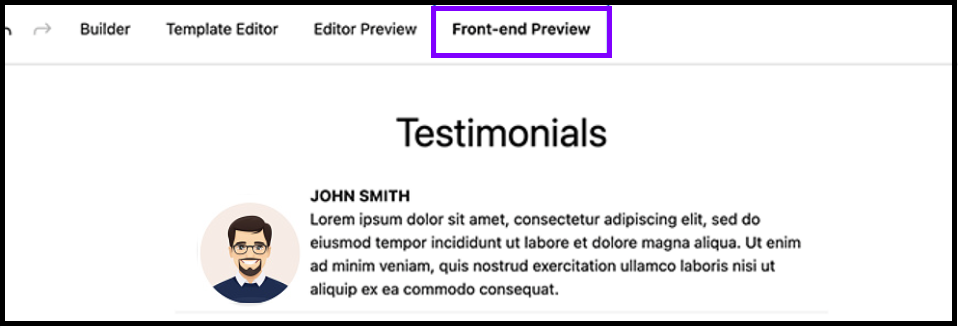
After the update, go to the Front-end preview to check how the Block will display on your WordPress website.
Step 4: Start Using The Custom Block
After the block creation, template configuration, and preview, you can utilize the Testimonial block on a real-world website.
You can generate a new page or post and even open an old one to edit. Following it, click on the widgets option from the top left corner, and under it, search for your custom block.
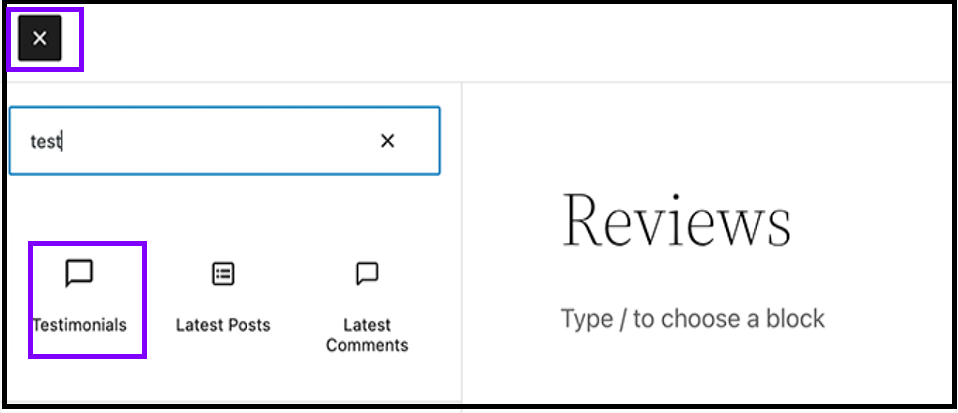
After finding the custom block, drag and drop it on your webpage or post and input the content you want to display.
Finally, your custom Gutenberg WordPress block is ready. And now you can use it for quick development. In addition, you can follow a similar procedure to create any other custom block & use it on a WordPress website. However, ensure that you create the correct HTML, CSS, and PHP code for it. As a result, within four significant steps, your custom block will be ready to use & publish.
What is Gutenberg WordPress Editor?
Gutenberg WordPress Editor is WordPress websites’ primary web page and post editor. It provides an interface to create and edit site pages using different blocks. You can refer to blocks as pre-built layouts.
For instance, if you want to upload an image on a WordPress post, you can use the image block through the Gutenberg editor. And then, you only need to use that Block to upload images without writing any code. Moreover, the best part is that the code of blocks gets maintained automatically in the background.
Therefore, blocks are the fundamental pillars of the Gutenberg editor, and numerous blocks are available by default. However, if any additional block is required, you can create a custom one and add it to the list.
The Need for Custom WordPress Block
Custom WordPress blocks are becoming quite popular. Even every WordPress development company creates it to streamline their content publishing tasks for their customers. In addition, it helps even non-technical persons in a firm to efficiently create a blog or web page layout with a bit of training.
For instance, if you create a custom block that sets the complete layout of the blog, including author bio, main content, title, body, and all other components. Then, someone with some knowledge of WordPress can drag that Block, input data, and publish the blog.
The Benefits of Building Custom Gutenberg Blocks
The benefits of creating custom blocks in Gutenberg WordPress include the following:
- Reduce time in setting up different blocks.
- Effortlessly fulfills the requirement.
- Enables non-technical persons to use CMS systems with little training.
- Aids in aligning block with theme layout and design.
- Enhances website appeal and improves productivity.
Why Hire Dedicated Developers For WordPress Web Design and Block Development?
From WordPress designing to building custom Gutenberg blocks, WordPress development company is an important aspect. Such companies have the right hardware, software, and human resources to build custom Gutenberg WordPress blocks quickly. And they also ensure compliance of blocks with WordPress coding and industry standards.
In addition, when you hire dedicated WordPress developers, you get free from development, template uploading, and all other tasks. You get the final result of a custom WordPress block that you can use across your websites.
Moreover, you also get the benefit of the following:
- Affordable and Quick creation of custom WordPress block
- Secure uploading of files
- Compliance with WordPress standards
- Top-Notch Block, alluring WordPress Web Design
- Transparent Process
- Development through experienced WordPress developers
Boost Your Online Presence with a Talented WordPress Developer!
Take Your Online Business to New Heights – Enlist the Services of a Professional WordPress Developer Today!
Concluding Up
You can use the Genesis custom blocks plugin to create a custom WordPress block. It streamlines the task & makes the block creation streamlined:
- Install the Genesis plugin and activate it.
- From the dashboard, click on Custom Blocks, then under it, choose Add New option.
- From the plugin’s interface, provide a name to the Block, add its field, and save the changes.
Following it, create & upload the folder containing CSS and PHP files to the website folder through a secure file transfer protocol. You can also directly modify the HTML and CSS from the plugin’s interface in the editor tab. Lastly, preview the Block and use it while creating web pages and posts.

Expert in Marketing Strategy and Brand Recognition
Jemin Desai is Chief Marketing Officer at Positiwise Software Pvt Ltd, he is responsible for creating and accelerating the company’s marketing strategy and brand recognition across the globe. He has more than 20 years of experience in senior marketing roles at the Inc. 5000 Fastest-Growing Private Companies.