

Quick Overview:
The blog helps you discover how to use WebSockets in ASP.NET Core with step-by-step guidance. It provides a complete procedure to configure a WebSocket server and client and test their connection. In addition, you will also discover the WebSockets functionality while handling multiple users in a real-time chatroom.
How To Use WebSockets in ASP.NET Core
In modern web applications, WebSocket connections are pretty popular and highly used. It helps businesses align with digital landscape requirements and process real-time data from end-users. It also supports empowering productivity, output rate, and user experience.
If you are not using it, you should start using websockets in ASP.NET Core applications. It will support you in achieving the expected business results in this dynamic market. To learn about its implementation, explore the process provided further.
What are WebSockets in ASP.NET Core Applications?
In ASP.NET Core applications, Web Sockets enable a protocol that establishes low overhead communication between the server and the client. It allows devices in server-client architecture to communicate constantly until either of them closes the connection.
In real-time applications, WebSockets serve a primary role, as they enable the server to receive constant updates of data. This kind of connection is bidirectional in nature and requires HTTP support for stability, performance, and speed.
When To Implement WebSocket Connection Functionality In ASP.NET Core Project?
You should implement WebSockets in ASP.NET Web API App and other applications only if it aligns with the following requirements or use cases.
- Development of a real-time application, like chatrooms, FinTech, or enterprise system.
- Building an online game application where the server receives constant client updates.
- When you need UI refresh without the user asking for it.
- For building chat applications for internal use, within the department, or a building.
- To create forex and trading systems for real-time stock and share trading.
Similarly, you can identify whether your requirements fall under these scenarios. For better clarification, consult with a .NET development company or hire .NET Core developers.
Insight To Web Sockets in ASP.NET Core Applications: A Practical Example
Here, we will learn about web sockets’ functionality in an ASP.NET Core project. Once you undergo this tutorial, you will understand the fundamentals of WebSocket communication configuration for an ASP.NET Web API app.
To start, download, install, and open the latest version of Visual Studio IDE. We will be using the .NET 6.0 framework for this tutorial. You can use a higher version, but before implementation, check its support for the protocol.
This procedure divides into three major phases, as outlined below:
- Phase 1: Server-Side Configuration
- Phase 2: Client-Side Configuration
- Phase 3: Testing the WebSockets Communication
Let’s start with the process.
Phase 1: Server-Side Configuration
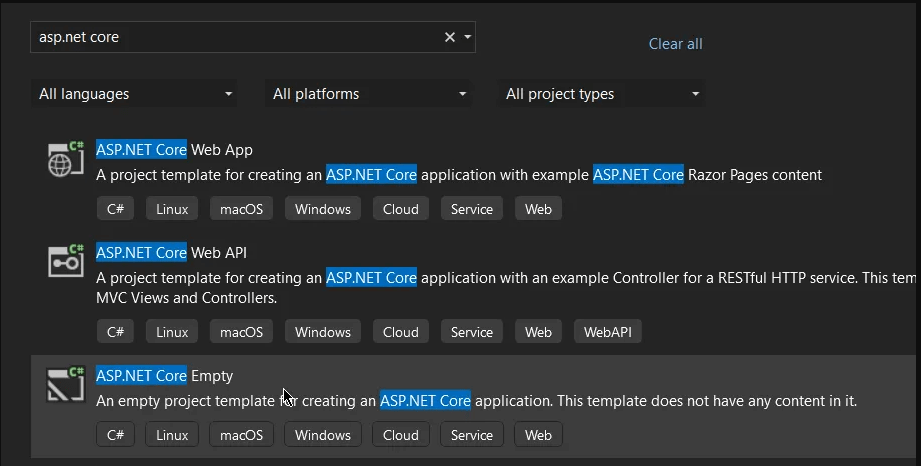
- Step 1: In Visual Studio IDE, create an empty ASP.NET Core project using C# as its primary programming language.
On every project setup screen, you will find the Next/Create button in the lower right corner. After filling in the details and choosing the reliable option, click on that button to move further.
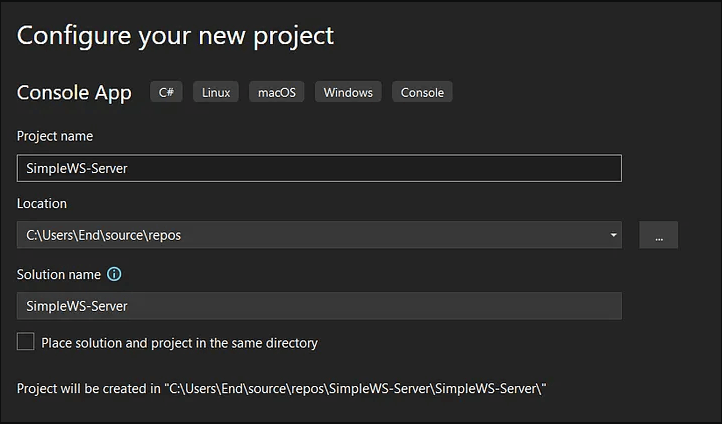
- Step 2: On the “Configure your new project” screen, fill in the project details per your requirements. For this tutorial, we are using “SimpleWS-Server” as the project and solution name.
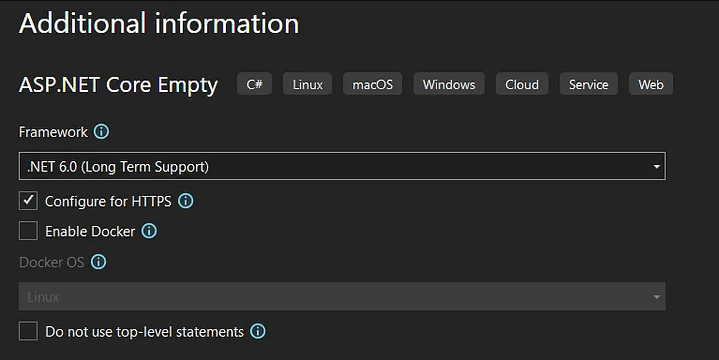
- Step 3: On the “Additional information” screen, select .NET 6.0 and leave the rest as specified. Ensure that all the settings match as in the below snippet.
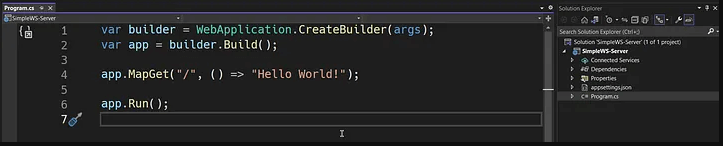
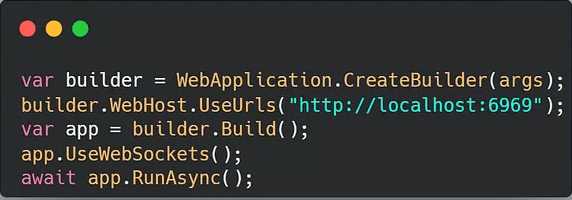
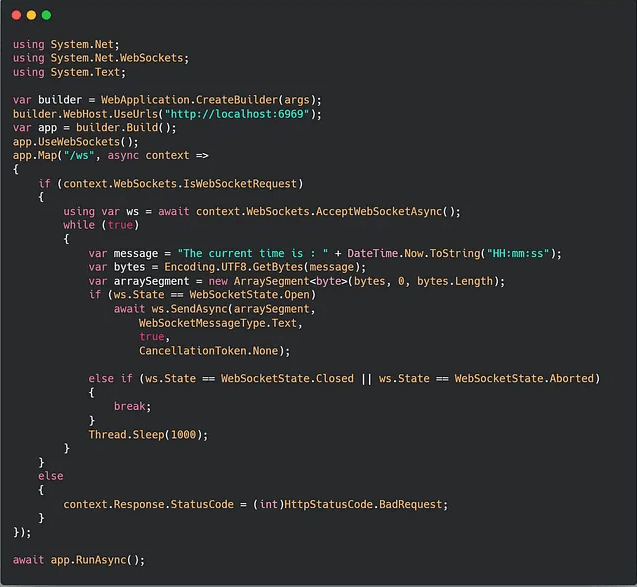
- Step 4: Once the project is generated, you will see all its associated files in the Solutions Explorer tab. Also, it will display a default Hello World code as below. You have to replace the app.Run() method to app.RunAsync().
- Step 5: Now, we will be adding the UseWebSockets() function and builder.WebHost.UserUrls() method.
The function will enable our application to use WebSocket communication. The method will aid in defining the port and URL for the server, which, in our case, is “http://localhost:6969.”
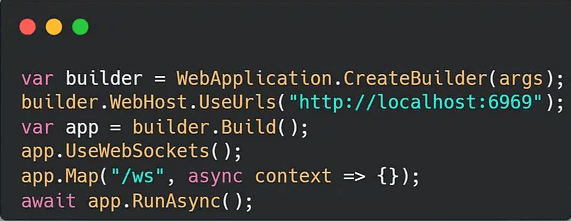
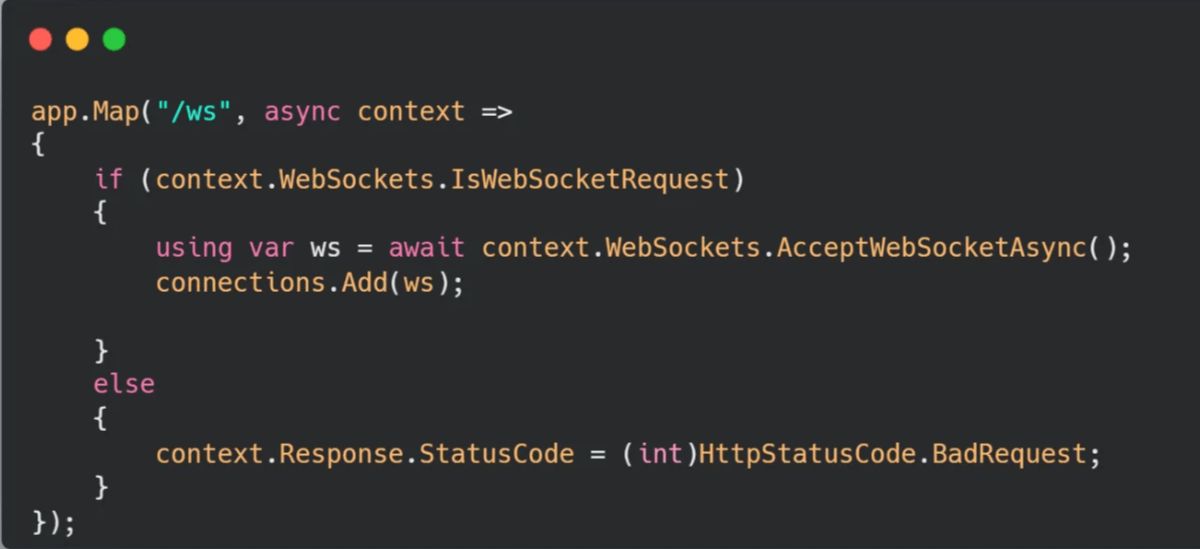
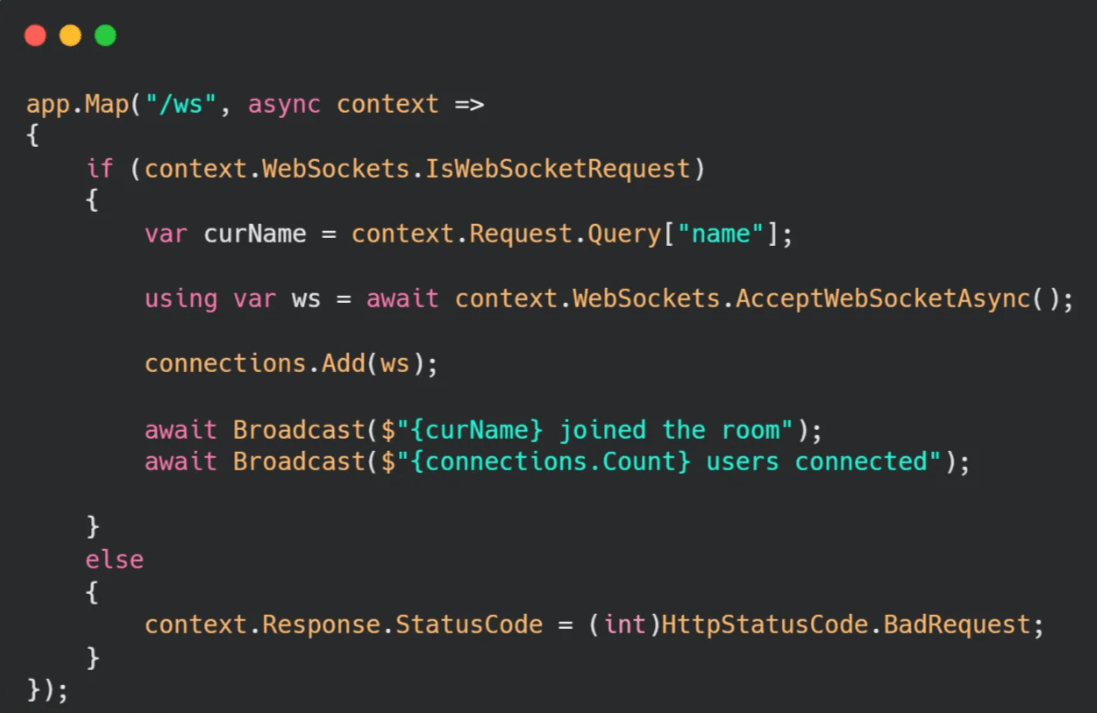
- Step 6: After the WebSocket function, configure the server’s endpoint mapping. We will be using the app.Map() method with WebSocket route as “ws.” In addition, we’ll also be adding a context in the same method.
- Step 7: The context in the app.The map () method needs to be configured. Inside it, we will add the logic to accept/allow only WebSockets communication.
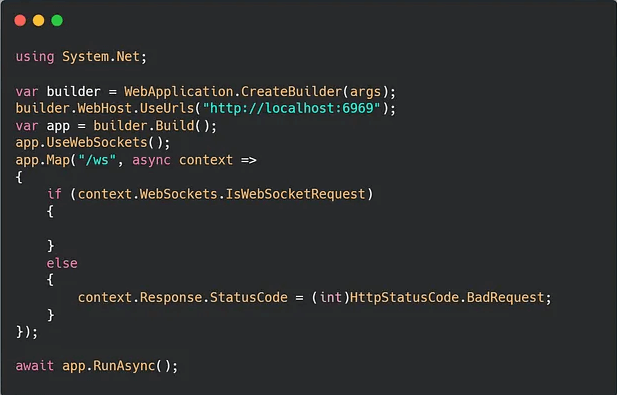
For this, you have to add context.WebSockets.IsWebSocketRequest check. If the request is of a web socket, the ASP.NET Core application will accept it; otherwise, error 400 (Bad request) will be sent.
- Step 8: Once the application confirms that it’s a web socket connection, it should define an instance for it. To do so, add the below code.
using var ws = await context.WebSockets.AcceptWebSocketAsync();The instance will help verify the current connection state using the ws.State.
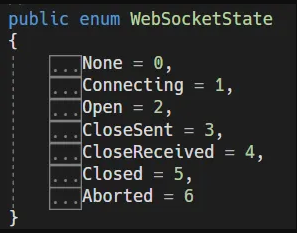
In the above snippet, you can see all seven connection states that a web socket can undergo. Every state has a corresponding value used to determine the current state.
- Step 9: To enable your server to send the messages, utilize the SendAsync() method on the WebSocket instance. It accepts the following parameters.
- ArraySegment<byte>
- WebSocketMessageType enum
- Bool endofMessage
- CancelationToken
All these parameters are needed to convert as a byte array, leading to generating an ArraySegment<byte> and sending a message to the client.
var message = "Hello World!";
var bytes = Encoding.UTF8.GetBytes(message);
var arraySegment = new ArraySegment<byte>(bytes, 0, bytes.Length);
await ws.SendAsync(arraySegment,
                    WebSocketMessageType.Text,
                    true,
CancellationToken.None);- Step 10: To enable the WebSocket server to return the current time to the client in “HH:MM:SS” format, wrap the below logic in a while(true) loop as below. The logic also uses a Thread.Sleep(1000) function for delaying the process by 1 second.
In addition, the code will verify the WebSocket connection state only to send the message if the open state is detected.
Here, the server-side configuration completes. Therefore, our WebSockets server is ready.
Phase 2: Client-Side Configuration
Let’s create the WebSocket client.
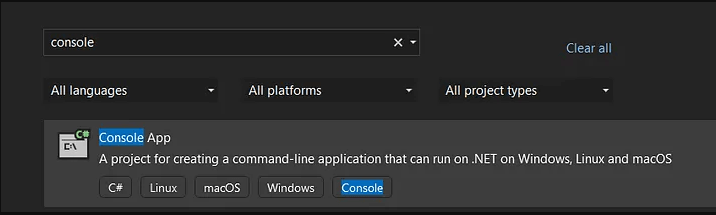
- Step 1: Open your Visual IDE to create a .NET Console app with C# as its programming language.
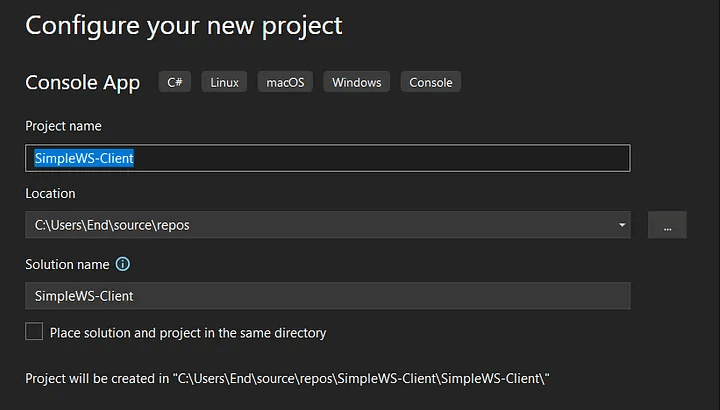
- Step 2: Complete the project details. For this tutorial, we are using SimpleWS-Client as a solution and project name.
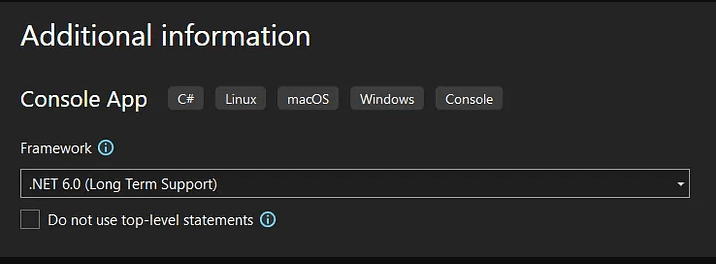
- Step 3: Choose the .NET 6.0 framework and create the project.
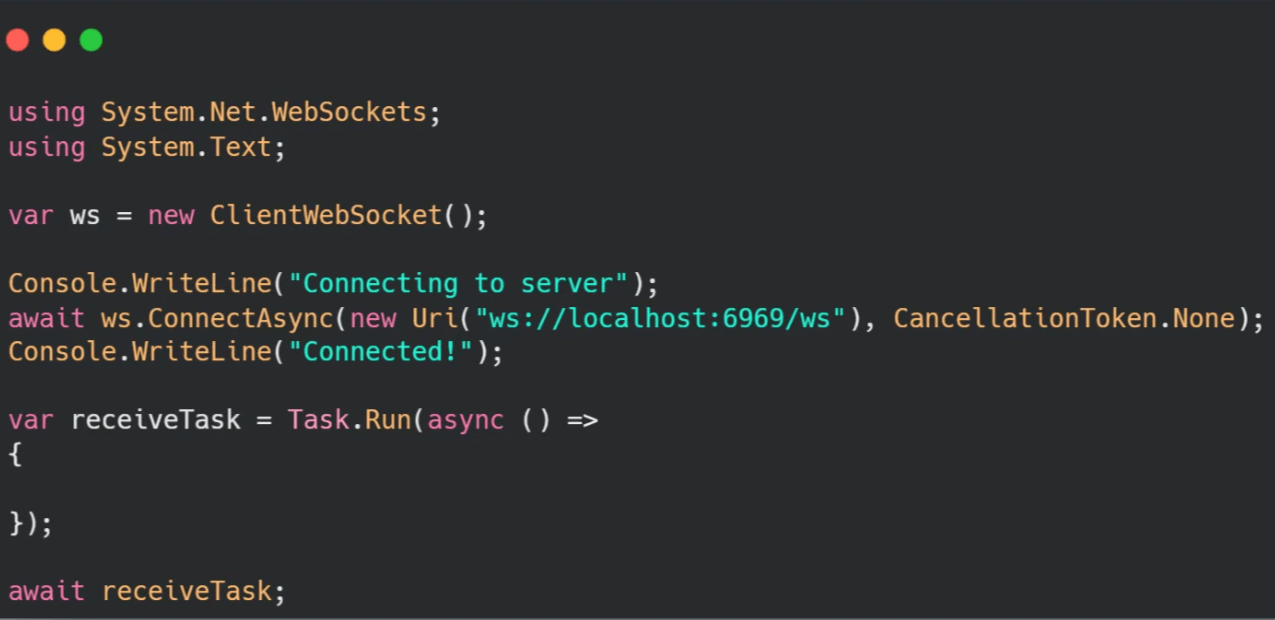
- Step 4: To enable a client device to initiate a web socket connection, we’ll use the ClientWebSocket provided by System.Net.WebScokets.
using System.Net.WebSockets;
var ws = new ClientWebSocket();- Step 5: For connecting with a WebSockets server, use the following code block. It comprises the ConnectAsync method with a cancelation token and URL.
await ws.ConnectAsync(new Uri("ws://localhost:6969/ws"),
CancellationToken.None);- Step 6: Write the code for the client to receive messages from the server after the connection status changes to alive.
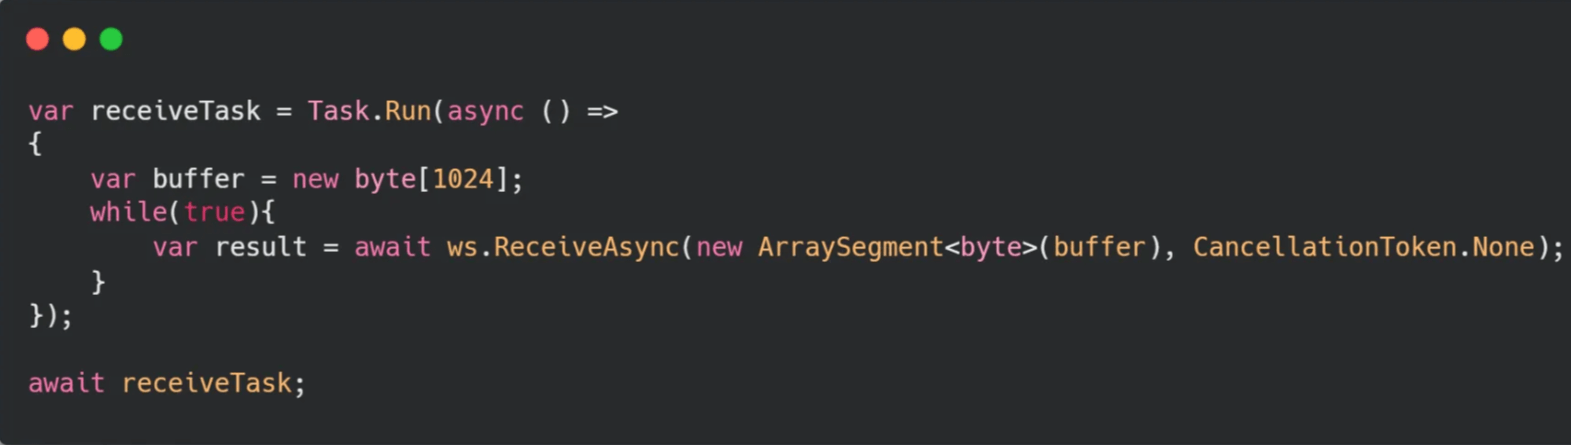
- Step 7: For receiving the messages from the WebSockets server, we’ll add the RecieveAsync() method to our client codebase. It will enable the client devices to accept cancellation tokens and ArraySegment<byte>.
Also, you will be creating a byte array buffer for generating the ArraySegment<byte>.
- Step 8: With all the above code, our result would still be in byte array format. However, we want it to display as a string. So, we have to implement encoding using the Encoding.UTF8.GetString() method.
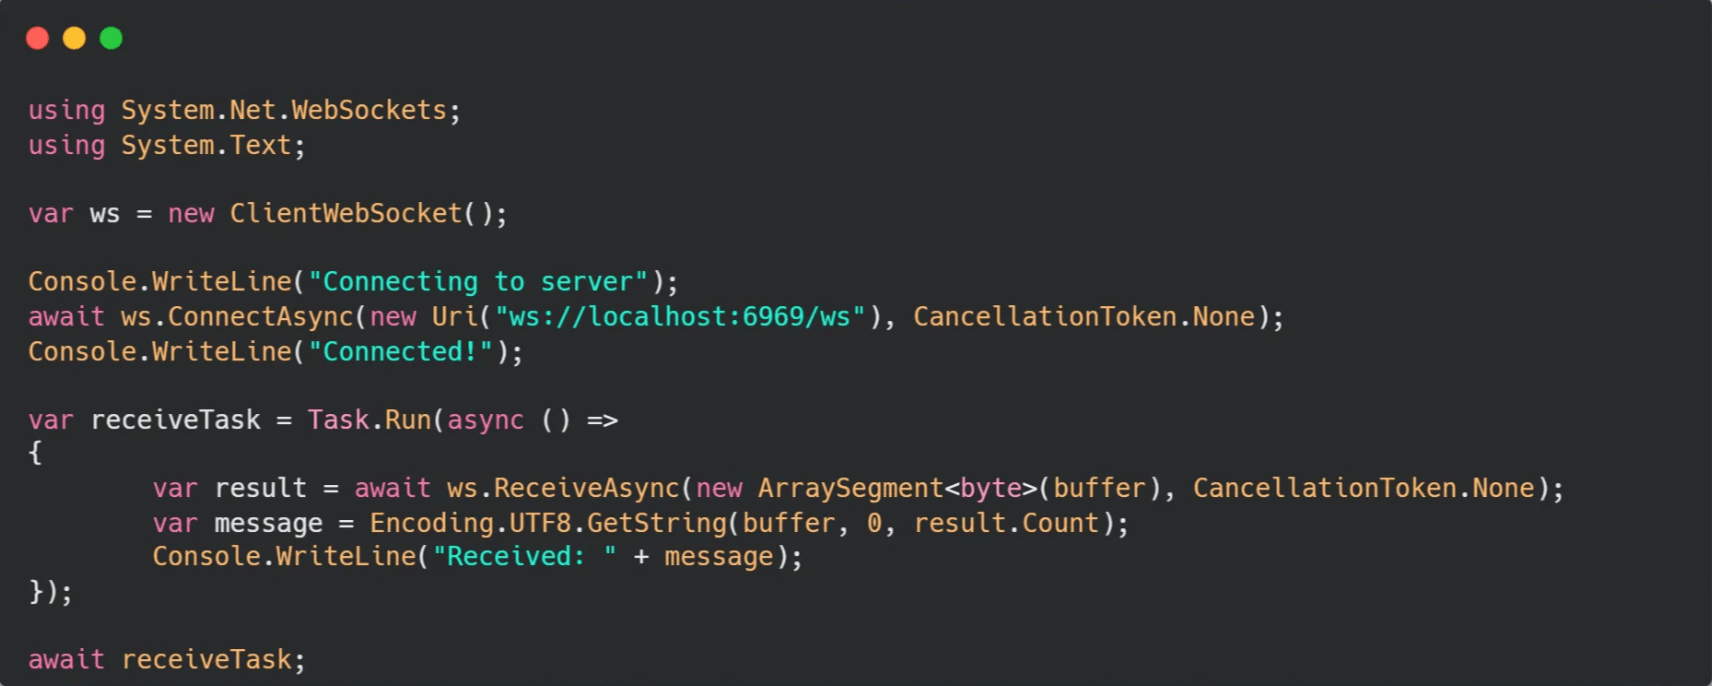
Additionally, add the below code to check whether the connection is not closed.
result.MessageType == WebSocketMessageType.Close- Step 9: Check the code. Ensure that your final client-side code looks the same as the following.
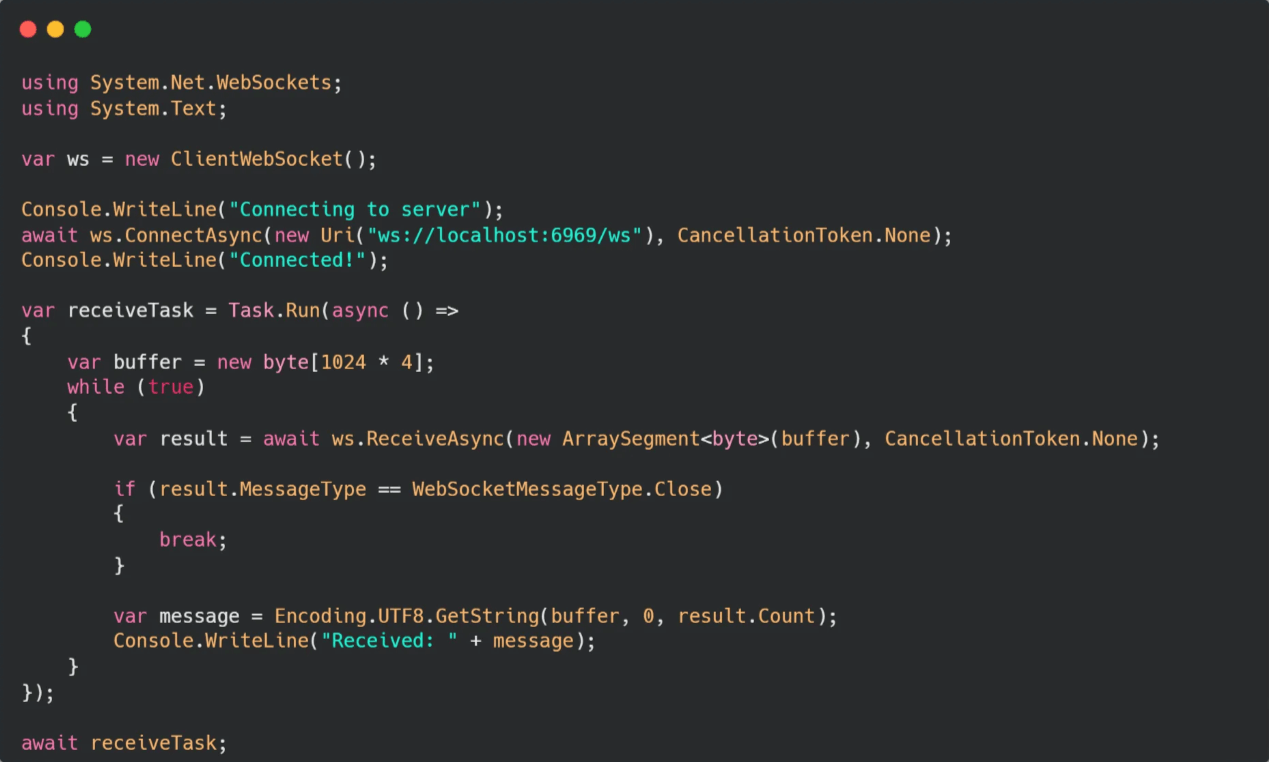
- Step 10: Test the functioning of the WebSockets server and client. First, run the server project and then the client project. The configuration is successful if it shows the current time in HH:MM:SS format.

Till now, we have tested the WebSockets project for one client. But, in real-time scenarios, there can be multiple end-users. So, in the next phase, we are going to test it for handling more than one WebSocket communication.
Phase 3: Testing the WebSockets Communication
To test the multiple WebSockets connection, we are going to create and use a chatroom application. It will consist of the following functionalities:
- Connecting multiple users and creating instances for them.
- Asking each user to enter their username/name.
- Broadcasting the chatroom, joining and leaving notifications.
- Receiving and sending of messages by each user in the chatroom.
- Removal of client instance by checking the WebSocket connection state.
Similar to the configuration in the previous two phases, we will first write the code for the server and then for the client.
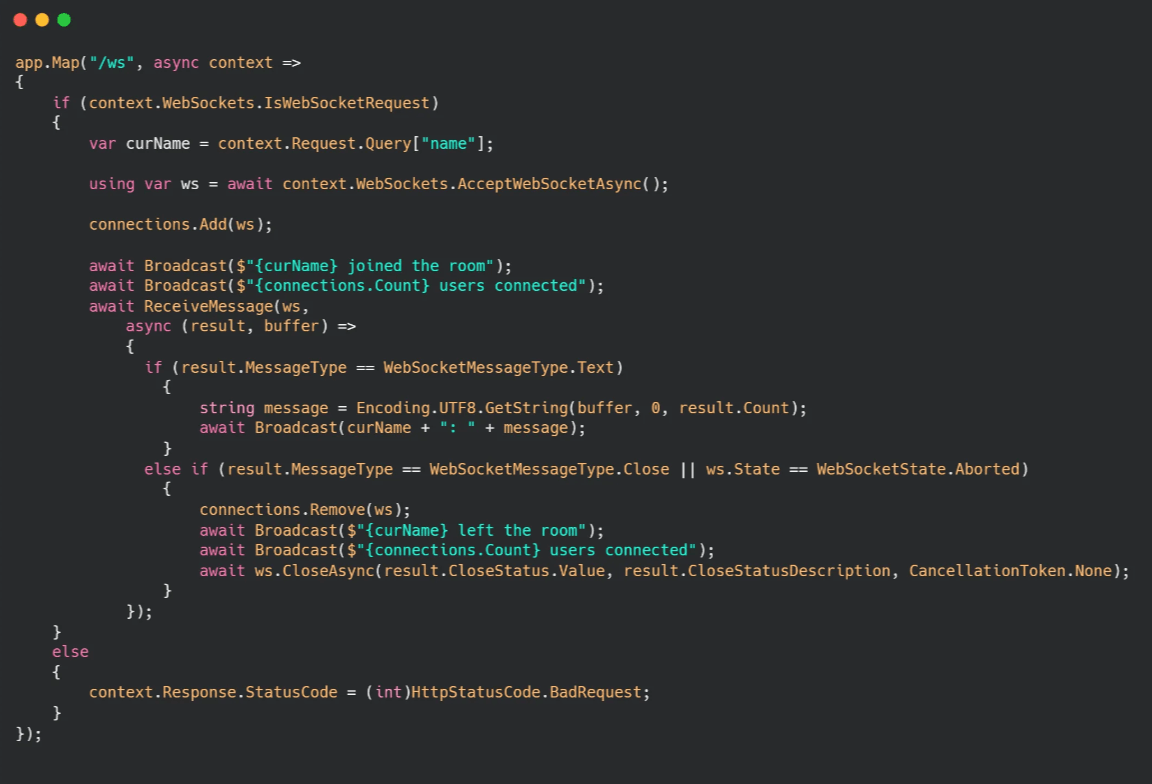
Server Code:
Your complete server code will be the following codebase.
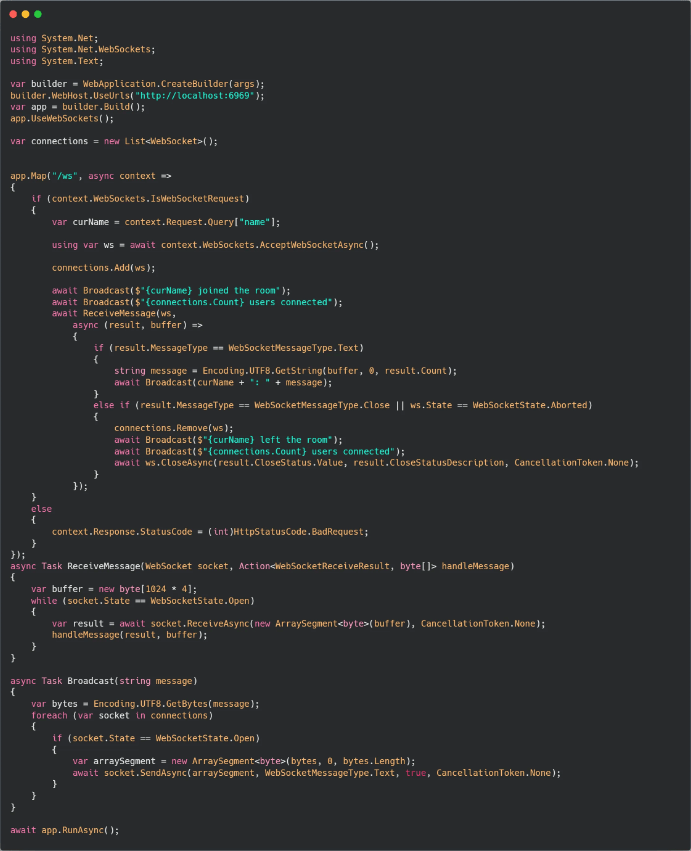
Let’s break down the code. First, you will find the code purpose and, below it, the part of the code performing that process.
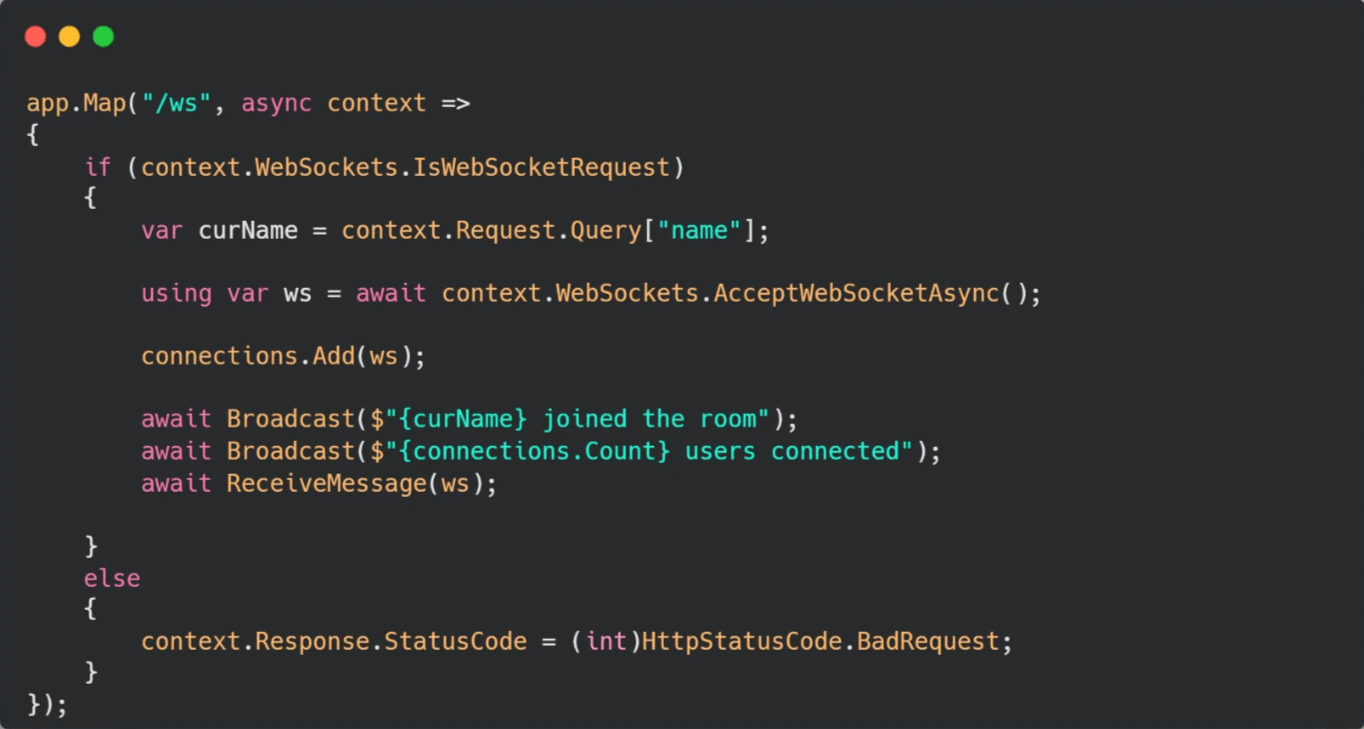
For tracking multiple WebSocket connections.
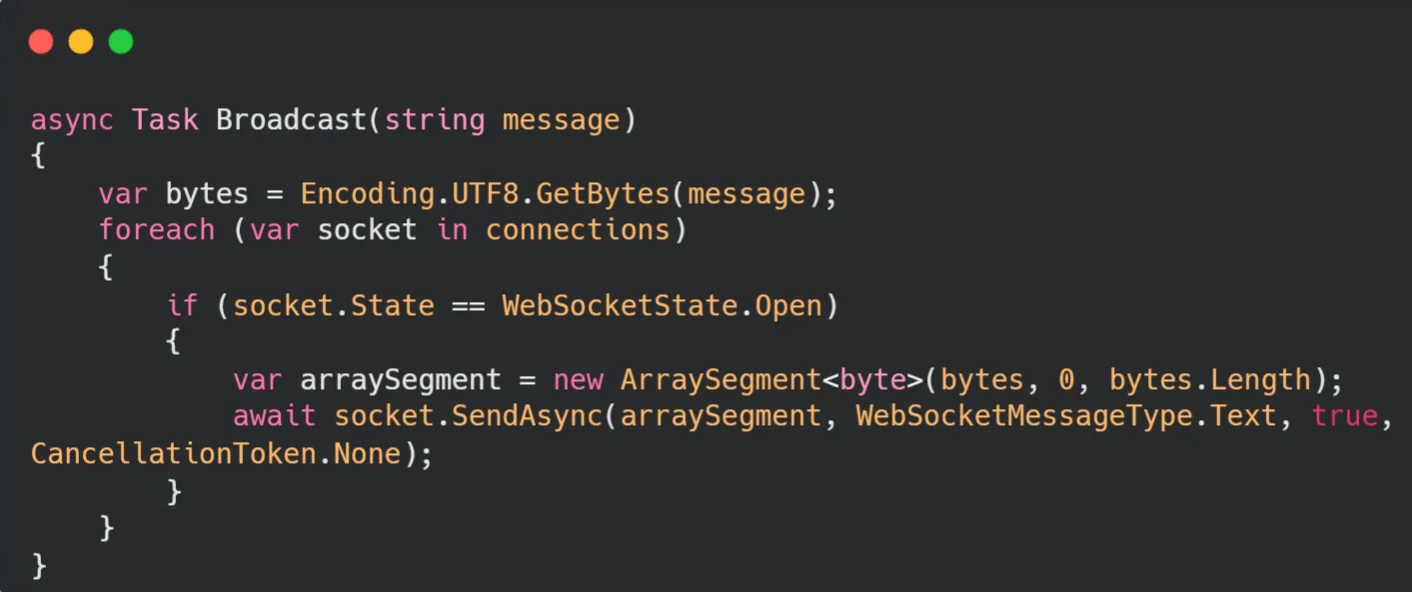
To broadcast the message to each end-user/client, the SendAsync() method is used.
For emulating chatroom and broadcasting the username of a newly connected client.
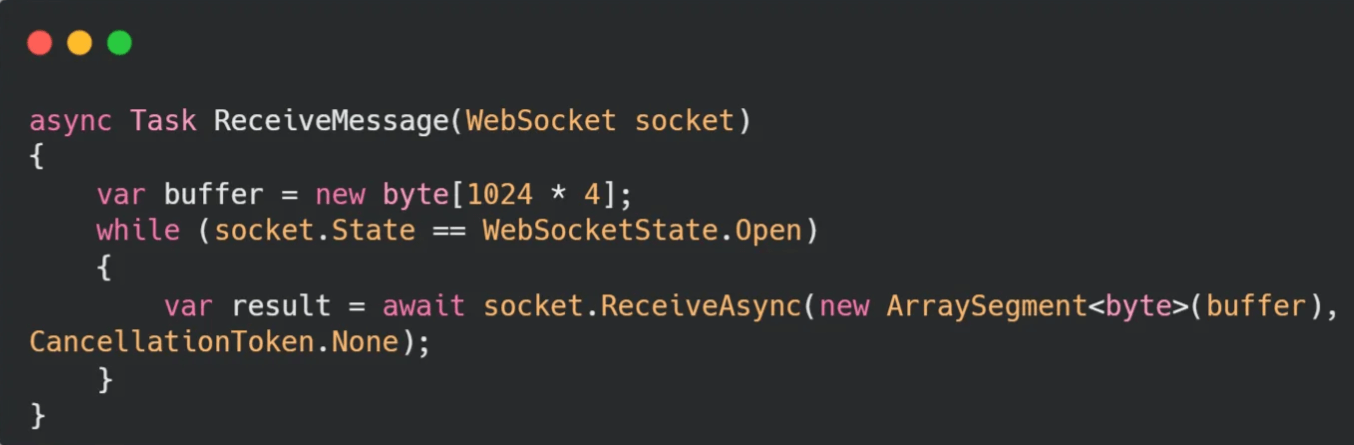
To manage the message-receiving process, the RecieveAsync() method, similar to client configuration, will be used.
Calling of ReceiveMessage() function inside WS handling.
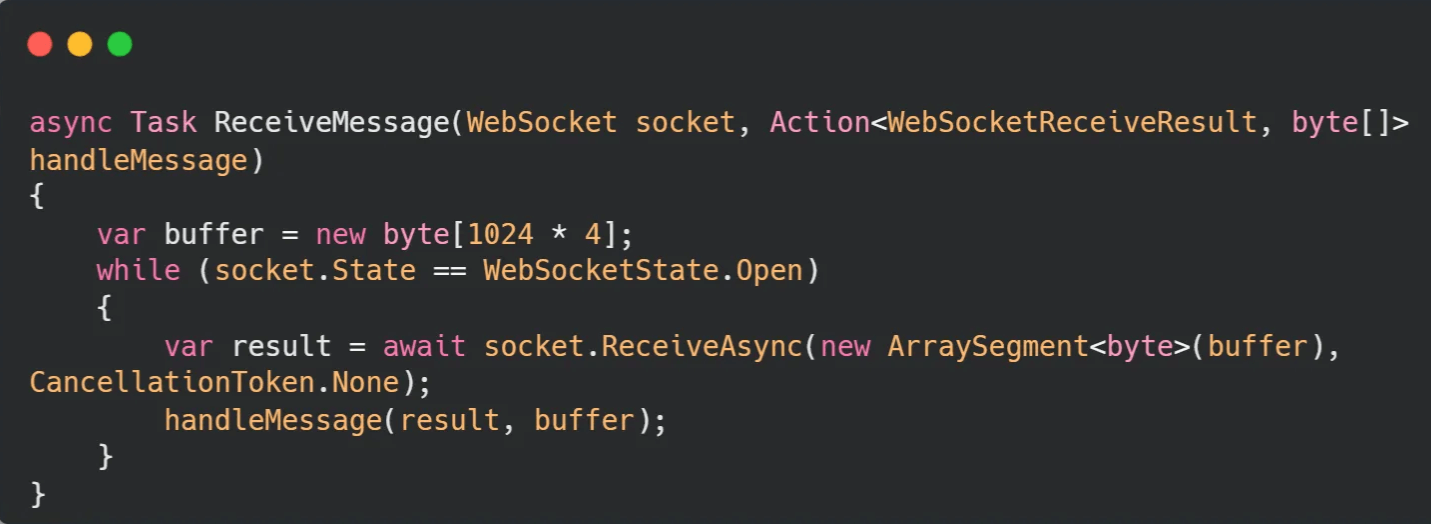
For broadcasting the received messages in the chatroom, the ReceiveMessage() function is modified with Action<WebSocketReceiveResult, byte[]> handleMessage.
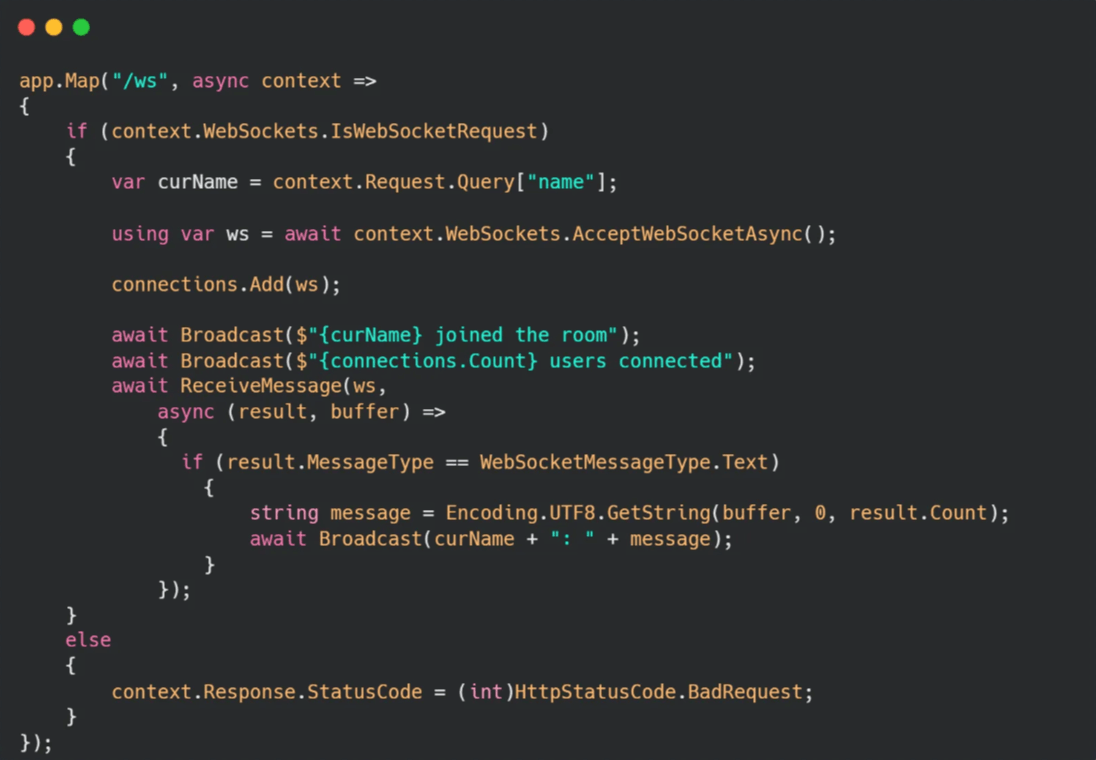
Further, the ReceiveMessage call is modified, enabling the lambda function to pass. In addition, within the lambda function, we will add the logic to broadcast messages from one user to all others present in the chatroom.
The code below is used to keep track of the users leaving the chatroom. It detects the WebSockets status to determine the presence of a client.
Client Code:
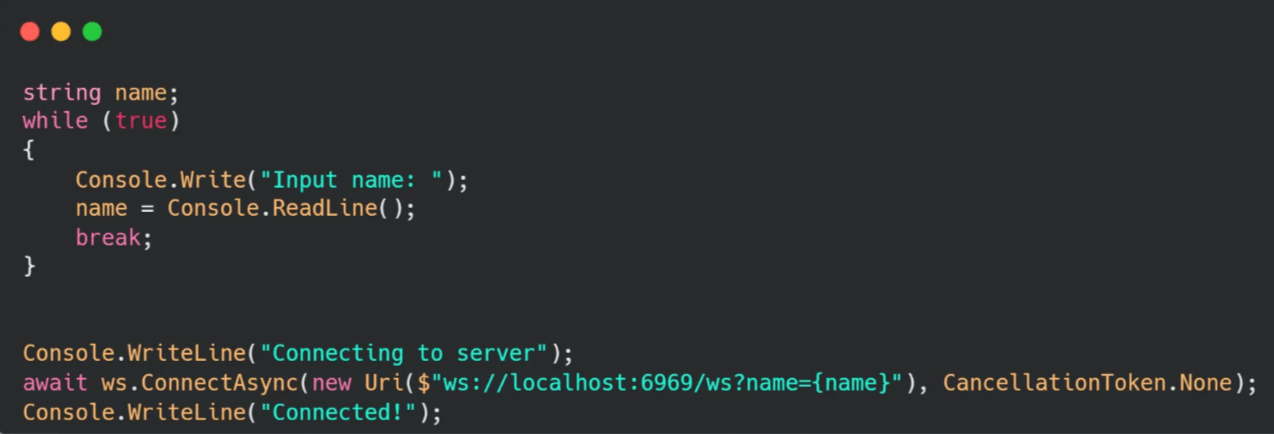
On the client side, add the following code block for inputting the username.
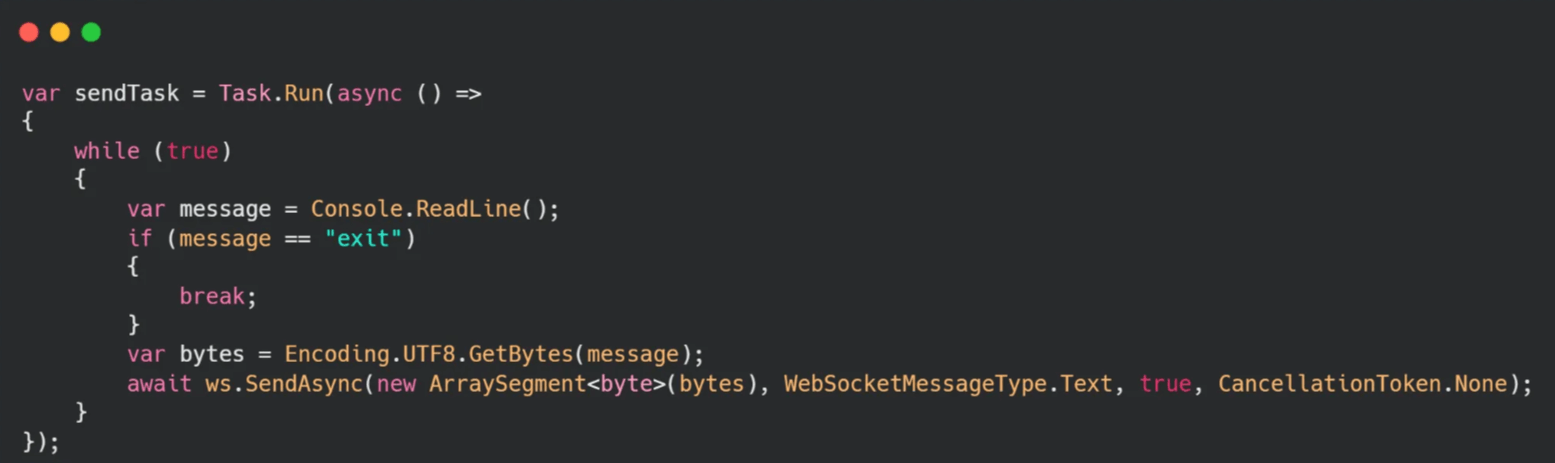
Use the below code for sending messages to the server, which will then be broadcast in the chatroom. Here, the SendAsync() method will be used on the ClientWebSocket instance.
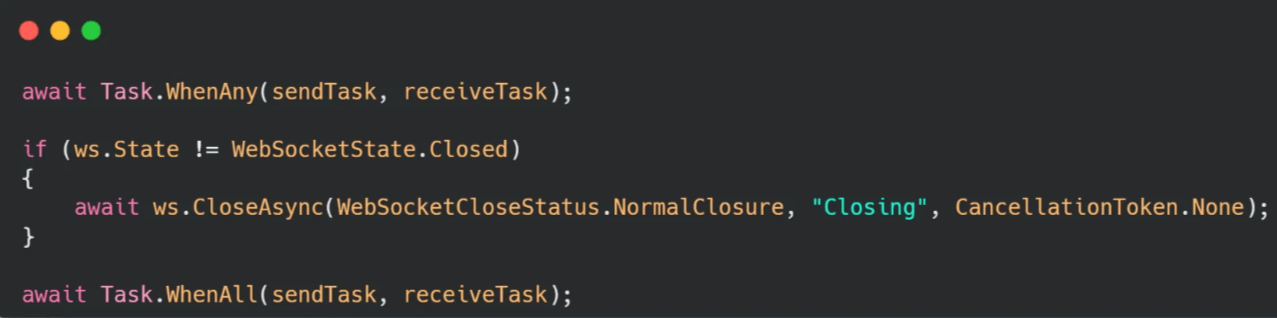
To manage the client exiting the chatroom, use the following code. It will tell the application to delete the WebSocket instance for that particular client.
Now, the client code is completed, and only the testing part is remaining.
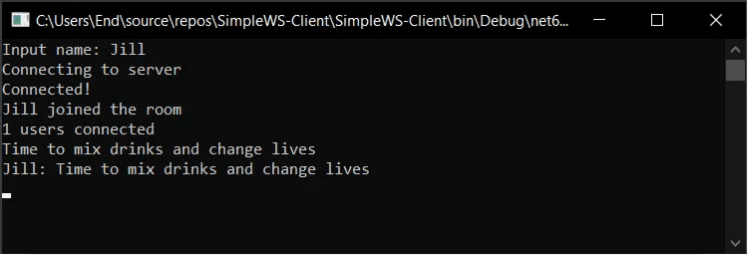
To test the chatroom application, run the server and client projects. If you see the “user joined the room” message, the ASP.NET Core app is running successfully.
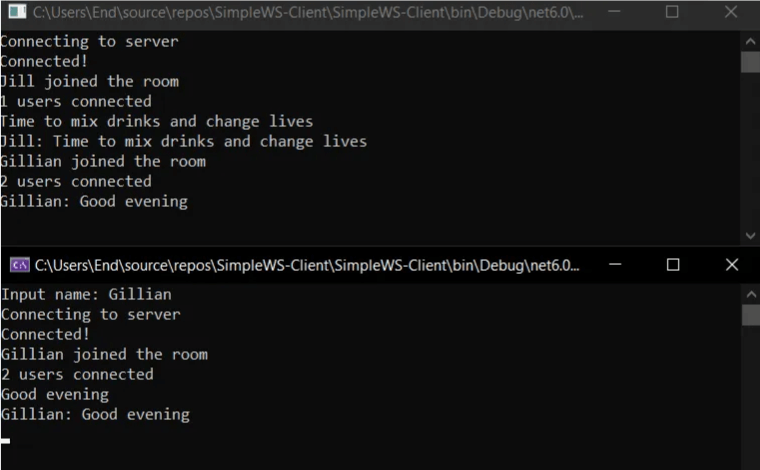
Now, create another client instance to verify whether the server is detecting and broadcasting new user-joined notifications. The output will look similar to the following.

Further, send the message from the second instance and keep monitoring the first client to receive a message.
Now, close the connection for the second instance and open a new client (third client).
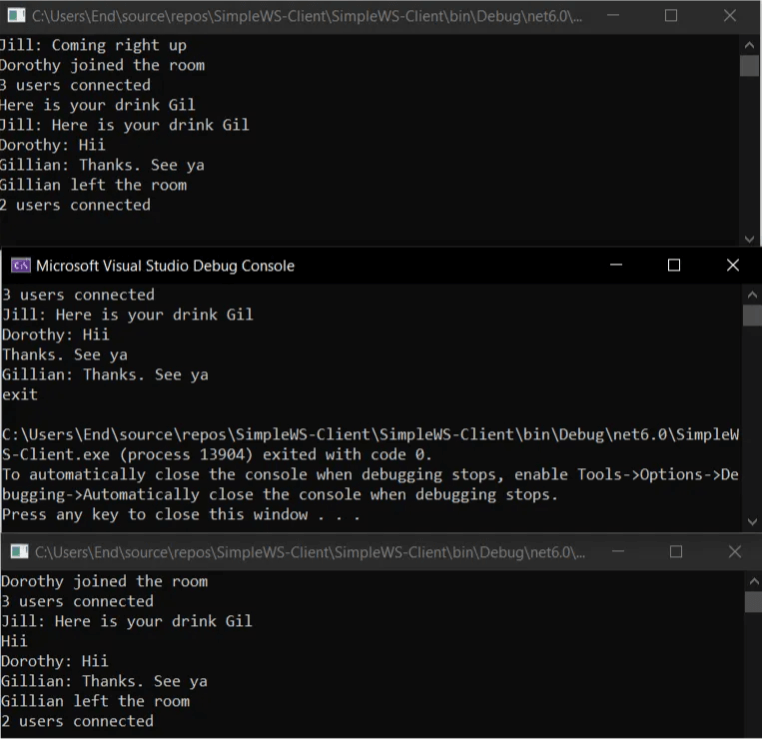
Similarly, you can send messages, add new clients, remove current clients, and broadcast messages to test the ASP.NET Core WebSockets application.
Concluding Up on WebSockets in ASP.NET Core
Real-time applications extensively utilize WebSockets, offering bidirectional communication within the server-client architecture. To implement it, you should first choose the right use case, as mentioned in this blog. Further, you can follow the provided procedure to learn about its implementation.
The WebSockets configuration guide enables exploring the functions and methods used on both the server and client side. You can create your own ASP.NET Core applications with WebSockets functionality by referencing them. However, if you want to develop enterprise software, you should contact ASP.NET Core Development Company

Expert in Software & Web App Engineering
Parag Mehta, the CEO and Founder of Positiwise Software Pvt Ltd has extensive knowledge of the development niche. He is implementing custom strategies to craft highly-appealing and robust applications for its clients and supporting employees to grow and ace the tasks. He is a consistent learner and always provides the best-in-quality solutions, accelerating productivity.


