
Quick Overview:
The blog helps you understand the procedure for implanting OData with ASP.NET Web API. You will undergo the fundamentals of OData, its features, and EDM (Entity Data Model). In addition, you will get a brief about how you can choose a reliable .NET development company for ASP.NET Core projects. As a result, you will acquire complete knowledge to use OData and standardize RESTful APIs.
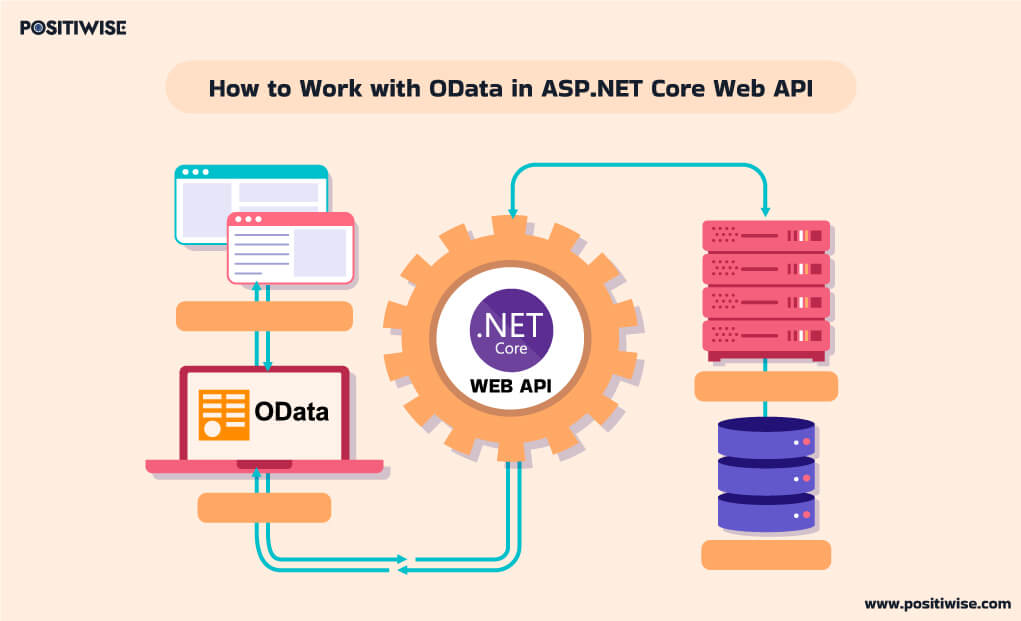
Integrate OData with ASP.NET Core Web API
In the .NET development domain, especially while building ASP.NET Core projects, developers find it complex to standardize the REST API. It’s considered as one of the most time-consuming tasks.
To make it easy for .NET developers to build a queryable REST API, OData was introduced. It helps them with standardization and provides stability for API communications. For ASP.NET Web API projects, it’s highly used and preferred now. In this blog, we are going to grab all the details required to implement OData with ASP.NET Core Web API services.
What is OData?
OData is a library for ASP.NET Core projects, which helps in building REST API services using the OData protocol. This protocol follows the best practices and leads to establishing a strong, stable, and consistent connectivity between the user and the service source. In addition, the OData library supports extending the ASP.NET Web API services by enabling routing, query handling, and response serialization implementation.
In addition, the OData RESTful APIs offer the following benefits:
- It provided convention-based routing, which offers better control over template attributes.
- It efficiently manages the requests and response serialization and deserialization.
- You can implement requests and response validation using OData APIs.
- It allows the users to send batch requests in a single API request.
- It helps to expose the REST API layer for better analytics function execution.
- It’s available as a NuGet package, which you can install within minutes in your ASP.NET Core project.
- It’s compatible with all significant ASP.NET Core versions, supported by Microsoft.
- It’s interoperable with Swagger and OpenAPI.
Perquisites To Learn Usage of OData with ASP.NET Core Web API Services
Before you start implementing the OData with the ASP.NET Web API project, you should understand the EDM or Entity Data Model.
EDM builds the foundation for OData, as it supports in describing the OData service exposed data. You can consider it as the core of your OData service. It consists of numerous components, such as:
- EntitySets
- ComplexTypes
- ScalarTypes
In addition, it enables the select, filter, count, and expand functionality in your OData RESTful API. You can also consider it a mapper that maintains the relation between the data source and the selected format. Whether your data source is Cosmos DB, in-memory database, or SQL, it can map it to any format, including JSON, XML, and even raw text.
Ready to Build an ASP.NET Core Web Applications for Your Organization?
Empower your organization with custom ASP.NET Core Web Applications crafted by our team of 10+ years of experienced .NET developers. Let’s build excellence together!
How To Use OData in .NET Core?
To learn about the usage of OData in ASP.NET Web API, we’ll be creating a project using the Visual Studio IDE. We will be taking a scenario in which API will be used to fetch the details of a company and its products.
In addition to the configuration steps, you will also get insight into testing the OData RESTful APIs. All the primary methods, including GET, POST, PUT, and DELETE, will be executed for testing purposes. To start with the procedure, you should install the latest Visual Studio IDE version.
After the installation, undergo the below phases, containing the steps to implement and test OData with ASP.NET Core Web API services.
Phase 1: ASP.NET Web API Project Creation and Preparation
1: Create an ASP.NET Web API project and define the model. Firstly, create a “Company” and “Product” class.
Company Class Code:
public class Company
{
    public int ID { get; set; }
    public string? Name { get; set; }
    public int Size { get; set; }
    public List<Product>? Products { get; set; }
}
Product Class Code:
public class Product
{
    public int ID { get; set; }
    public int CompanyID { get; set; }
    public string? Name { get; set; }
    public decimal Price { get; set; }
}
2: Write the code for the “Context” class, as we are going to use an in-memory database for this ASP.NET core project.
public class ApiContext: DbContext
{
    public ApiContext(DbContextOptions<ApiContext> options)
        : base(options)
    {
    }

    public DbSet<Company> Companies { get; set; }
    public DbSet<Product> Products { get; set; }
}
3: Implement a repository that will help to manage the database actions for the complete project.
public class CompanyRepo : ICompanyRepo
{
    private readonly ApiContext _context;
    public CompanyRepo(ApiContext context)
    {
        _context = context;
    }

    public IQueryable<Company> GetAll()
    {
        return _context.Companies
            .Include(a => a.Products)
            .AsQueryable();
    }

    public IQueryable<Company> GetById(int id)
    {
        return _context.Companies
            .Include(a => a.Products)
            .AsQueryable()
            .Where(c => c.ID == id);
    }

    public void Create(Company company)
    {
        _context.Companies
            .Add(company);
        _context.SaveChanges();
    }

    public void Update(Company company)
    {
        _context.Companies
            .Update(company);
        _context.SaveChanges();
    }

    public void Delete(Company company)
    {
        _context.Companies
            .Remove(company);
        _context.SaveChanges();
    }
}
4: Now, implement the “ICompanyRepo” interface into the “CompanyRepo” class. Our OData mechanism will use this interface for returning the “IQueryable<Company>” reference for Get() methods.
public interface ICompanyRepo
{
    public IQueryable<Company> GetAll();
    public IQueryable<Company> GetById(int id);
    public void Create(Company company);
    public void Update(Company company);
    public void Delete(Company company);
}
Phase 2: Adding the OData with ASP.NET Core Web API Services
The primary aim of this phase is to build the controller, which will function like a RESTful API controller. As a result, when a user sends a query, it will provide the desired result. For instance, if you send a query with the GET() method to “/api/companies,” it will return the companies list.
[Route("api/[controller]")]
[ApiController]
public class CompaniesController : ControllerBase
{
    private readonly ICompanyRepo _repo;
    public CompaniesController(ICompanyRepo repo)
    {
        _repo = repo;
    }

    ...
}
Now, follow the below provided steps.
Step 1: In the controller, implement the GET() method. In this tutorial, we’ll be configuring two kinds of GET() methods. Both methods will be annotated with the “[EnableQuery]” attribute.
Further, one method type will provide output by referencing the company list associated with “IQueryable.” The second method type will output a single item, as it will refer to “SingleResult.“
[EnableQuery(PageSize = 3)]
[HttpGet]
public IQueryable<Company> Get()
{
    return _repo.GetAll();
}

[EnableQuery]
[HttpGet("{id}")]
public SingleResult<Company> Get([FromODataUri] int key)
{
    return SingleResult.Create(_repo.GetById(key));
}
Additionally, in the above code, you can see [EnableQuery] and the “IQueryable” attribute. Both these work in collaboration. The “[EnableQuery]” provides functionality to send the API request/queries, and the “IQueryable” supports OData in query execution.
Moreover, for the second method, you should always use a “key.” Otherwise, it will not work, leading to cause errors.
Phase 3: Configure the PUT, POST, and DELETE request methods with OData
In addition to the GET() method, we’ll be adding the POST, PUT, and DELETE methods in the API logic. It will enable the users to insert, delete, and update the data in the database.
The code for the POST method enables the insertion of new data into the database.
[HttpPost]
public IActionResult Post([FromBody] Company company)
{
    if (!ModelState.IsValid)
    {
        return BadRequest(ModelState);
    }
    _repo.Create(company);

    return Created("companies", company);
}
The code for PUT request, if you want to enable update functionality for the database. A dot net application development company always recommends using this method, as it supports promptly updating information.
[HttpPut]
public IActionResult Put([FromODataUri] int key, [FromBody] Company company)
{
    if (!ModelState.IsValid)
    {
        return BadRequest(ModelState);
    }

    if (key != company.ID)
    {
        return BadRequest();
    }

    _repo.Update(company);

    return NoContent();
}
The code enables DELETE functionality, leading to the removal of an entry from the database.
[HttpDelete]
public IActionResult Delete([FromODataUri] int key)
{
    var company = _repo.GetById(key);
    if (company is null)
    {
        return BadRequest();
    }

    _repo.Delete(company.First());

    return NoContent();
}
Phase 4: OData Configuration
For the OData setup, you should modify the Program.cs file, available in the Solutions Explorer section of the Visual Studio IDE.
Step 1: Open the Program.cs file and modify it with the following code.
static IEdmModel GetEdmModel()
{
    ODataConventionModelBuilder builder = new();
    builder.EntitySet<Company>("Companies");
    return builder.GetEdmModel();
}

var builder = WebApplication.CreateBuilder(args);

builder.Services.AddControllers()
    .AddOData(options => options
        .AddRouteComponents("odata", GetEdmModel())
        .Select()
        .Filter()
        .OrderBy()
        .SetMaxTop(20)
        .Count()
        .Expand()
    );

builder.Services.AddDbContext<ApiContext>(opt => opt.UseInMemoryDatabase(databaseName: "CompaniesDB"));
builder.Services.AddScoped<ICompanyRepo, CompanyRepo>();
var app = builder.Build();
DBSeeder.AddCompaniesData(app);

...
In the code above, Oda is registered with the “AddOData()” method. Also, the functionalities and capabilities of the ASP.NET API web service are defined, leading to the creation of an endpoint with the following characteristics:
- URL containing “odata” instead of “api”.
- Providing the counting, expansion, filtering, selection, and ordering functionality.
- Offering the output of up to 20 entries in the company list for a single request.
Also, the AddOData() method utilizes the GetEdmModel(), which functions as the fundamental pillar of OData in ASP.NET Core web API. You can also use the “ODataModelBuilder” class to avail of a better EDM control.
While writing this code, you should also focus on the “EntitySet()” method. It should be of the same name as the parameter “controller (Companies).“
Step 2: Now, create a separate class, “DBSeeder.cs,” and define a static method, “AddCompaniesData().” With the help of this class, the in-memory database will be seeded.
public class DBSeeder
{
    public static void AddCompaniesData(WebApplication app)
    {
        var scope = app.Services.CreateScope();
        var db = scope.ServiceProvider.GetService<ApiContext>();

        db.Companies.Add(
            new Company()
            {
                ID = 1,
                Name = "Company A",
                Size = 25
            });

        //more companies here...

        db.Products.Add(
            new Product()
            {
                ID = 1,
                CompanyID = 1,
                Name = "Product A",
                Price = 10
            });

        //more products here..

        db.SaveChanges();
    }
}
Now, our Odata-configured API service is ready. So, let’s test to verify the functioning of all its methods.
Phase 5: ASP.NET Web API Testing
For testing purposes, you can use the POSTMAN tool or a web browser at your convenience. In both cases, a JSON-based output will be displayed, similar to the below snippet for request: “/odata/companies?$filter=Size gt 20&$count=true”.
{
  "@odata.context": "https://localhost:7004/odata/$metadata#Companies",
  "@odata.count": 3,
  "value": [
    {
      "ID": 1,
      "Name": "Company A",
      "Size": 25
    },
    {
      "ID": 2,
      "Name": "Company B",
      "Size": 56
    },
    {
      "ID": 4,
      "Name": "Company D",
      "Size": 205
    }
  ]
}
Further, you can test the API by creating numerous cases, as we did. Let’s have a look at each test case and its output.
Test Case 1: Requesting the product data with company information. (Using the $expand option)
Request:
/odata/companies?$filter=Size gt 20&$count=true&$expand=Products
Output:
{
  "@odata.context": "https://localhost:7004/odata/$metadata#Companies(Products())",
  "@odata.count": 3,
  "value": [
    {
      "ID": 1,
      "Name": "Company A",
      "Size": 25,
      "Products": [
        {
          "ID": 1,
          "Name": "Product A",
          "Price": 10
        },
        {
          "ID": 2,
          "Name": "Product B",
          "Price": 35
        }
      ]
    },

    // --> more companies and products here
  ]
}
Test Case 2: POST request to add a new company to the list
Request:
/odata/companies with the body:
{
    "ID": 10,
    "Name": "Company Z",
    "Size": 100
}
Output:
{
    "@odata.context": "https://localhost:7004/odata/$metadata#Companies/$entity",
    "ID": 10,
    "Name": "Company Z",
    "Size": 100
}
Test Case 3: PUT request for modifying an entry. This time, we are going to provide a key value.
Request:
/odata/companies(1) with the body:
{
    "ID": 1,
    "Name": "Company A",
    "Size": 350
}
As a result, you will receive a 204 no-content output. In addition, this output will remain constant for the DELETE() method.
Similarly, you can configure OData with your other ASP.NET Web API projects and leverage its functionalities and benefits. However, if it has to be configured for enterprise software, it’s always preferred to hire a .NET development company.
Which .NET Development Company is Suitable for ASP.NET Core Projects?
For developing ASP.NET Core projects, you should always look for an experienced and expert firm, like Positiwise Software Pvt Ltd. Such companies provide all-rounder development services, from providing consultation to supporting the solution post-deployment.
In addition, you get the advantage of flexible pricing, affordability due to outsourcing professional developers, and 100% transparency with assurance of data security. Whenever you have to finalize a .NET development company, analyze their portfolio, offered services, reputation in the market, client feedback, and technology stack.
Furthermore, you should also interview them to assess their technical and soft skills. After examining all such factors, conclude your result and hire dedicated ASP.NET developers.
Concluding Up
Odata is an advanced library that helps streamline REST API development. It allows the users to request the services using POST, PUT, GET efficiently, and DELETE methods. The most appropriate way of building an OData ASP.NET Web API is using the Visual Studio IDE, as demonstrated above. It helps you easily create the classes, add Microsoft OData packages, and test the working.
Furthermore, whenever you create an API with OData, always test it using POSTMAN or any other tool of your choice. It will lead to the release of a stable version of the ASP.NET Core projects.

Expert in Software & Web App Engineering
Parag Mehta, the CEO and Founder of Positiwise Software Pvt Ltd has extensive knowledge of the development niche. He is implementing custom strategies to craft highly-appealing and robust applications for its clients and supporting employees to grow and ace the tasks. He is a consistent learner and always provides the best-in-quality solutions, accelerating productivity.


