

Quick Overview:
The tech development marketplace has seen exponential growth in recent years. But, the growth this marketplace has observed and its threats are also scaling significantly. This requires validating rules for your business application interfaces. In the old times, Data Annotations were considered the savior under such circumstances, however, with the evolving tech the process has become outdated. In this blog post, we will consider the new age of validation rules that is FluentValidation, we will consider how to use FluentValidation in ASP.NET Core.
Why Not Data Annotations?
The data annotations when introduced were a great choice for projects that are small in size and for proof of concept systems, however, as the application evolves and you start learning cleaner ode or begin to understand the principles of application design data annotations seem to be an outdated choice. This dissatisfaction is because combining your models and the validation logic is not a great choice. Using the data annotations ties your validation rules to your model classes, violating the separation of concerns principle, as validation logic is mixed with your domain logic.
Introduction To FluentValidation
Fluent Validation .NET Core is an open-source validation library for .NET applications that allows your development teams to easily define and enforce the validation rules for their models and view models. The library here uses fluent syntax to make it easy to express the complex validation rules simply and effectively.
Using FluentValidation in ASP.NET Core
To use the FluentValidation in ASP.NET Core here are the steps that you must follow:
Install The FluentValidation Package
For the first step start by installing the required FluentValidation NuGet package to your project using the Package Manage Console.
Install-Package FluentValidation
Install-Package FluentValidation.DependencyInjectionExtensions
User Registration Request
After the installation process is completed for your Fluent Validation .NET Core you need to modify your Startup class to include the call to AddFluentValidationAutoValidation()
var builder = WebApplication.CreateBuilder(args);

// Here we are adding services to the container.
builder.Services.AddControllers();
builder.Services.AddFluentValidationAutoValidation();
You must call this method after the AddMvc (or AddControllers/AddControllersWithViews). Also, make sure that you are adding using FluentValidation.AspNetCore to your startup file so that the appropriate extension methods only are available.
Defining The Model
The below example will make use of a User object which is given as follows:
public class User
{
    public string Name { get; set; }
    public int Age { get; set; }
}
Creating the Validator Class
Now, after the above step let us move ahead with the validator class that inherits from the AbstractValidator, where the T is our User class. Then, define the validation rules within the validator class.
using FluentValidation;

public class UserValidator : AbstractValidator<User>
{
    public UserValidator()
    {
        RuleFor(user => user.Name).NotEmpty().WithMessage("Name is required.");
        RuleFor(user => user.Age).InclusiveBetween(18, 99).WithMessage("Age must be between 18 and 99.");
    }
}
Registering The Validator
When using an MVC, Web API or Razor you need to register the validator with the Service Provider within the Startup class.
var builder = WebApplication.CreateBuilder(args);

// Here we are adding the services to the container.
builder.Services.AddControllers();
builder.Services.AddFluentValidationAutoValidation();
builder.Services.AddScoped<IValidator<User>, UserValidator>();
Usage
Contrary to the manual validation examples, generally we don’t need to have a reference to the validator directly. Instead, of that here is the ASP.NET will be responsible for handling the invoking of the validator and the addition of the error messages to the ModelState before the controller action is invoked. Inside the action, here is that we only need to verify the ModelState.IsValid.
// Here is the code for the Automatic validation
[HttpPost]
public IActionResult Create(User model)
{
     if (!ModelState.IsValid)
     {
        return StatusCode(StatusCodes.Status400BadRequest, ModelState);
     }

     // Continue with user creation process

     return StatusCode(StatusCodes.Status201Created, "User created successfully!");
}
When you make a POST request with the wrong name and age, the input that comes is returned as the Error Validation Result.
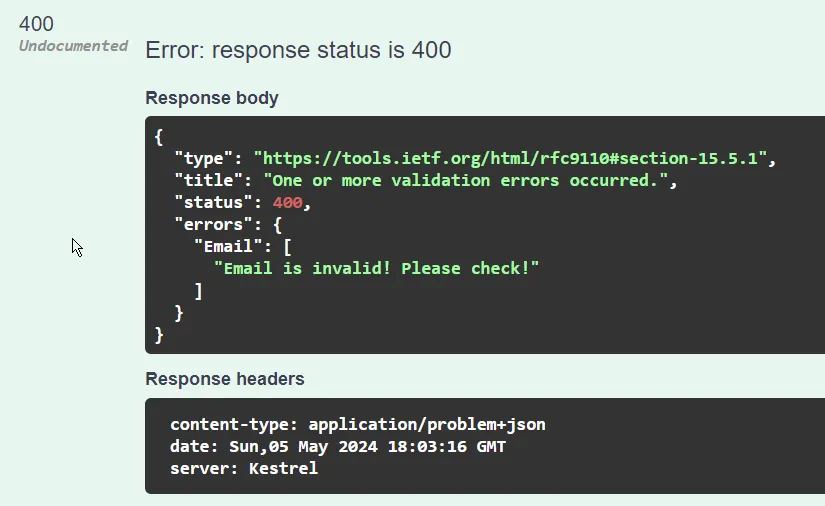
Within such scenarios when you consider the manual validation approach you have the option to precisely designate the class or model for which you wish to create the validator. In this case, the Validate method offers a ValidationResult object with the two key attributes. The first one here IsValid, which is a boolean indicating the success or the failure of the validation process. The second attribute here is the Errors which includes a list of the ValidationFailure objects that contain the detailed information relating to any kind of ValidationFailure. Objects detailed information about any encountered errors.
Here you can implement the manual validation by the following ways:
// Here are the steps for the Manual validation process
[HttpPut]
public IActionResult Update(User user)
{
     var validationResult = _userValidator.Validate(user);

     if (!validationResult.IsValid)
     {
        return StatusCode(StatusCodes.Status400BadRequest, validationResult.Errors);
     }

     // Then you should continue with the user update process

     return StatusCode(StatusCodes.Status200OK, "User updated successfully!");
}
As soon as we make the PUT request with an input error within the request then, we get returned with the Error Validation Result.

Why Do You Need Validation?
Data validation is a crucial aspect of developing powerful and effective business applications that are secure and scalable. It ensures that the data mentioned or given by the users is accurate, reliable, and safe for processing. Without the ideal validations in place, your applications are vulnerable to significant issues in the future including:
- Data Integrity: The validation allows for the data to conform to the expected format and the rules, that prevent the incorrect or incomplete information or data from being saved within the database. This allows you to maintain the integrity of your data and ensures that there is consistency within the same.
- Business Logic: The Validation within your system enforces all the business rules and logic, allowing for the data to meet the requirements for your business application ideally.
- User Experience: The validation process helps improve the overall user experience by offering immediate feedback to the users about the correctness of the input that you have provided. This allows your users to quickly correct the mistakes within the system if made, allowing for reduced frustration and improving the overall usability.
- Security: Last but not least as we know security is the most crucial aspect of your validation process. Ideal validation helps prevent any kind of security vulnerabilities such as SQL injection, cross-site scripting or XSS, and cross-site request forgery or CSRF ensuring that your user input is ideally sanitized and is safe for processing.
Looking to Effortlessly Boost Your .NET Project?
Equip your team with exceptional .NET expertise. Bring our skilled .NET Developer on board for your projects now!
Conclusion
In conclusion, this is all that we had on How To Use FluentValidation in ASP.NET Core. We hope that this blog post has given you significant insight into the Fluent Validation .NET Core. However, to understand this better you can refer to FluentValidation in .NET Core: A Complete Guide, and if you are a business owner and are confused about how to leverage FluentValidation for your .NET Core application development, get in touch with a leading web application development company to help you guide you through the process and also you can focus on your core business applications while they develop your next business application development project.

Expert in Software & Web App Engineering
Parag Mehta, the CEO and Founder of Positiwise Software Pvt Ltd has extensive knowledge of the development niche. He is implementing custom strategies to craft highly-appealing and robust applications for its clients and supporting employees to grow and ace the tasks. He is a consistent learner and always provides the best-in-quality solutions, accelerating productivity.


