
Quick Overview:
In the hustle of day-to-day work, everyone wants to complete their numerous jobs as fast as possible. And most of the business and personal operations are conducted using applications.
Vite.js has made its debut in the market for making apps faster, which has gained a lot of popularity and endorsement from industry experts.
Vite Javascript is a no-bundler modern technology development environment, allowing applications to render more precisely and efficiently through its native ES module importing and HMR.
Looking to install Vite.js? Follow this step-by-step guide for a seamless installation process to learn how to start a vite project:
What does Vite.js Offer?
Let’s explore the perks of installing and using Vite.js
Hot Module Replacement
HMR is the most popular feature of Vite.js as it allows you to update the content on the web page immediately without needing a browser refresh. It is available in the Javascript bundler to optimize the functionality of your application.
As per the official Vite documentation, its performance and speed are decoupled from the overall available modules.
Bare Module Resolving
Most of the browsers don’t allow importing of bare modules using commands, such as import {createApp} from ‘vue’, as it is not a relative path to the node_modules.
However, Vite setup enables the bare import specifiers from the Javascript files. It rewrites the file content and executes module resolution for locating the suitable file from the dependencies.
On-demand compilation
For making the application fast as light-speed, Vite compiles only a portion of the code according to the request forwarded by the browser. After compilation, changes are made on-screen, and all unaltered files provide a 304 error code.
This feature is quite different from the traditional bundlers, which compile the overall code and bundle them before changing.
Due to this, developers prefer Vite for making large and complex applications.
Configuration Option
Vite offers a wide array of modules to extend the functionality of your application.
By configuring ‘vite.config.js’ and ‘vite.config.ts’ in the project’s root directory, you can optimize the software to add more features to it. In addition, you can use Koa middleware for custom file transformation.
A Step-by-Step Guide To Install and Use Vite on Your System
Before moving to the installation procedure, you must ensure that the latest version of Node.js is installed on your system.
Step 1: Checking Requirements and Initiating Installation
Once the Node.js is present and running on your computer, the next step is to run the ‘npm init @vitejs/app.’ Further, a similar list as below provided will be available, and you have to select a project name from it.
Project Name List:
- vanilla
- vue
- vue-ts
- react
- react-ts
- svelte
- svelte-ts
- preact
- preact-ts
- lit-element
- lit-element-ts
In this installation, we have selected vanilla as the project name.
When you select an option from the project name list, it creates a directory containing essential files required for software development. ‘index.html’, ‘main.js’, ‘style.css’, ‘favicon.svg’, and some additional files for performing npm and Git operations.
Moreover, the ‘package.json’ file is also present, which includes ‘vite’ as a dependency and some basic scripts to initiate the dev ecosystem for starting the build. We have all the required knowledge to move on with the installation process.
Step 2: Creating a Project Directory
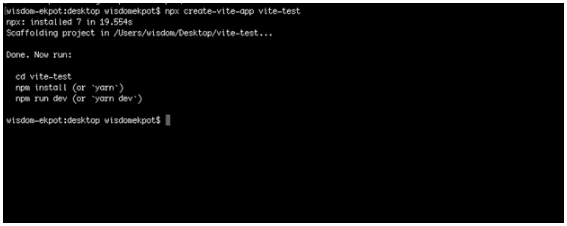
Further, open the terminal on your system and navigate to any directory path to run the command as provided: npx create-vite-app vite-test, where ‘vite-test’ is the name of the project directory.
Step 3: Installation command execution
Move to the project directory using the ‘cd’ command and install the application dependency by executing the ‘npm install’ command.
Command execution structure:
- cd vite-project
- npm install
After this, you will see the application running in the VS Code.
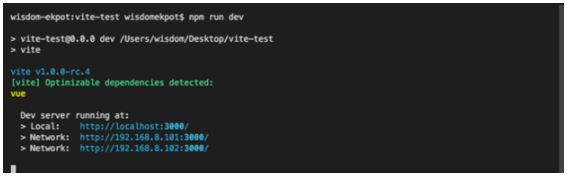
Step 4: Running the Dev Server
At this step, we will start the dev server by running the ‘npm run dev’ command, and after its successful execution, you will be able to view your application on http://localhost:3000/.
Also, if you perform any modification in the project files, all the changes will be immediately reflected on the screen.
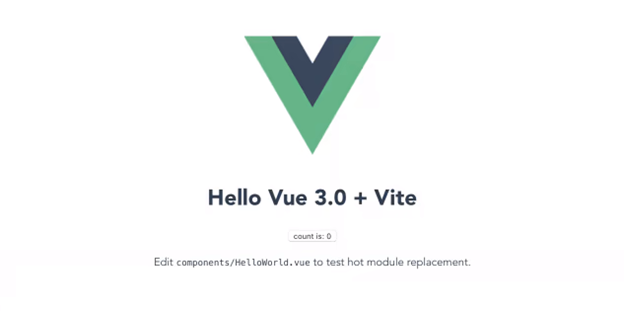
Step 5: Vite Test
This screen will be displayed to you once you navigate to the localhost page to view your application.
Now, you are ready to use Vite.js for your software development projects.
Install Vite on macOS: A Step-by-Step Guide
Likewise, for Windows computers, you need to install Noed.js before installing Vite.js on MacOS.
Let’s get started with installing Vite.js on MacOS. Follow the below steps, and you are good to go with your application creation.
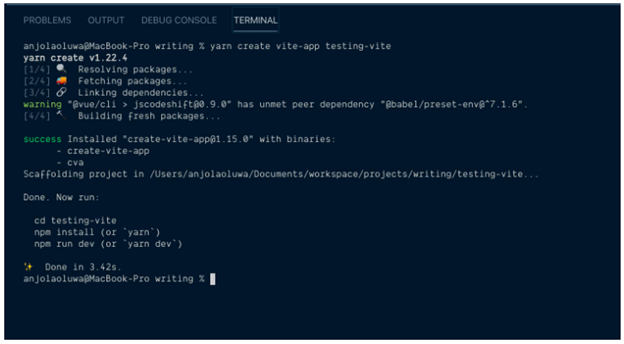
#1: Creating a new Vite App
Open the terminal and create new projects using any of the two commands.
- Using NPX: npx create-vite-app testing-vite
- Using Yarn: yarn create-vite-app testing-vite
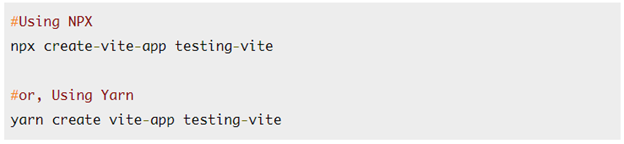
‘testing-vite’ is the project’s name, and you can replace it with any other term of your choice.
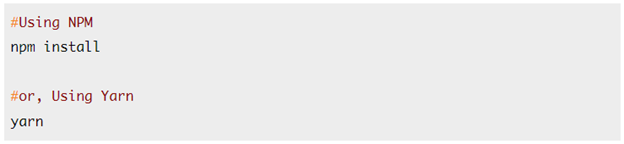
#2: Accessing Project Directory and Installing Packages
Move to the directory with the project name you have created in the first step.

And install all the dependencies and packages required to work with the application development. You can use ‘npm install’ or ‘yarn’ to perform this installation.
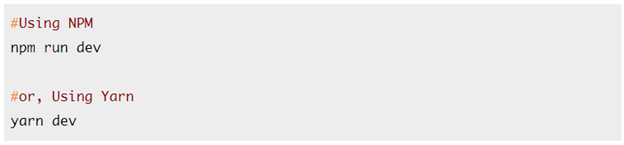
#3: Running the Dev Server
You have to run the server in the browser to view your application, and for this, you can use ‘npm run dev’ and ‘yarn dev’ commands.
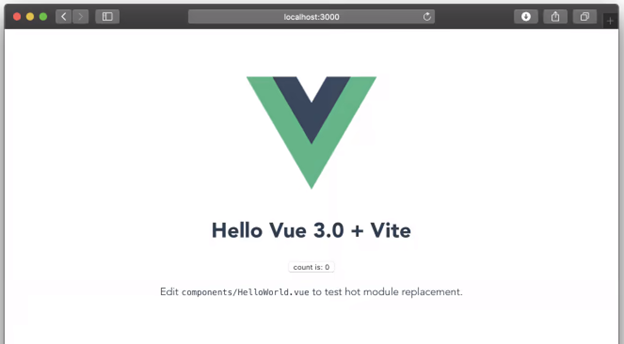
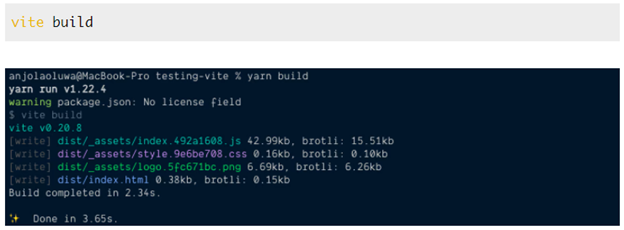
#4: Vite Test
By navigating to http://localhost:3000/, you can test whether your server is running or not. Your server is running seamlessly if you view a similar page, as shown in the screengrab below.
#5: Creating the build
You have to run this command for bundling up your production application. It will Rollup the App and store the output in the dist directory, present in the root of your software project. In addition, you can find out all the static assets in it.
Install Vite.js Vue Router: A Step-by-Step Tutorial
Vue Router is an essential component of every application. It leads to establishing a connection between the browser’s URL and elements of Vue to ensure smooth rendering over the App.
It also aids in syncing URLs so that the user can view that in your software solution. Let’s move further to understand its installation.
1. Checking Prerequisites
First, check whether you have Vue.js on your computer or not. If it is present, then we are good to go further, and if it’s not, you must install its packages in your vite.js application.
‘npm I –save [email protected]’ is the command you have to execute to install Vue Router packages in your Vite App.
It will ensure that the latest version of the Vue Router is installed.
2. Creating a Javascript file
You have to create a file with the name ‘router.js’ for defining the routes as displayed below:
import { createWebHistory, createRouter } from "vue-router";
import Home from "./components/Hello.vue";
const history = createWebHistory();
const routes = [{ path: "/", component: Home }, ];
const router = createRouter({ history, routes });
export default router;
After successful execution of this code, you have to register the ‘register.js’ file in the ‘main.js’ using the command as defined:
import { createApp } from 'vue'
import App from './App.vue'
import './index.css'
import router from "./router";
createApp(App).use(router).mount('#app')
Subsequently, it’s necessary to modify our App.vue root component for rendering all of our components.
<template>
<img alt="Vue logo" src="./assets/logo.png" />
<Hello msg="Hello Vue 3.0 + Vite" />
<router-view />
</template>
<script>
import Hello from "./components/Hello.vue";
export default {
name: "App",
components: {
Hello,
},
};
</script>
3. Root Component Configuration
This is the last step of Vue Router installation, in which you have to modify the App.vue root component to enable it to render all other app components for rendering.
After this, you will have the leverage to register custom routes for your Vite.js application.
Bring Your App Idea to Life with Our Experts
Got a concept for a mobile app but lack the skills to make it real? Our experienced developers turn ideas into reality. With expertise in iOS and Android development, UI/UX design, and app marketing, we bring your vision to life. Let us help build your dream app today!
Vite Install for Single Page Application
Most people have a question, about whether they can create a single page application with Vite.js or not. A reliable answer is. Yes, you can fabricate SPA software with it.
Let’s find out which packages you have to install and configure for doing it so.
At first, we have to execute ‘npm init @vitejs/app’ and pick out a Vue template. We will get a Vite, Vue, and Vite plugin for compiling the Vue.
In addition, for handling the routes, you have to install a Vue Router, which is an essential component, leading to flawless functionality of your single-page application. It will work efficiently after enabling Vue Router and linking it with your App.
Vite has a significant role here, as most operations are Vue-based. Moreover, we can also create a multi-page application using the Vite Rollup configuration.
If you find difficulty defining the routes, you can use a community-made plugin vite-plugin-vue-router to simplify the task.
Backend Configuration
If your project requires custom integration, you must follow the below-provided steps to configure it manually. Otherwise, you can navigate to the Awesome Vite website to serve the HTML with a traditional backend.
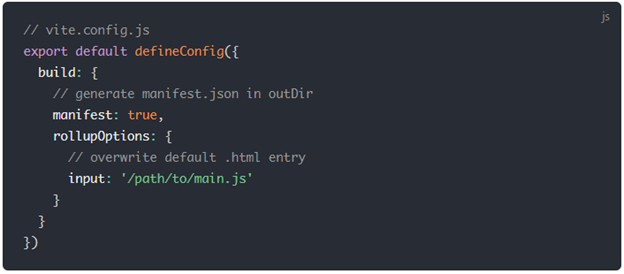
- Enable the build manifest and configure the entry in your Vite config file.
- If the module preload polyfill is not disabled, you have to import it in your entry.

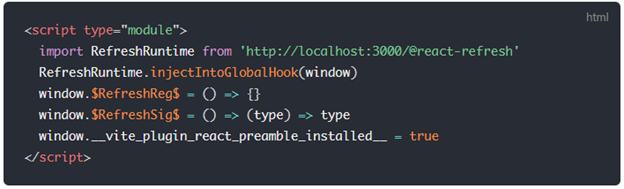
- Add the below-shown code in your HTML template and modify the http://localhost:3000 with the local URL, where Vite is currently running.

- Check the following server configuration to assure that static assets precisely work in the Vite environment. Otherwise, the application won’t load images.
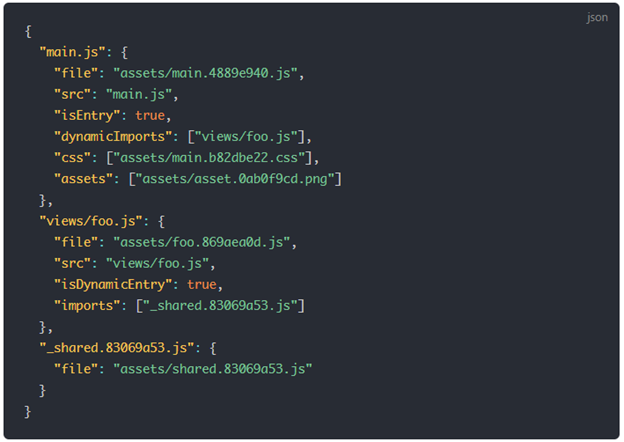
- This step focuses on the production part. You have to run a vite build command to create a manifest.json file, whose content will look like the screenshot provided below.
The JSON file must contain:
- Record <name, chunk>
- The key should be the relative source path from the project root.
- The key should be the base name for non-entry chunks.
- Both static and dynamic information must be available in chunks.
Concluding Up
Vite is a robust technology, and one should always know to install it on their system. And you can effortlessly install it on any Windows or macOS-based machine with the above-given step.
If you find any error or difficulty at any step, you should try to verify the prerequisites, confirm the configuration with the provided steps, and then continue it.
You can use Vite with any Vue application; whether it’s Vue 2 or Vue 3, it is compatible with both of them.
Stay Tuned for more exciting articles and guides.

Expert in Software & Web App Engineering
Parag Mehta, the CEO and Founder of Positiwise Software Pvt Ltd has extensive knowledge of the development niche. He is implementing custom strategies to craft highly-appealing and robust applications for its clients and supporting employees to grow and ace the tasks. He is a consistent learner and always provides the best-in-quality solutions, accelerating productivity.