

Quick Overview:
In the business intelligence domain, viewing and analyzing reports is a significant requirement of an application. It supports the analysts to accurately determine current marketing, sales, accounts, and other data. For ASP.NET Core web applications, providing report viewing functionality is a seamless task. This feature can be effortlessly embedded through numerous tools. But, in this blog, you are going to discover the use of the Terelink package, HTML5 report viewer, and a REST service for it. This article will teach you how to embed reporting in ASP.NET core web applications.
Introduction
Reports are integral to business intelligence (BI), as they help inefficient data analysis and processing. All the analysts utilize reports for optimizing business operations and improving productivity. To enhance the work of such analysts, it’s essential that displaying reports on screen must be a feature of your enterprise solution.
In an ASP.NET core web application, report viewing can be effortlessly embedded using the Terelink report viewer and REST service. And in this blog, we are going to discuss the complete process for it. So, let’s start by understanding the two main components of the reporting mechanism.
The Components of .NET Web Reporting in ASP.NET Core Web Applications
You need two primary components for the dotnet report builder feature: the Telerik HTML5 report viewer and the reporting REST service. These two components collaborate to fetch the report from the backend and view it on the screen. So, let’s have a look into these to understand the background working more thoroughly.
HTML5 Report Viewer
The primary purpose and responsibility of the HTML5 report viewer is to display the report documents to end-users. The report viewer fetches the document from the backend and uses its jQuery widget to convert the file content into an HTML template.
Following the conversion, it displays the content on the screen, enabling end-users to view the report using their desktop and mobile browser. Some of the most prominent features of the HTML5 report viewer include:
- In-built search functions to find a piece of particular information in the report.
- Hyperlink interaction for better navigation.
- Zoom view of multi-page to efficiently view every content piece.
- Custom layout entirely based on HTML5 template.
- Support for desktop and mobile browsers.
- Webpage scaling for complete and partial web pages.
- Ability to utilize the theming mechanism of Kendo UI.
Furthermore, to use an HTML5 report viewer, you should ensure that your system checks all the below requirements. Otherwise, you should update your computer system readily.
- Telerik Reporting REST service (Running instance is required)
- jQuery version 1.9.1 or above
- Q3 2015 version of Kendo UI Professional
- Browser supporting HTML5
- JavaScript supporting HTML5 Report Viewer
Reporting REST Service
HTML5 report viewer cannot retrieve the reports itself, as its functionality is limited to displaying only. To manage all other reporting operations, the REST services come into action. Through it, the ASP.NET core web application fetches the reports from the database and provides a report viewer over an HTTP connection. The complete process takes place only in three steps, as listed below:
- Step 1: The user requests a report through the ASP.NET application. The user can use any defined parameter for fetching the report, such as its ID or name.
- Step 2: The application will pass the parameter to the REST service. Following it, the service will execute a report engine to find the file, render it, and provide it to the HTML5 viewer.
- Step 3: The HTML5 report viewer will display the report to the user. In these three steps, the HTML5 report viewer and reporting REST service work in the background.
In these three steps, the HTML5 report viewer and reporting REST service work in the background.
The Prerequisites To Complete Before Configuring Reporting
The prerequisites are quite easy to complete for embedding reporting in an ASP.NET Core web application. You must ensure that:
- The latest Visual Studio is installed (Minimal 2019 version is required).
- The latest .NET Core version is installed (Check for ASP.NET Core Runtime 3.1.32 support).
- Complete the HTML5 report viewer requirements.
Following the completion of prerequisites, move to the practical part.
Ready to Build an ASP.NET Core Web Applications for Your Organization?
Empower your organization with custom ASP.NET Core Web Applications crafted by our team of 10+ years of experienced .NET developers. Let’s build excellence together!
Configure Reporting REST Service in ASP.NET Core Web Application: Complete Process
In this guide, we’ll walk you through the entire process of embedding hosting in your ASP.NET Core web application, brought to you by a leading ASP.NET Core Development Company.
Before we start with report embedding, create an ASP.NET core web app project using the Visual Studio IDE. If you have already created one, you are good to go. Otherwise, it is quite easy to generate a project through the following procedure:
- Open the Visual Studio IDE and go to File >> New >> Project.
- From the numerous available project options, choose the ASP.NET core web application and move forward.
- Choose the framework version. In this tutorial, we are using .NET Core 3.1.
- Finalize all the details and create a project.
After creating the project, follow these steps to enable the reporting feature.
Transform Your ASP.NET Core Project in a Few Easy Steps
- Step 1: Go to the NuGet package manager to download and install the “Telerik.Reporting.Services.AspNetCore” package in the existing project. With the installation of this package, you will have some additional dependencies in your project, like “Microsoft.AspNet.Core.Mvc.NewtonsoftJson”.
To activate the package and its dependencies in the project, open the Startup.cs file and modify the code as demonstrated below:
services.AddRazorPages().AddNewtonsoftJson();- Step 2: Again, in the Startup.cs file, add the following code for configuring REST service for reporting.
services.TryAddSingleton<IReportServiceConfiguration>(
    sp => new ReportServiceConfiguration
    {
        Storage = new FileStorage(),
        ReportSourceResolver = new UriReportSourceResolver(
            System.IO.Path.Combine(
                sp.GetService<IWebHostEnvironment>().ContentRootPath,
                "Reports"))
    });
The above code consists of three primary parts: Storage, Source Resolver, and Reports folder.
The storage parameter defines the location where internal services of REST service will get saved. In addition, the exact storage location will also save the associated temp files. Further, the ReportSourceResolver enables the service to discover a specific report inside the application folder.
Lastly, it’s the Reports folder. This folder has not been created yet but will be generated in the next step.
- Step 3: Create the Reports folder inside the root of your ASP.NET core web app project. And after its creation, put the report definition file inside it. You will find the definition in the Telerik Reporting installation folder. However, you can also create a new definition. But, it’s always recommended to hire ASP.NET developers for such purposes.
- Step 4: Open the report definition file and go to the ConfigureServices method and the following code:
services.AddControllers();Further, inside the Configure method, add the below code block for mapping the controller endpoints.
app.UseEndpoints(endpoints =>
{
    endpoints.MapRazorPages();
    endpoints.MapControllers();
});- Step 5: Now, you should create a ReportsController class, which is going to function as the core of the REST service. You only need to follow the below sub-steps:
- Go to the project’s root in the Solution Explorer and create a new folder. Name the folder “Controller.” You can name it anything, but we are using this name for this tutorial.
- Use the right-click on the Controllers folder and choose Add >> Controller from the menu.
- From the further options, choose the API controller with an empty template.
- Click on Add and then provide a controller’s name. We are using the “ReportsController.cs” name for this practical.
- Click on Add, and it’s done.
- Step 6: Open the ReportsController.cs file and add the code below.
using Microsoft.AspNetCore.Mvc;
using Telerik.Reporting.Services;
using Telerik.Reporting.Services.AspNetCore;

namespace AspNetCoreReportViewerSample.Controllers
{
    [Route("api/reports")]
    public class ReportsController : ReportsControllerBase
    {
        public ReportsController(IReportServiceConfiguration reportServiceConfiguration)
            : base(reportServiceConfiguration)
        {
        }
    }
}
With the above code, the URL to access the controller will get effortlessly mapped. Now, you have embedded the reporting REST service in your ASP.NET Core web application.
But, the procedure continues, as you need to test and verify its functioning.
Testing and Validating Functionality for Seamless Operations
To fetch the report using reporting REST service and view it using HTML5 viewer, execute the below process:
- Step 1: Open the _Layout.cshtml file from the location Pages/Shared/_Layout.cshtml. Once you find the file, add the head element as displayed below:
<head>
    ...

    @RenderSection("Head", required: false)
</head>- Step 2: Now go to Page/Index.cshtml file and create a div element. Ensure that you provide a unique ID to the element.
<div id="reportViewer1" style="width:940px; height:1300px">
</div>
Also, in the head section, provide links for Kendo UI.
@section Head {
    <link href="https://kendo.cdn.telerik.com/2020.1.114/styles/kendo.common.min.css" rel="stylesheet" />
    <link href="https://kendo.cdn.telerik.com/2020.1.114/styles/kendo.default.min.css" rel="stylesheet" />
}- Step 3: Add a link for the JavaScript file associated with the viewer widget. It will help the viewer discover appropriate jQuery dependencies and extend the telerik_ReportViewer method with the jQuery global project.
Your scripts section must look like as below:
@section Scripts {
    <script src="/api/reports/resources/js/telerikReportViewer"></script>

    <script type="text/javascript">
        $(document).ready(function () {
            $("#reportViewer1")
                .telerik_ReportViewer({
                    serviceUrl: "api/reports",
                    reportSource: {
                        report: "Report Catalog.trdp"
                    },
                    scaleMode: telerikReportViewer.ScaleModes.SPECIFIC,
                    scale: 1.0
                });
        });
    </script>
}- Step 4: Check the final configuration and ensure your complete code resembles the following block.
@page
@model IndexModel
@{
    ViewData["Title"] = "Home page";
}

@section Head {
    <link href="https://kendo.cdn.telerik.com/2020.1.114/styles/kendo.common.min.css" rel="stylesheet" />
    <link href="https://kendo.cdn.telerik.com/2020.1.114/styles/kendo.default.min.css" rel="stylesheet" />
}

<div class="text-center">
    <div id="reportViewer1" style="width:940px; height:1300px">
    </div>
</div>

@section Scripts {
    <script src="/api/reports/resources/js/telerikReportViewer"></script>

    <script type="text/javascript">
        $(document).ready(function () {
            $("#reportViewer1")
                .telerik_ReportViewer({
                    serviceUrl: "api/reports",
                    reportSource: {
                        report: "Report Catalog.trdp"
                    },
                    scaleMode: telerikReportViewer.ScaleModes.SPECIFIC,
                    scale: 1.0
                });
        });
    </script>
}
All the configuration tasks have been completed at this step; the only thing left is running the application.
- Step 5: According to our configuration, the ASP.NET core web application will request the “Catalog.trdp” report. So, press the F5 button to start the application and wait for the output as below.
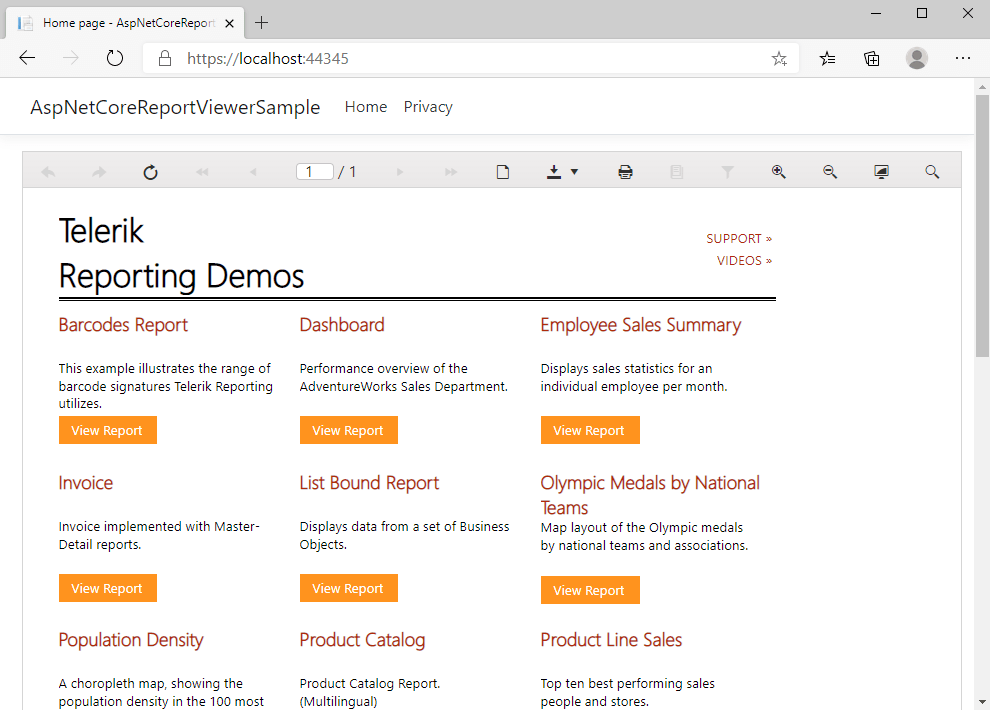
If you view the same output, your application works accurately, providing the reporting functionality. If not, then you should check the code and verify the configurations.
The Role of ASP.NET Development Company in Embedding Reporting
Embed reporting in ASP.NET core web applications is a crucial task requiring domain expertise. Suppose a newbie or an inexperienced person tries to configure it. In that case, it can lead to an application crash and vulnerable loopholes. Thus, hiring an ASP.NET core web application developer from a reputed firm is always recommended.
An ASP.NET development company, like Positiwise Software Pvt Ltd, can help you at every step. The all-rounder .NET development services, flexible pricing, and 100% transparency will help you seamlessly move forward in your domain. Thus, a development company builds a solid foundation for every component and application.
Additional Alternatives: Best Reporting Tool For ASP NET Core
Besides the Telerik package that we used in our practical, you can use the following tools. But, before you decide, consult an ASP.NET development company to select an appropriate mechanism per your business requirements.
The top alternatives include:
- Crystal Reports
- SSRS
- HTML Reports
- ActiveReports
- XtraReports
Conclusion on Embed Reporting in ASP.NET Core Web Applications
Reporting has become an essential feature of an ASP.NET core web application, as most organizations require it for marketing, sales, accounts, and other operations. The most preferred way to embed reporting in ASP.NET core web applications is using the Telerik package with the help of an HTML5 report viewer and the reporting REST service.
The HTML5 view and REST service depend on each other, as one fetches the report, renders it, and displays it. Also, you should utilize a Visual Studio 2019 or above version to embed reporting. Once you understand all the above steps and execute them, your application starts displaying the reports to end-users.

Expert in Software & Web App Engineering
Parag Mehta, the CEO and Founder of Positiwise Software Pvt Ltd has extensive knowledge of the development niche. He is implementing custom strategies to craft highly-appealing and robust applications for its clients and supporting employees to grow and ace the tasks. He is a consistent learner and always provides the best-in-quality solutions, accelerating productivity.


