

Quick Overview:
The blog introduces dependency injection in .NET Core, its advantages, and the need to implement it. Further, it provides exposure to the procedure of configuring it in an ASP.NET Core application to separate the dependencies between classes. In addition, you can also avail of the details of manual method and action method injection with complete outputs.
Introduction
With the frequently changing user requirements, it’s not recommended to implement dependency between classes. It causes additional time and effort to implement the changes and make all modifications within a minimal time.
To resolve this issue, dependency injection in .NET Core applications is used. It aids in separating the dependencies and make application coupled loosely. It’s a must-have skill for .NET developers, and you should also learn it via this blog. Here, you will understand what Dependency injection is and how to implement the common type of dependency injection.
What is Dependency Injection?
Dependency Injection is a software development and design pattern that helps in eliminating the dependency of one class on the other class. Using dependency injection or DI primarily aims to build loosely coupled applications instead of tightly coupled ones.
The following are the top advantages of using dependency injection in .NET Core web API and applications:
- Reusability: Dependency injection enables developers to reuse a code block, as they can share dependencies between classes.
- Easy Testing: During unit testing procedures, dependency injection enables the developers to use mock objects for testing the application. It provides accurate results, leading to patching loopholes, fixing errors, and streamlining code maintenance in .NET Core.
- Loose Coupling: DI helps to remove the dependency of one class over another class. This will result in accurate output even if you modify a single class, and it will not impact the dependent class.
- Extensibility: With the use of dependency injection, the application becomes more flexible and scalable, allowing it to remove dependencies while retaining uptime.
The Need for Dependency Injection in .NET Core
Let’s see an example below to understand the need for dependency injection.
public class Car
{
    private AUDI _audi;
    public Car()
    {
        _audi = new AUDI();
    }
}
public class AUDI
{
    public AUDI()
    {
    }
}
In the above code, two classes are present: class Car and class AUDI. The class Car depends on class AUDI for providing the output. Therefore, both these classes are tightly coupled, and due to this, each time the program runs, an AUDI class object needs to be created.
Now, suppose that you add a ModelName parameter in the AUDI class constructor. Then, you need to add and pass the same parameter in the Car class, similar to the following code example. Otherwise, your program will not provide the output, which is, in our case, the model name.
public class Car
{
    private AUDI _audi;
    public Car()
    {
        _audi = new AUDI("BMW A7");
    }
}
public class AUDI
{
    public AUDI(string ModelName)
    {
    }
}
Due to the tight coupling of these classes, modification made in one class impacts the other. It’s not a good practice for large projects, as it’s a time, cost, and effort-consuming task. Thus, you need dependency injection to break hard coupling and make your .NET application loosely coupled.
Dependency Injection Code Example: A Deep Insight Into DI Implementation
To understand the use of dependency injection, we are going to create an ASP.NET Core project using the Visual Studio IDE. Learning the dependency injection implementation doesn’t make any significant difference in ASP.NET Core, as it is based on .NET Core development technology.
But, before you start with the code examples, ensure that you understand object-oriented programming, C# programming language, and ASP.NET Core.
Let’s start with an example, divided into different steps.
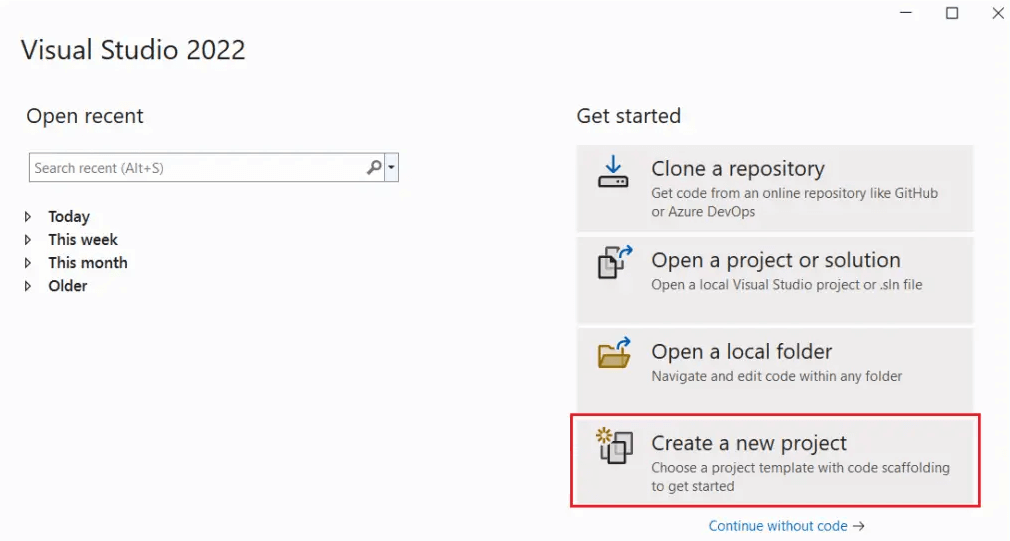
- Step #1: Download and install the 2019 or above version of the Visual Studio IDE on your machine.
- Step #2: Open the VS IDE and create a new project.
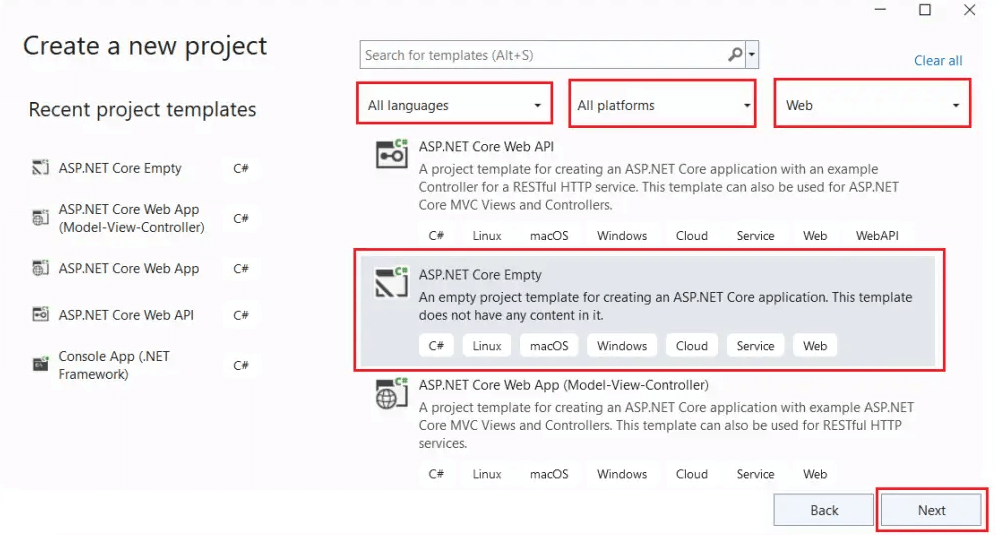
- Step #3: On the “Create a new project” window, choose the ASP.NET Core empty template and then left-click on the Next button.
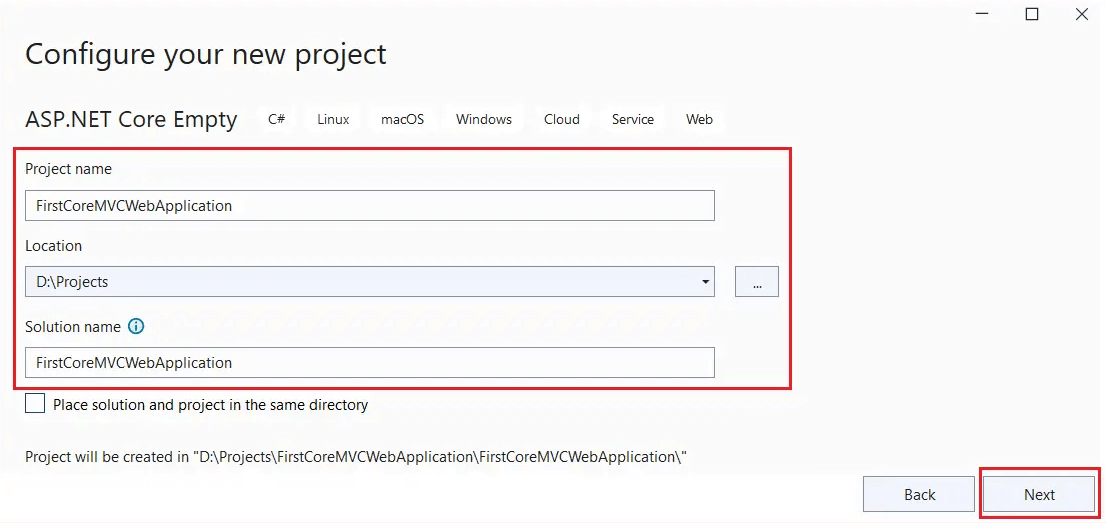
- Step #4: You will see a new project creation window asking you to provide project details, such as its name, solution name, and storage location. Define all the parameters per your needs and again hit the Next button. For this tutorial, we are using the project and solution name “FirstCoreMVCWebApplication.”
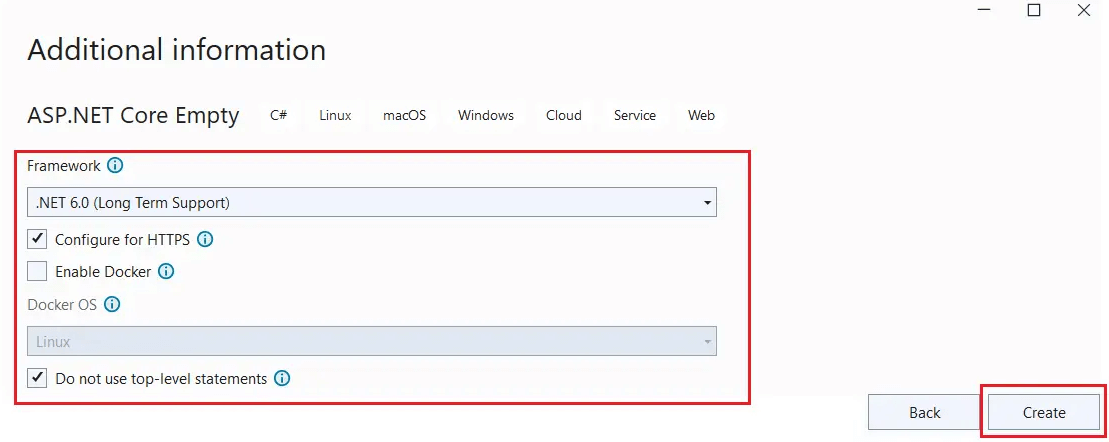
- Step 5: At this step, provide the additional details, including the .NET framework version, configuration of HTTPS, enabling docker, and usage of top-level statements.
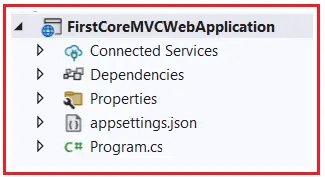
- Step 6: Hit the Create button, and your ASP.NET Core project will be created and displayed. Further, see the Solutions Explorer window on the right side. You will see a project structure similar to the below snippet.
- Step 7: Now, we will add the models to our empty ASP.NET Core project.
You are required to create a new folder named “Models” and then create a class file named “Student.cs” under it. This Student.cs file will be the first model of our project. So, open it and put the below code in the file.
namespace FirstCoreMVCWebApplication.Models
{
    public class Student
    {
        public int StudentId { get; set; }
        public string? Name { get; set; }
        public string? Branch { get; set; }
        public string? Section { get; set; }
        public string? Gender { get; set; }
    }
}- Step 8: This step is about building a service interface.
Under the same model folder created in step 7, add a new file named “IStudetnRepository.cs.” Open the newly created file and copy the below-provided code to it. The code will be used to define the operations that can be executed on student data.
using System.Collections.Generic;
namespace FirstCoreMVCWebApplication.Models
{
    public interface IStudentRepository
    {
        Student GetStudentById(int StudentId);
        List<Student> GetAllStudent();
    }
}- Step 9: Here, we will be developing the service implementation.
Again, create a new class file in the same Model folder named “StudentRepository.cs.” Till now, we have created a total of three class files in the Model folder.
The StudentRepository.cs file will implement both interfaces in the IStudetnRepository.cs file. To finalize this implementation, you should put the code below in the StudentRepository.cs file.
using System.Collections.Generic;
using System.Linq;

namespace FirstCoreMVCWebApplication.Models
{
    public class StudentRepository : IStudentRepository
    {
        public List<Student> DataSource()
        {
            return new List<Student>()
            {
                new Student() { StudentId = 201, Name = "Adam", Branch = "CSE", Section = "A", Gender = "Male" },
                new Student() { StudentId = 202, Name = "Aeron", Branch = "ETC", Section = "B", Gender = "Male" },
                new Student() { StudentId = 203, Name = "Rahul", Branch = "CSE", Section = "A", Gender = "Male" },
                new Student() { StudentId = 204, Name = "Pamela", Branch = "CSE", Section = "A", Gender = "Female" },
                new Student() { StudentId = 205, Name = "Sam", Branch = "ETC", Section = "B", Gender = "Female" }
            };
        }

        public Student GetStudentById(int StudentId)
        {
            return DataSource().FirstOrDefault(e => e.StudentId == StudentId) ?? new Student();
        }

        public List<Student> GetAllStudent()
        {
            return DataSource();
        }
    }
}
In addition, in this code example, student data is hard-coded. But, you can utilize a database of your choice while developing a real-time application. Even when a business opts for .NET Core development services, real-time data is used only.
- Step 10: From the solutions explorer, open the Program.cs file and copy the below-provided code into it.
namespace FirstCoreMVCWebApplication
{
    public class Program
    {
        public static void Main(string[] args)
        {
            var builder = WebApplication.CreateBuilder(args);

            // Add MVC services to the container.
            builder.Services.AddMvc();

            var app = builder.Build();

            app.UseRouting();
            app.UseEndpoints(endpoints =>
            {
                //Configuring the MVC middleware to the request processing pipeline
                endpoints.MapDefaultControllerRoute();
            });

            app.Run();
        }
    }
}
This code block will support the configuration of the IoC container and MVC service along with the required middleware. All these components will work collaboratively to process data in the pipeline. Save the code in the Program.cs file and move further.
- Step 11: Now, you should create another folder named Controllers. Under this folder, create a class file and name it HomeController.cs. In this class file, you should put the following code and save it.
using FirstCoreMVCWebApplication.Models;
using Microsoft.AspNetCore.Mvc;
using System.Collections.Generic;

namespace FirstCoreMVCWebApplication.Controllers
{
    public class HomeController : Controller
    {
        public JsonResult Index()
        {
            StudentRepository repository = new StudentRepository();
            List<Student> allStudentDetails = repository.GetAllStudent();
            return Json(allStudentDetails);
        }

        public JsonResult GetStudentDetails(int Id)
        {
            StudentRepository repository = new StudentRepository();
            Student studentDetails = repository.GetStudentById(Id);
            return Json(studentDetails);
        }
    }
}
Currently, we have not configured dependency injection. It will get configured in further steps. But, before that, you should analyze the output without the use of dependency injection. As a result, when you run the application with dependency injection, you will get to know how DI makes a difference.
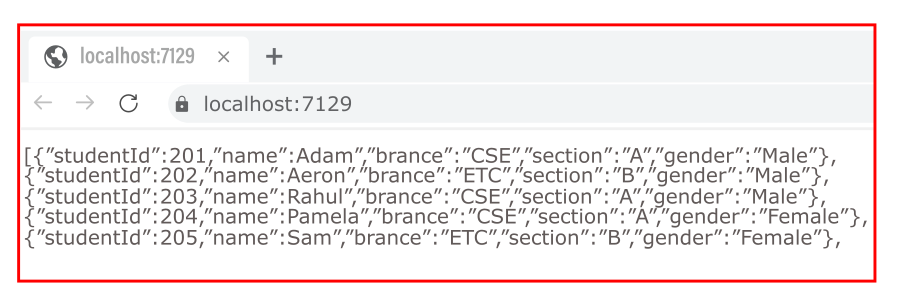
- Step 12: Run the application without dependency injection. You will see an output similar to the following snippet.
So, here’s the output of our application running without dependency injection. And yes, there’s a problem that you must avoid for medium and large projects with dynamic requirements.
Problem Description:
The HomeController.cs file depends on the StudentRepository.cs class file. The StudentRepository.cs class instance calls the GetStudentById() method because of it. Therefore, both classes are tightly coupled.
If you change the name of StudentRepository.cs or modify it, you have to modify it for HomeController.cs manually. If you have a large application with hard coupling, then it will take a lot of time, resources, and time, and if you utilize dependency injection, it will eliminate this problem.
They will add the object of the class on which the other class depends to their code with the help of DI. So, whatever changes you make will not impact the functioning, and all the classes will invoke methods as before. Thus, the application will become loosely coupled.
So, let’s implement the dependency injection (DI). You should always hire .NET Core developers for this implementation to avoid misconfigurations and errors.
- Step 13: Open the Program.cs file and add the below code to its main method. Rest, the type of service you can select according to requirements.
using FirstCoreMVCWebApplication.Models;

namespace FirstCoreMVCWebApplication
{
    public class Program
    {
        public static void Main(string[] args)
        {
            var builder = WebApplication.CreateBuilder(args);

            // Add Framework MVC services to the Container.
            builder.Services.AddMvc();

            //Application Service
            builder.Services.AddSingleton<IStudentRepository, StudentRepository>();
            //builder.Services.AddSingleton(typeof(IStudentRepository), typeof(StudentRepository));
            //builder.Services.AddTransient<IStudentRepository, StudentRepository>();
            //builder.Services.AddTransient(typeof(IStudentRepository), typeof(StudentRepository));
            //builder.Services.AddScoped<IStudentRepository, StudentRepository>();
            //builder.Services.AddScoped(typeof(IStudentRepository), typeof(StudentRepository));

            //Add Application Service to the Container.
            //builder.Services.Add(new ServiceDescriptor(typeof(IStudentRepository),
            //    new StudentRepository())); // by default singleton
            //builder.Services.Add(new ServiceDescriptor(typeof(IStudentRepository),
            //    typeof(StudentRepository), ServiceLifetime.Singleton)); // singleton
            //builder.Services.Add(new ServiceDescriptor(typeof(IStudentRepository),
            //    typeof(StudentRepository), ServiceLifetime.Transient)); // Transient
            //builder.Services.Add(new ServiceDescriptor(typeof(IStudentRepository),
            //    typeof(StudentRepository), ServiceLifetime.Scoped));    // Scoped

            var app = builder.Build();

            app.UseRouting();
            app.UseEndpoints(endpoints =>
            {
                //Configuring the MVC middleware to the request processing pipeline
                endpoints.MapDefaultControllerRoute();
            });

            app.Run();
        }
    }
}- Step 14: Go to the Models folder and open the HomeController.cs file to add the following code block. It will enable the IoC container to execute constructor injection.
using FirstCoreMVCWebApplication.Models;
using Microsoft.AspNetCore.Mvc;
using System.Collections.Generic;

namespace FirstCoreMVCWebApplication.Controllers
{
    public class HomeController : Controller
    {
        //Create a reference variable of IStudentRepository
        private readonly IStudentRepository? _repository = null;

        //Initialize the variable through constructor
        public HomeController(IStudentRepository repository)
        {
            _repository = repository;
        }

        public JsonResult Index()
        {
            List<Student>? allStudentDetails = _repository?.GetAllStudent();
            return Json(allStudentDetails);
        }

        public JsonResult GetStudentDetails(int Id)
        {
            Student? studentDetails = _repository?.GetStudentById(Id);
            return Json(studentDetails);
        }
    }
}- Step 15: Once again, run the application to view the following output.
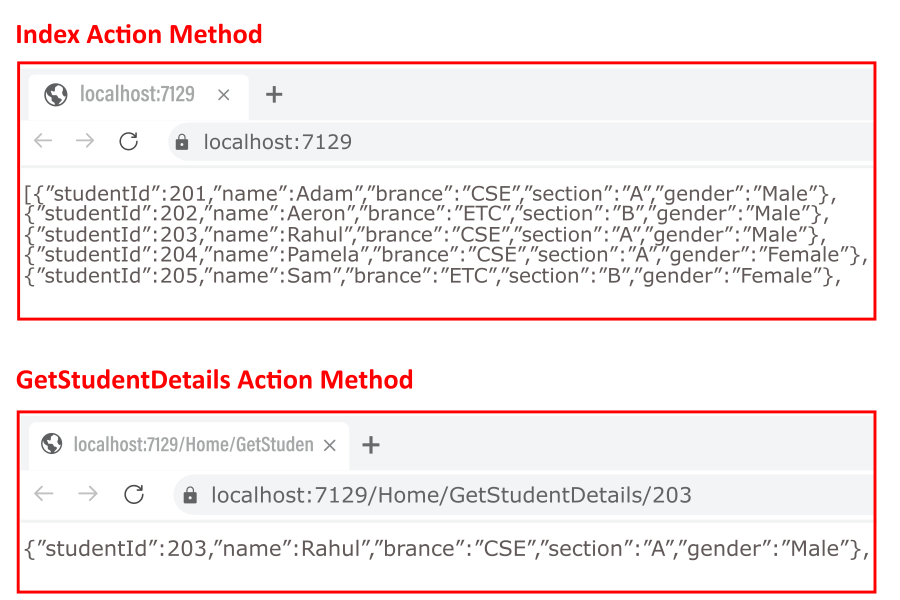
With the help of code modifications performed in steps 13 and 14, the IoC container is automatically passing StudentRepository.cs file instance to HomeController.cs. The constructor injects the object, a process known as constructor dependency injection.
There are many other injections that you can use, such as action method and property dependence. In addition, you can also avail of service manually per your needs. Built-in IoC containers do not support property dependence. To utilize it, a third-party container is necessary.
To understand the two, let’s have a look at them.
1. Action Method Dependency Injection
For using the dependency injection in a single action method, you have to use the [Form Services] attribute. For this, you have to change the code in the HomeController.cs file, available in the Model folder.
Go to the HomeController.cs file and modify the code with the following. Consequently, the dependency object will be injected into the reference variable of the IStudentRepository.cs file.
using FirstCoreMVCWebApplication.Models;
using Microsoft.AspNetCore.Mvc;
using System.Collections.Generic;

namespace FirstCoreMVCWebApplication.Controllers
{
    public class HomeController : Controller
    {
        public JsonResult Index([FromServices] IStudentRepository repository)
        {
            List<Student> allStudentDetails = repository.GetAllStudent();
            return Json(allStudentDetails);
        }
    }
}
Output:
2. Manual Configuration
As the name defines, it’s a manual configuration and doesn’t require any dependency services. Here, the application will be using the HttpContext property – RequestServices. For this configuration, again modify the HomeController.cs file.
using FirstCoreMVCWebApplication.Models;
using Microsoft.AspNetCore.Mvc;
using System.Collections.Generic;

namespace FirstCoreMVCWebApplication.Controllers
{
    public class HomeController : Controller
    {
        public JsonResult Index()
        {
            var services = this.HttpContext.RequestServices;

            IStudentRepository? _repository = (IStudentRepository?)services.GetService(typeof(IStudentRepository));
            List<Student>? allStudentDetails = _repository?.GetAllStudent();
            return Json(allStudentDetails);
        }

        public JsonResult GetStudentDetails(int Id)
        {
            var services = this.HttpContext.RequestServices;
            IStudentRepository? _repository = (IStudentRepository?)services.GetService(typeof(IStudentRepository));
            Student? studentDetails = _repository?.GetStudentById(Id);
            return Json(studentDetails);
        }
    }
}
Further, run the application to see the same output as above.
Wrapping Up
Dependency injection is the need of new-age applications, as stakeholder requirements change dynamically. With the aid of DI, developers can create loosely coupled software, leading to removing dependency among classes. As a result, you save time and effort because all the changes get processed automatically without manually configuring the objects and instances.
To configure dependency injection in your .NET Core application, you can use the constructor injection method provided in this blog. In addition, you can also use the action method injection. From an expert’s perspective, one must utilize constructor injection. It will streamline the processes and help you remove class dependency in a better way.

Expert in Software & Web App Engineering
Parag Mehta, the CEO and Founder of Positiwise Software Pvt Ltd has extensive knowledge of the development niche. He is implementing custom strategies to craft highly-appealing and robust applications for its clients and supporting employees to grow and ace the tasks. He is a consistent learner and always provides the best-in-quality solutions, accelerating productivity.


