

Quick Overview:
The blog “Unit Testing In .NET Core Using NUnit” offers a complete process to integrate the NUnit testing framework with your ASP.NET API project and test its functionality. The step-by-step process will help you create a project, add files, put relevant code, and test them using NUnit. Through this, you will grasp how to invoke the methods and confirm if they return the correct data using unit tests in NUnit.
How to Use NUnit for Unit Testing in ASP.NET Core
In .NET development, developers widely use NUnit, one of the most popular frameworks, for unit testing multiple programs or an individual code block. Its fundamentals are based on JUnit, but its primary functioning is to test the .NET web applications and the .NET Web API project.
If you are a .NET developer, then you must know this framework and how to integrate and use it with ASP.NET Core applications. It will help you offer the best-in-class dotnet development services to clients.
So, let’s have a look at it.
What is Unit Testing?
Unit testing is a software testing methodology performed by developers to check the functionality of an individual code block or a set of programs. The main aim of unit testing is to identify and solve errors at the developers’ end.
Unit testing can reduce the time testers take to verify the functionality, compatibility, and security of .NET web applications. In addition, it will also help the developers to push streamlined and well-working code to the final product.
The Process To Perform Unit Test in .NET Core Using NUnit
To learn the unit testing process with NUnit, we will create an ASP.NET Core web API project in Visual Studio. Ensure that your system has a 2019 or later version of the IDE; otherwise, compatibility issues can arise.
In addition, with the NUnit testing framework, this tutorial also includes a significant use of Moq. We will employ the Moq method to make the data call for testing an ASP.NET Web API call, and then we will use NUnit to test the returned value.
In this procedure, we divide the complete process into phases, which, in turn, break down into smaller steps. It will help you understand every process and execute it properly. So, let’s start with it.
Phase 1: Creating the Project
- Open your Visual Studio IDE and navigate to File >> New >> Project.
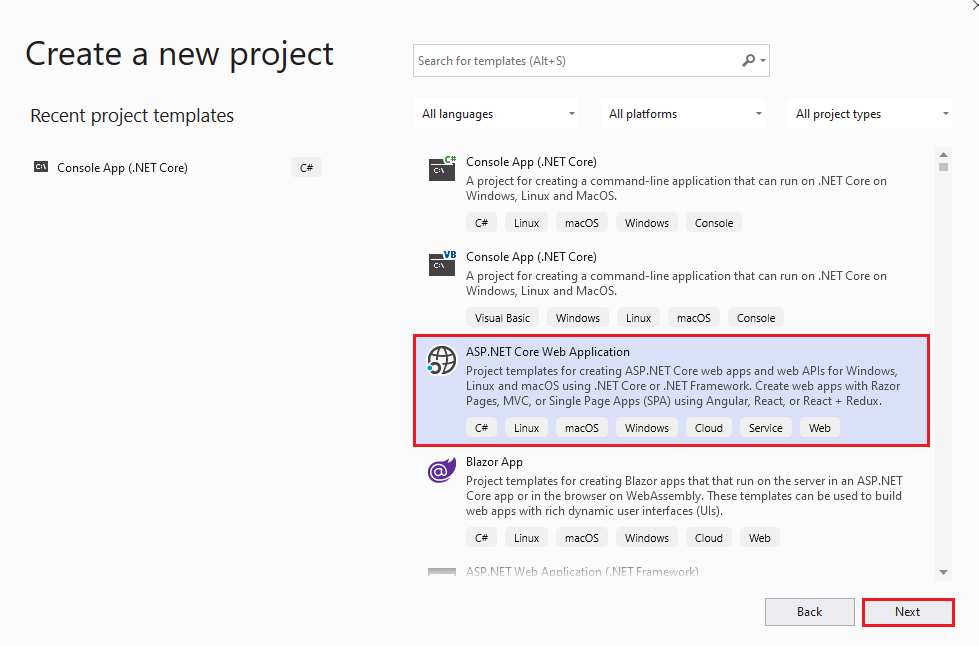
- Choose the ASP.NET Core Web Application from the available project templates, and to finalize it, left-click the Next button.
- The Visual Studio will ask for the project details. Fill them up and move to the next step by clicking on the Create button.
- The IDE will provide the option to select the type of ASP.NET Core web application project. Firstly, choose .NET Core and ASP.NET Core 3.1 from the drop-down list at the top. After that, select the API similar to the following snippet.
- Click on Create, and your project will be displayed on the screen.
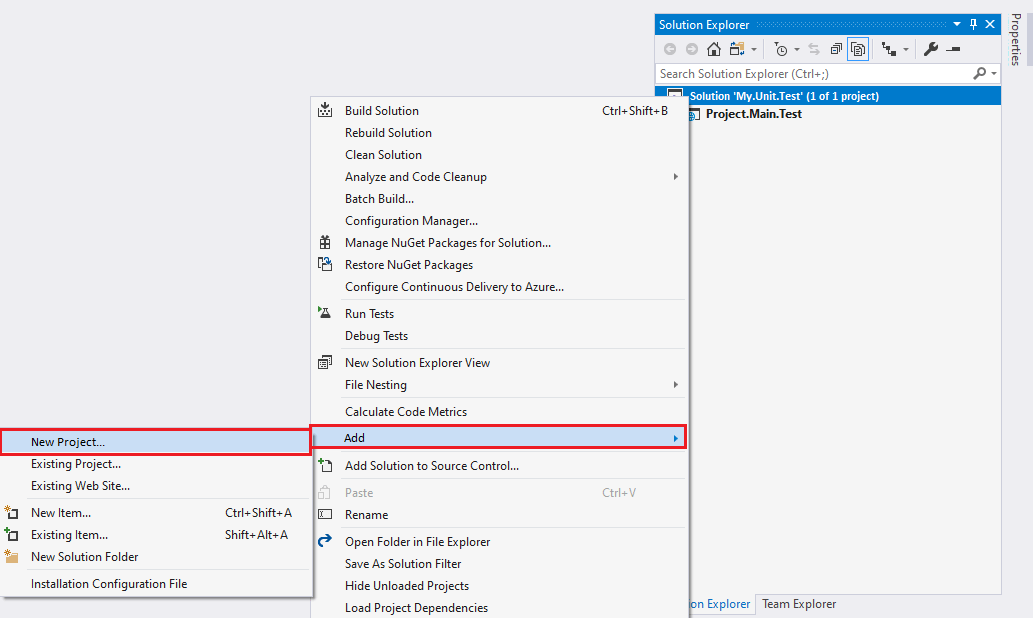
- Navigate to the project solution and right-click on it. From its menu, choose Add >> New Project.
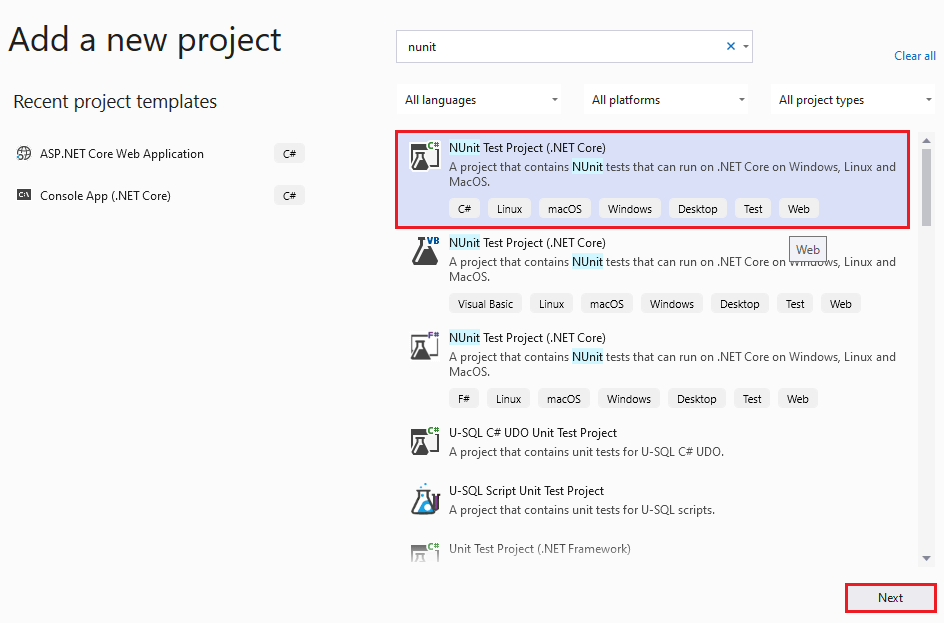
- From the project templates, choose the NUnit Test Project (.NET Core). Click on the Next button to move further.
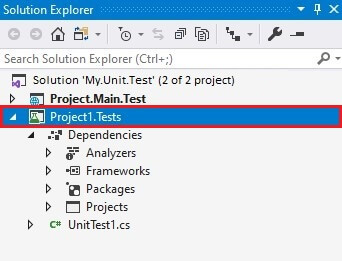
- Set the project name and use the Create button to finalize it. In the solutions explorer, you will see the unit test project and associated files.
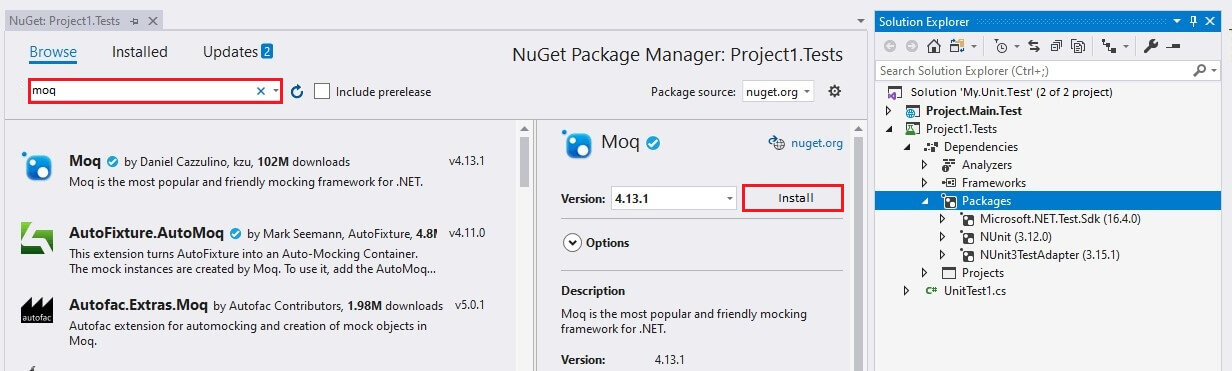
- For Projetc1.Tests, open the NuGet package manager, and find the Moq. Match the result with the following snippet and integrate the correct package.
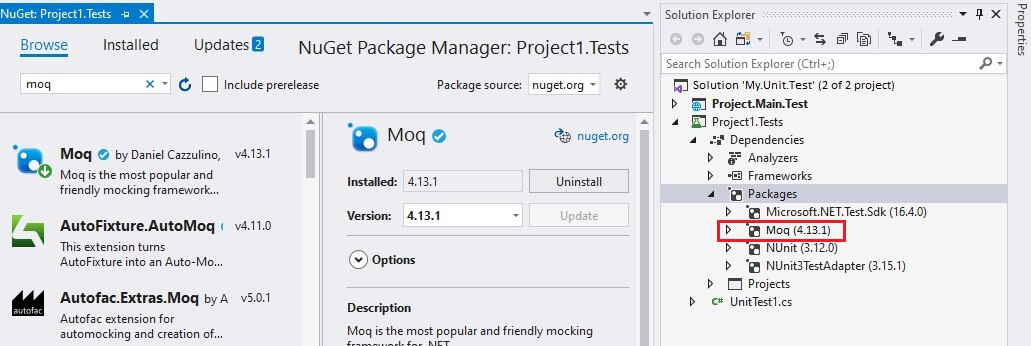
- After installation of Moq, it will be displayed in the Solutions Explorer.
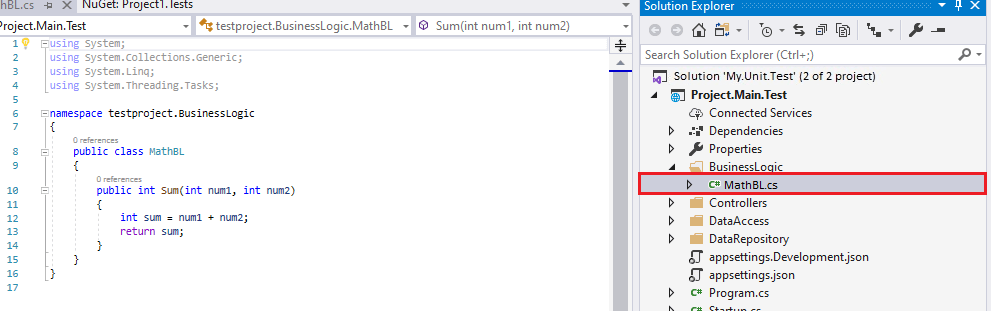
- Go to Solutions Explorer and under the Project.Main.Test add a MathBL.cs file containing the Sum() method as below.
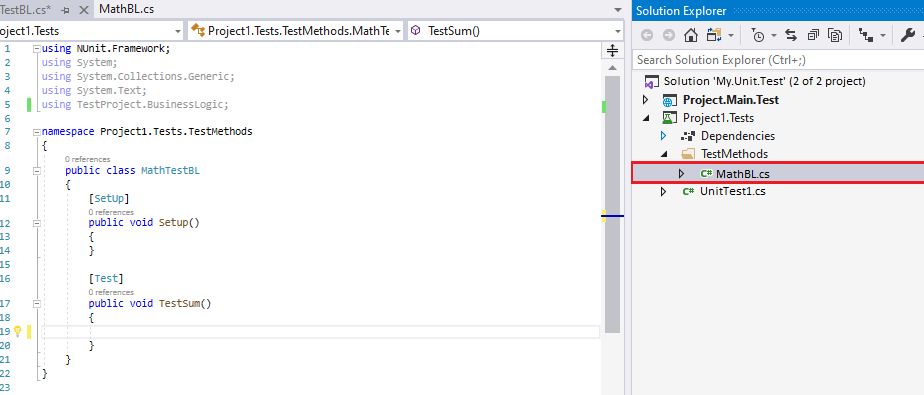
- Again, navigate to Project1.Test to add MathTestBL.cs class file.
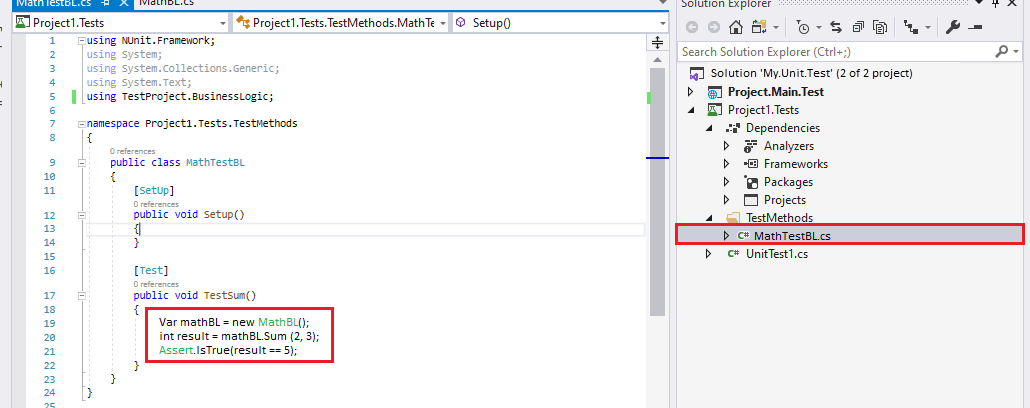
- Open the MathTestBL.cs file and add the Setup() and TestSum() methods.
- Now, add the reference if Project.Main.Test to Project1.Test. By right-clicking on Project1.Test, you will get the option to add project references.
- In the MathTestBL.cs class file, include the below-highlighted code block.
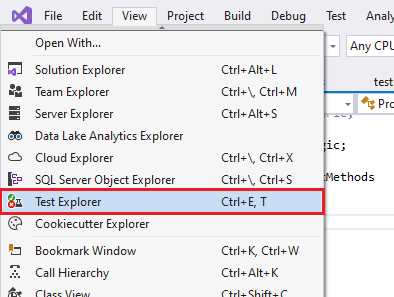
- Go to View and choose Test Explorer under it. It will help you build the project and check the code.
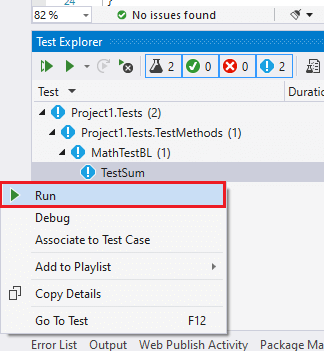
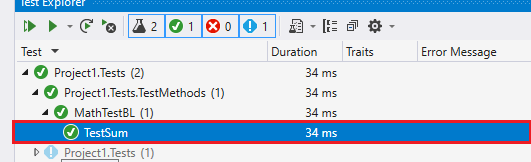
- The Test Explorer will display all the methods. You have to use right-click on MathTestBL and choose the Run option. The following snippet demonstrates that the IDE will test the class file and provide results.
- Under the Solutions Explorer, create the classes and add code like the following snippet.
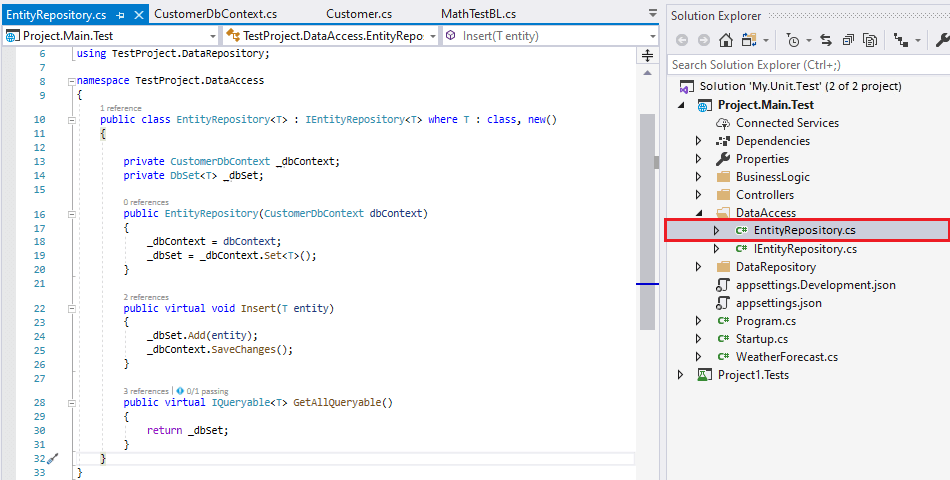
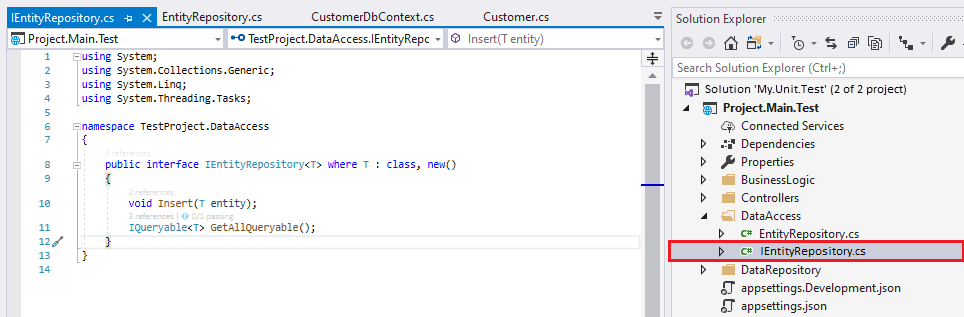
- Create the data access logic. You have to implement this logic by creating an EntityRepository.cs file, having an interface named IEntityRepository.cs.
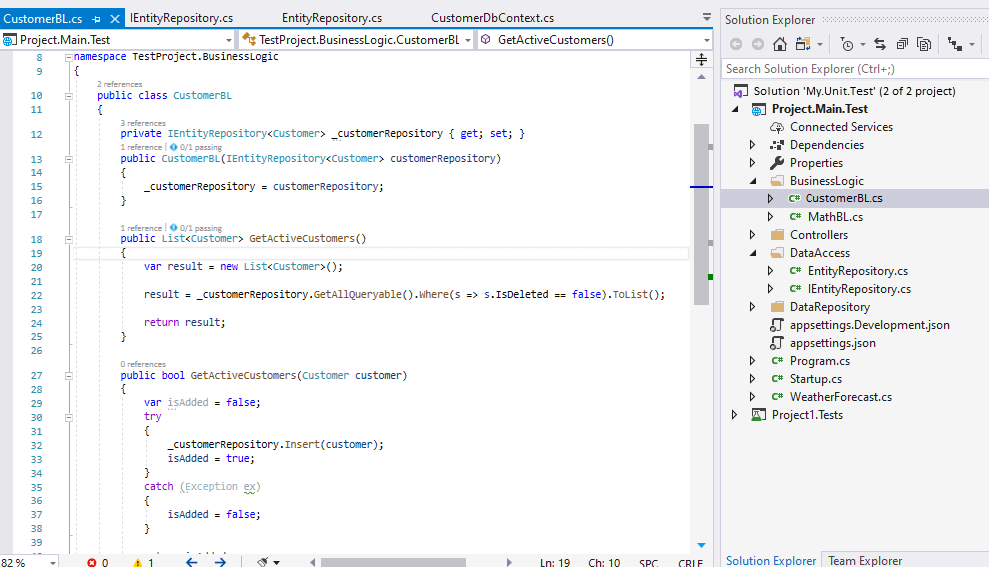
- Create the business logic by adding a new CustomerBL.cs file. Further, add the getActiveCustomer() and SaveCustomer() methods in the file.
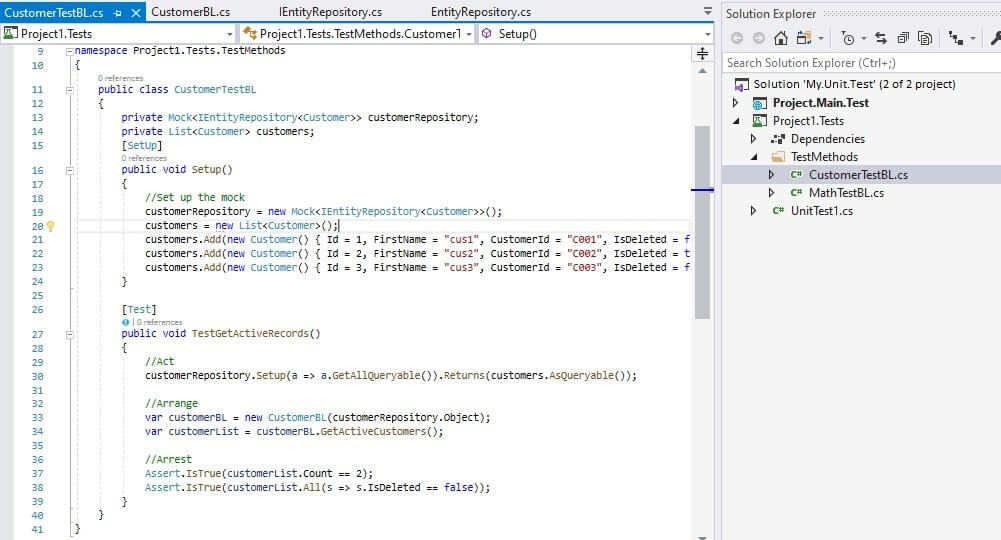
- Under the Project1.Tests, create CustomerTestBL.cs and a method under the name TestGetActiveCustomer().
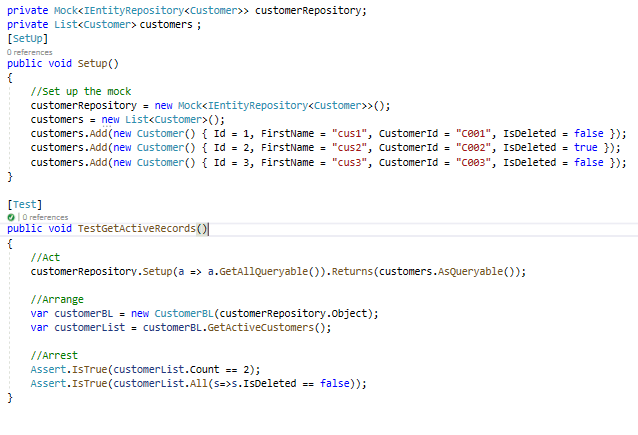
- Create a mock instance for IEntityRepository<Customer>. A fixed customer list will be returned when the program uses the GetQueriable() method. Below is the code for it that you need to implement.
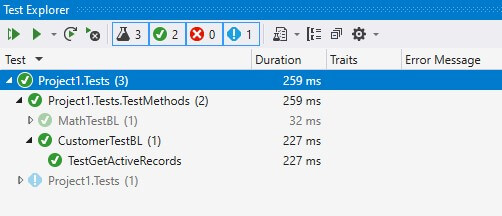
- Open the View menu and select Test Explorer to view the test case list.
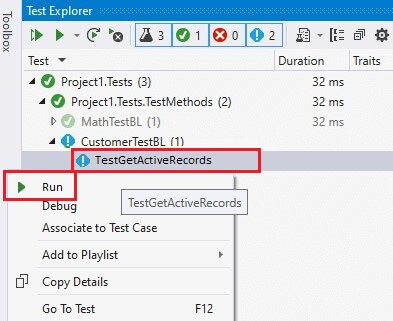
- From the available test cases, open the options for TestGetActiveRecords by right-clicking on it.
- The Test Explorer will display the results. NUnit provides all these results, as we are using it for unit testing.

Here, our first phase is completed.
Develop .NET Web Application with ASP.NET Technologies
Bring your web app ideas to ASP.NET development experts. Hire our skilled .NET developers to build secure, scalable web & desktop web applications.
Phase 2: Integration of NUnit and Moq (Creation of Unit Test Project)
Here, we complete the second phase.
Phase 3: Creation of Unit Test Case
In this phase, we are going to test an addition program using the NUnit. The method in the program provides the addition of two numbers as a result. Also, when you hire .NET core developers, they create test cases to ensure that every component will be checked before reaching the production stage.
The test is successful if you see all the green checks; otherwise, some error has been encountered.
Here, the phase three is completed.
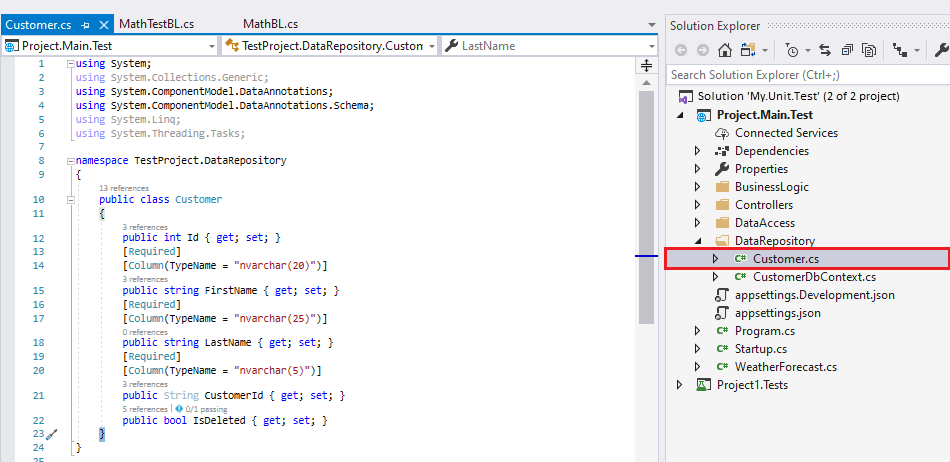
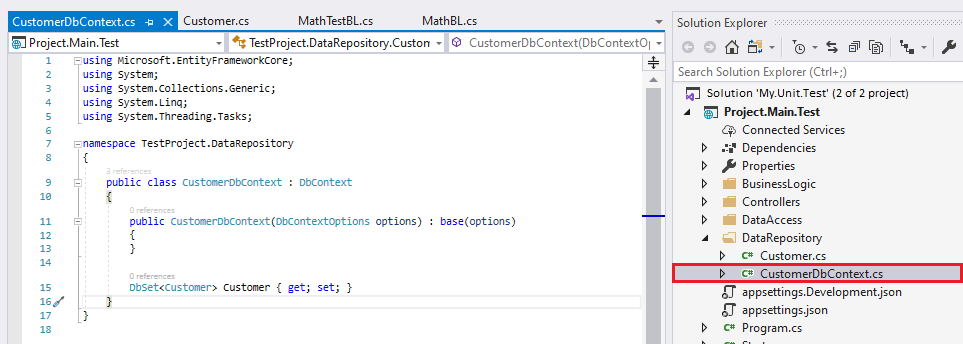
Phase 4: Testing the Data Access Service Call and Mock Database
This is the last phase of this tutorial of NUnit for unit testing in ASP.NET Core. We have to create a database context first with the name Customer.cs.
The Need of Dotnet Development Company for NUnit Testing
To avail of the benefits of NUnit, you need a dot NET development services company. Such firms provide you with the right team of developers, experienced in building .NET applications, creating test cases, and ensuring software functionality, compatibility, and security.
In addition, the .NET development company leverages extended support to maintain your business software and test every component before deployment. They even help with patching loopholes and removing errors and bugs after deployment. But, you should make sure to collaborate with a trustworthy and .NET expert company like Positiwise Software Pvt Ltd.
Wrapping Up on Unit Testing In .NET Core Using NUnit
NUnit is a top choice of .NET developers for unit testing the application. This framework allows testing applications written in all .NET-compatible languages. We integrated our ASP.NET Core web API in this tutorial and tested the call function. In addition, we have also used Moq with NUnit to help with testing the dependencies.
The complete procedure is divided into four phases. The first two phases represent the steps for creating an ASP.NET project and integrating the required testing framework. The next two phases provide the step for testing the API calls using the NUnit and mocking framework. Completing all these phases will help you understand the implementation and working of NUnit in .NET.

Expert in Software & Web App Engineering
Parag Mehta, the CEO and Founder of Positiwise Software Pvt Ltd has extensive knowledge of the development niche. He is implementing custom strategies to craft highly-appealing and robust applications for its clients and supporting employees to grow and ace the tasks. He is a consistent learner and always provides the best-in-quality solutions, accelerating productivity.


