
An image to Excel converter works to automatically turn the data of pictures into structured Excel files. At the core, it uses Optical Character Recognition technology. Do you know that today, you can build this tool using the Python language? Building your own image-to-Excel converter is not a difficult task if you follow the right steps.
So, if you are an initial-level developer and are willing to build an image to Excel converter, but don’t know where to start. This guide is for you!
Here we’ll walk you through a basic step-by-step process, following which you’ll be able to build your own tool.
Step-by-Step Guide for Developers to Build an Image to Excel Sheet Converter In Python
Step 1: Download & Install the Latest Version of Python
In the first step, you should download and install the latest version of Python or which is greater than 3.6. Don’t download the old version, as it will not work with the Tesseract:
Follow these steps to get Python’s latest version:
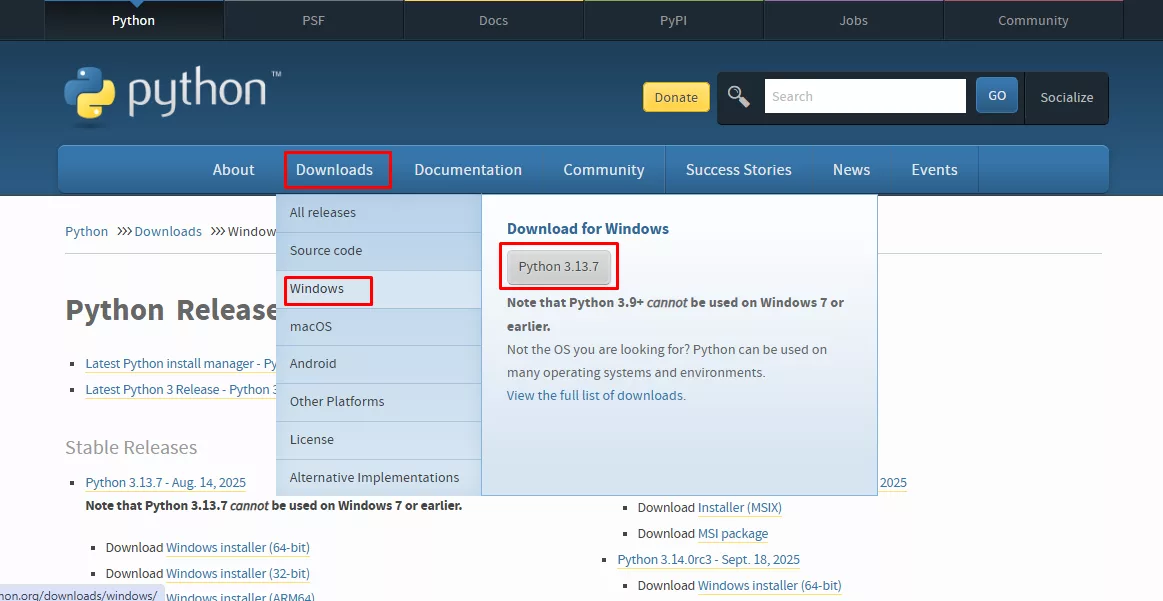
- Simply visit the official site of Python, which is Python.org.
- Find the download options from the top menu, press it, and another dropdown menu will appear.
- From the dropdown, you’ll find the Window option and click the button named Python 3.13.7.
Below, we have shown all the above steps in the picture.
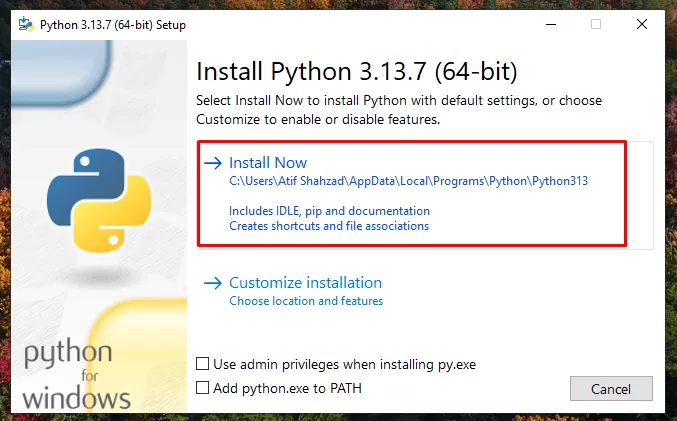
- Once the downloading is completed, you need to find the file from the device’s storage and run it to install.
This step is demonstrated below;
Step 2: Install and Import Necessary Modules or Libraries of Python
Once you have successfully installed Python, the second step is to download & import all the modules that are important for Python’s working.
For building the OCR-based image to Excel converting tool, you should install the following four libraries/modules:
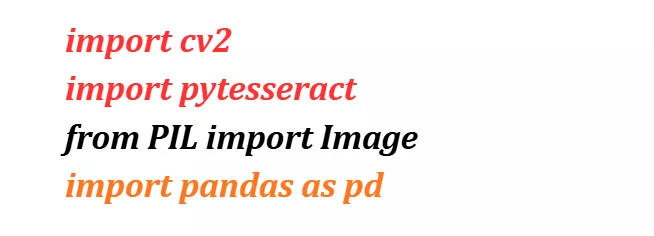
- OpenCV: This library is also called cv2 and works on image preprocessing to make it ready for post-processing.
- Pillow: It is also known as PIL and works to handle different formats of images.
- Pytesseract: This module is helpful for extracting textual and tabular data from images during conversion.
- Pandas: Pandas is necessary to organize the extracted data of the image into an editable Excel sheet.
Also Read: Top 10 Python Libraries for Machine Learning
For installing these modules, you are required to give the following command in your terminal;

- After installation, you should follow the code below to import the libraries;
Step 3: Install Tesseract OCR Software
Installing the Tesseract OCR software is another important prerequisite. It is significant for setting Pytesseract libraries, as their working is dependent on Tesseract to recognize and extract data from images.
Follow these simple steps to install:
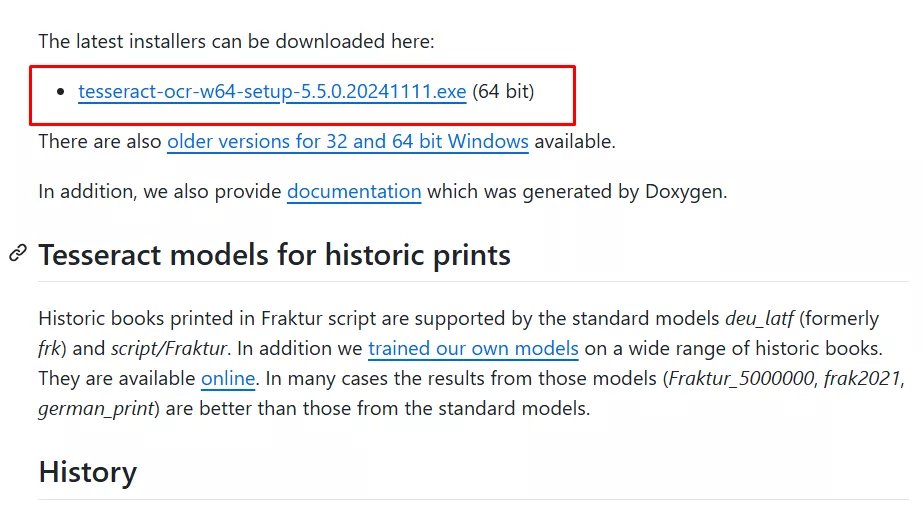
- Go to Tesseract GitHub, find the latest available version of the software, and click to start downloading it.
Here’s the pictorial guide;
Now, when the downloading is finished, you need to simply click the file, and the installation will start. You just need to follow the instructions to complete the Tesseract installation process. After that, import the Tesseract application using the code below in your Python code script;

Step 4: Load the Image
After setting all the prerequisites, let’s load the target image that you want to convert into an Excel sheet. For this purpose, you can use two libraries, either OpenCV or Pillow.
For the sake of instance, we used the OpenCV/cv2 module to import a JPEG image”
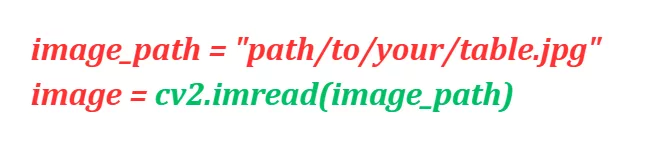
You can follow the same code for importing images, but you should first change the “path/to/your/table.JPEG” to your exact image path. Plus, you should replace the “jpeg” with your file’s format, like JPG, WebP, etc.
At this fourth step, your program has a raw image in the memory.
Also Read: Top 15 .NET Development Tools: Explore ASP.NET Tools
Step 5: Converting Image Text into Structured Data
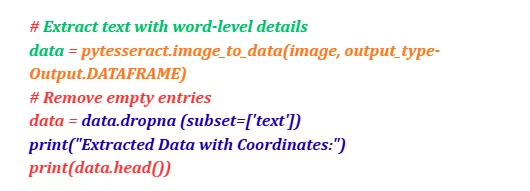
As we are building an image-to-Excel converter, instead of extracting just plain text from the image, you should use the “image_to_data () from Tesseract. Doing so will provide positional details of words, which helps rebuild rows and columns (or tables) for the Excel sheet.
In the fifth step, you should execute this code in the script.
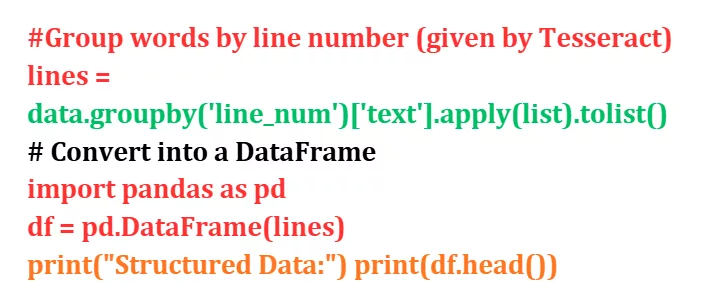
Step 6: Organizing the Extracted Text into a Table
Once the data is extracted, the next step is to organize it into a table in the same way; it was written on the image. This step is important to make sure that Excel sheets contain organized data, instead of scattered text.
Last Step: Transfer Tabular Output into an Excel Sheet
In the final step, you need to convert structured or tabular data into editable Excel spreadsheets. For this, you need to use the “Pandas Library”.
Just follow the code below:
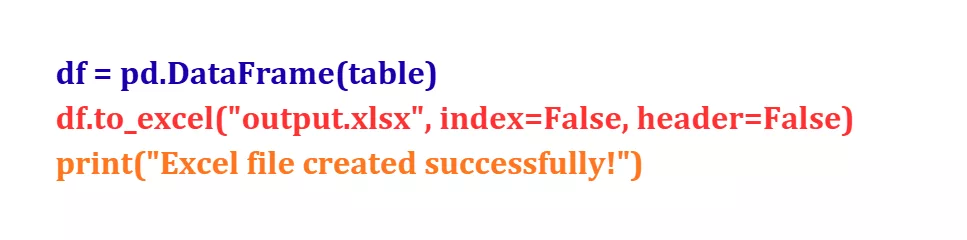
After running the above code in Python’s script, you’ll get the XLSX sheet output containing all the extracted data in the form of tables. That’s all, how you, as a developer, can build your own image to an Excel converting tool using Python.
P.S.: Following the above-mentioned steps provides a clear starting point for developing a basic-level image-to-Excel converter with Python. But it does not include the advanced functionalities and extended features, and API integrations. Let’s see how such an advanced built image-to-Excel converter works in real-time.
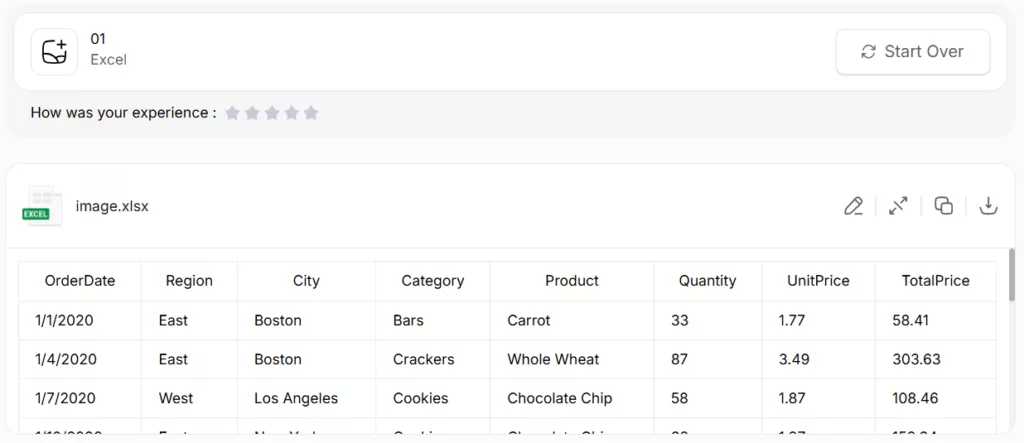
A Real-World Example of An Image to Excel Converter Built Using Python
To showcase how your image-to-Excel converter will work, we picked a tool that is built using Python. We uploaded an image containing tabular data to the tool, clicked the “Convert Now” button to initiate. Within seconds, the tool completed the conversion and provided us with an editable, ready-to-download Excel sheet as output.
Here’s the Pictorial Demo:
Conclusion
For beginner developers, creating an image-to-Excel conversion tool can feel overwhelming. In this blog, we’ve broken down the process step by step to make it easier using Python. If you’d like expert help or a custom-built solution, feel free to reach out to our Python development team.
Note: the approach explained here is modular, following which you can build a basic functional tool that you can gradually enhance later.

Expert in Marketing Strategy and Brand Recognition
Jemin Desai is Chief Marketing Officer at Positiwise Software Pvt Ltd, he is responsible for creating and accelerating the company’s marketing strategy and brand recognition across the globe. He has more than 20 years of experience in senior marketing roles at the Inc. 5000 Fastest-Growing Private Companies.